 Your photo editing isn’t improving for one simple reason…
The massive time-wasting complexity spent constantly searching for the “perfect” editing tools & techniques.
To improve, you need to focus all your time and energy on mastering a few simple tools.
Throw away everything else and devote yourself to mastering the skills required to improve.
This guide covers my 5 favorite techniques to reduce complexity and improve your photo editing.
Table of Contents
Trick 1 – My Favorite Technique – Photo Editing for Landscape Photography
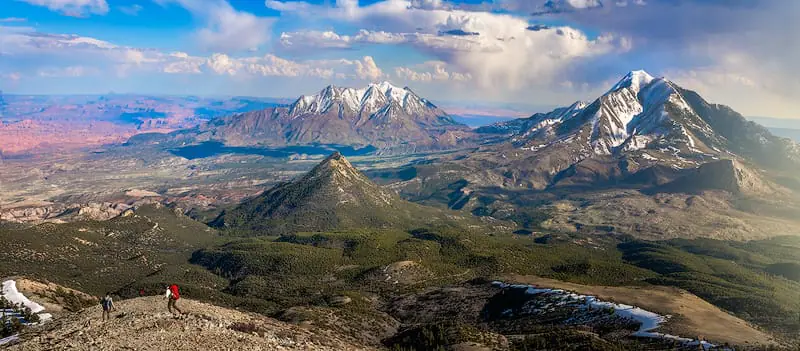
Shooting vast scenes with a wide-angle lens will shrink down all objects that are close to the center of the composition.
This is due to the physics of the lens and is called barreling.
This can happen while shooting any scene!
I’ll use a mountain scene for this example since it’s easy to see.
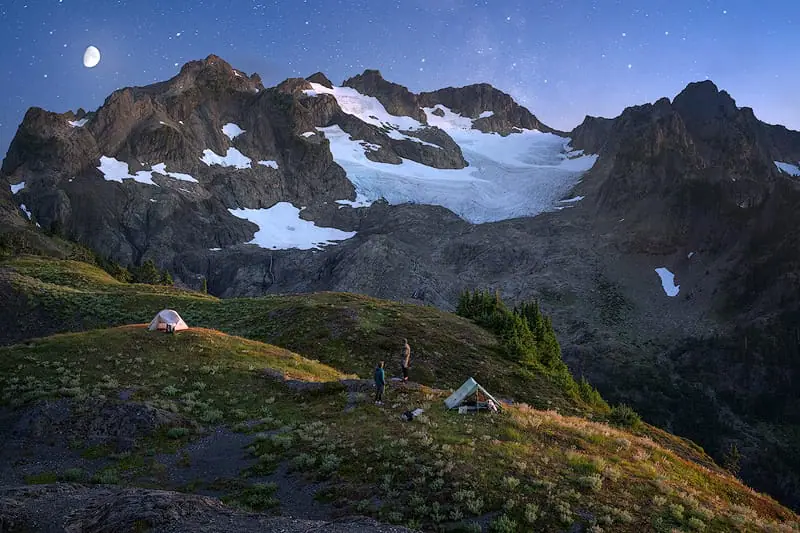
Shown below, is an example, where the mountains look very small and compressed near the center of the scene.
These mountains were huge when I shot them on a 10-day backpacking trip.
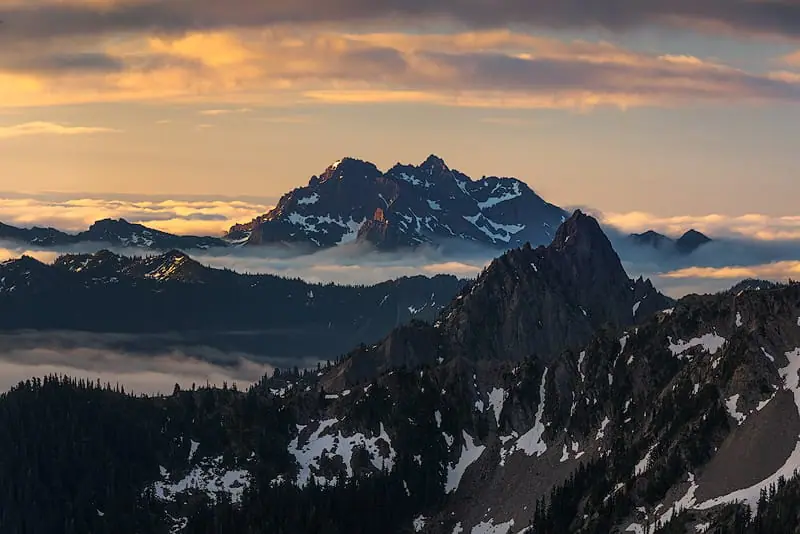
The effect above is NOT good for making your photo look like it has a massive scale.
Your goal is to size the mountains or any other large object so they look as they did when you were out shooting.
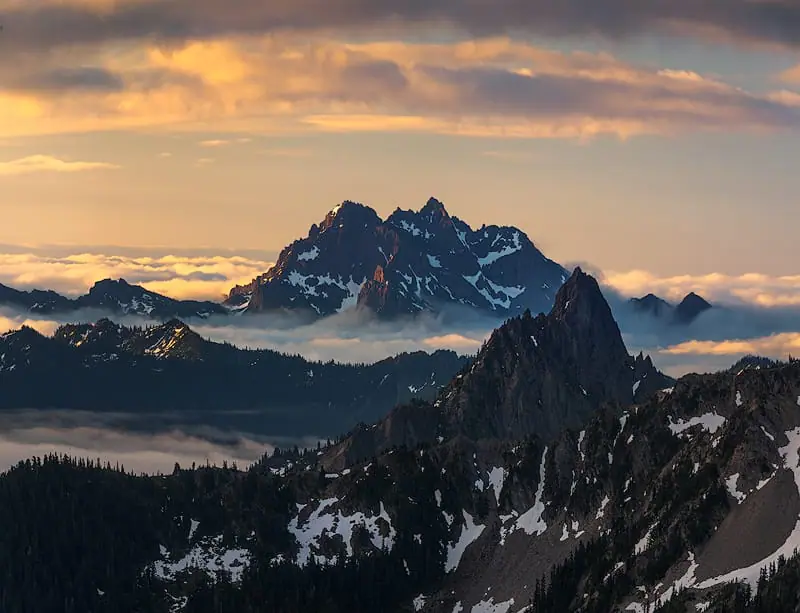
Instead, they should look like this…
Here’s How to Fix the Problem
Graphics are shown below the steps.
I always do this step last in my editing process!
Once you do this process a few times it becomes straightforward! It takes me less than 30 seconds.
This makes it simple to update already edited images that have this problem.
First, open your photo in Photoshop.
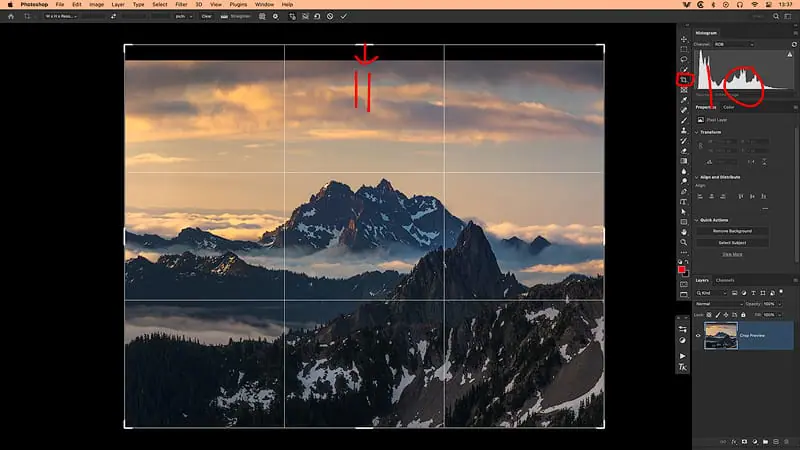
Step 1: Select the crop tool by hitting C on your keyboard, or selecting the crop tool in the sidebar.
Step 2: Drag the top edge of the crop up. It doesn’t matter how high you drag it. We will crop back down later. Going 1/3 of the image height works well!
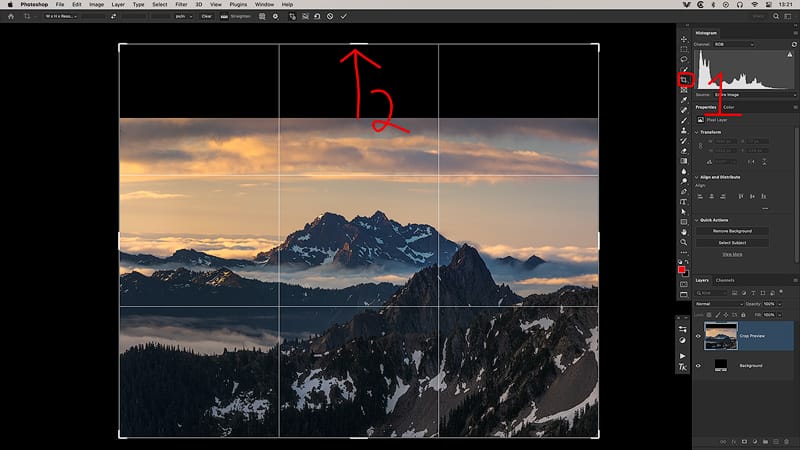
Step 3: Hit enter to save the crop.
Graphic below for following steps.
Step 4: Now select the Rectangular Marquee Tool
Step 5: Outline the entire image starting just under the mountains, to the top of the composition.
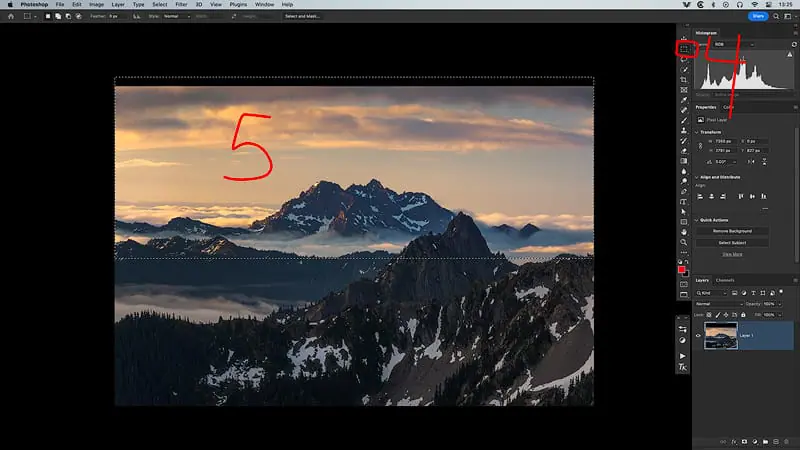
Step 6: In the top menu go to EDIT>FREE TRANSFORM, as shown in the graphic below
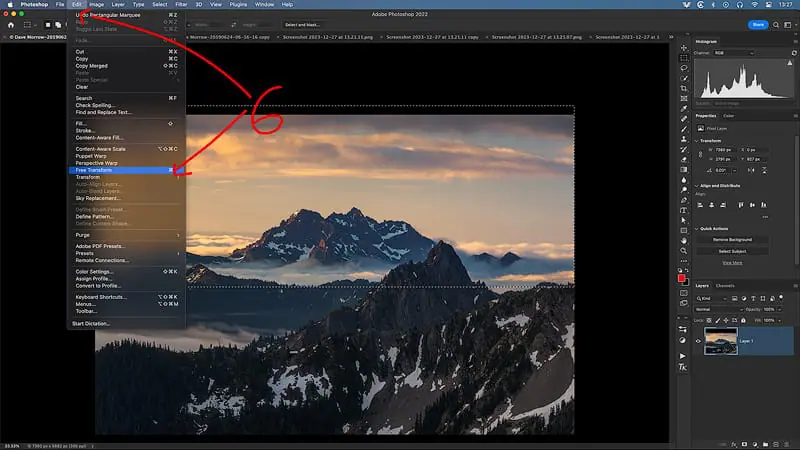
Step 7: Click and hold on the top blue line and drag it directly up until the mountains look the same size as they did in the field.
DO NOT drag this line so far that the mountains look unnaturally tall!
Reference the graphic below.
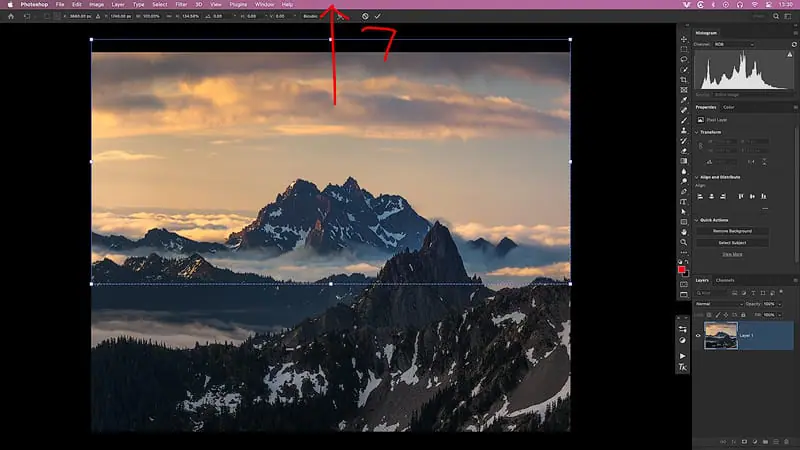
Step 8: After the sizing is correct, release your mouse button and click ENTER on the keyboard.
Step 9: In the top menu, go to SELECT>DESELECT as shown below.
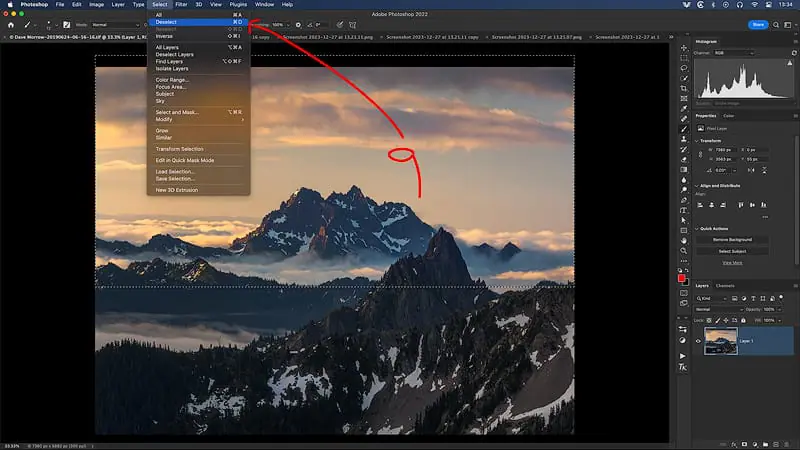
Notice how I didn’t select the entire image. Only the part of the image that was compressed near the center of the scene!
Step 10: Select the CROP TOOL once again.
Step 11: Drag the crop outline back down to the top of the photo & press enter.
The final result for my photo looks like this…

Now compare that to the photo captured, which looks like this…

I’ve fixed this photo to match exactly what I saw while out shooting.
It’s hard to see how compressed the mountains were until you compare them with the fixed version.
REMEMBER! You can use this technique for any scene or composition that requires it.
It doesn’t just apply to mountains.
Trick 2 – Fix Your Broken Photo Editing Setup
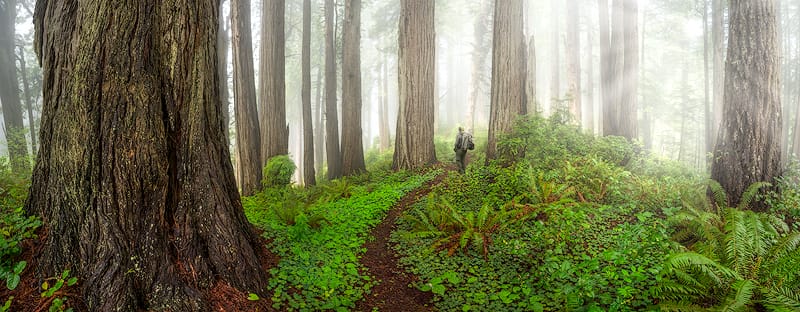
Most photographer’s photo editing setup is an absolute chaotic mess.
They have a bunch of tools on the screen that they never use, making each program overly complex.
Imagine trying to build a house and having tools out for building cars, airplanes, computers, and houses all at the same time.
All of the required tools are there, but it’s impossible to find them.
This is most photographers’ photo editing setup…
First, you only need 2 photo editing programs.
- Lightroom: Used to organize photos. No editing is done in Lightroom.
- Photoshop: Used to edit photos. Camera RAW, which works just like Lightroom is included in Photoshop.
Within those programs, you only need 5-10 tools max!
The crowd yells, “but so and so editing program is so much better, look at all the stuff you can do… the innovation!”.
I’ll cover why this is a destructive mindset below…
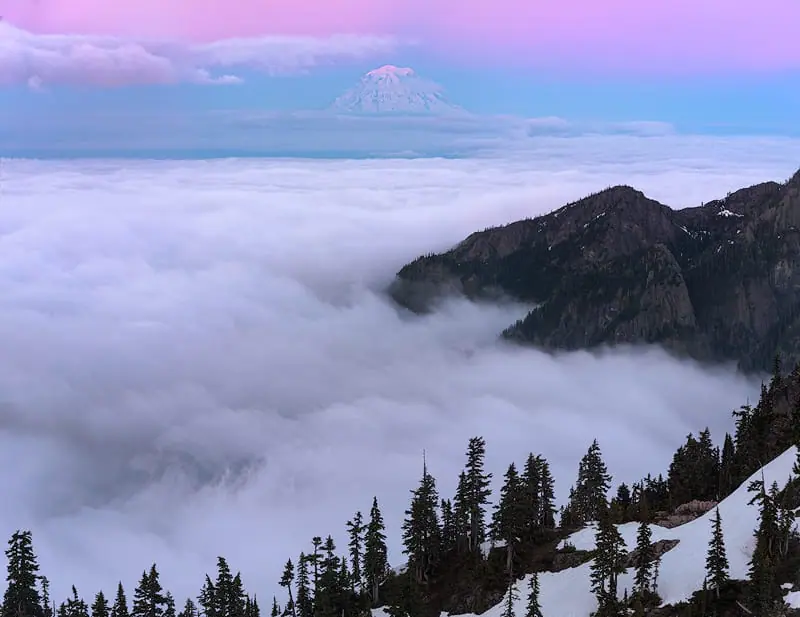
There are only 2 adjustments you can make to any photo. Pure physics… there isn’t an argument here.
- Change the Color
- Change the Tonal Value
Every tool in any photo editing program is only doing these two things.
Even tools like Gaussian blur or sharpening are only changing the color and tonal values of pixels. Your eyes just perceive these changes as blurring or sharpening.
You’re changing the color or tonal value of specific pixels. That’s it!
Why Lightroom & Photoshop Are All You Need
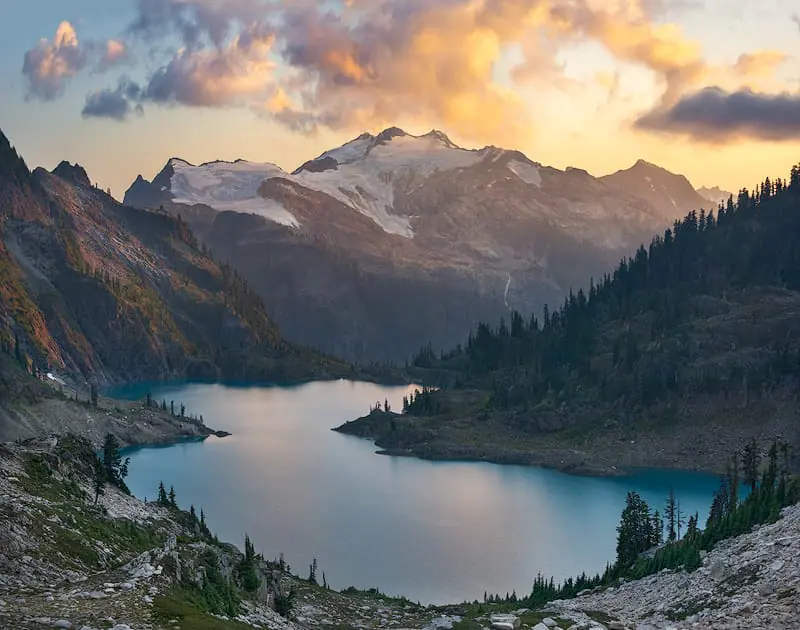
99% of the Adobe Software setup has not changed in 10 years.
You want a program that is going to stay the same and stop innovating with a bunch of new buttons and gadgets!
If it constantly changes and adds “better features”, all of your time will be spent learning the program updates instead of learning to edit photos.
The thing most photographers are lacking is not more tools, but knowing when and where to apply the color and tonal value adjustments.
You’ll only become an expert at this with practice.
Practice time is optimized using a steady-state program that you don’t have to constantly relearn!
Tips to Optimize Lightroom
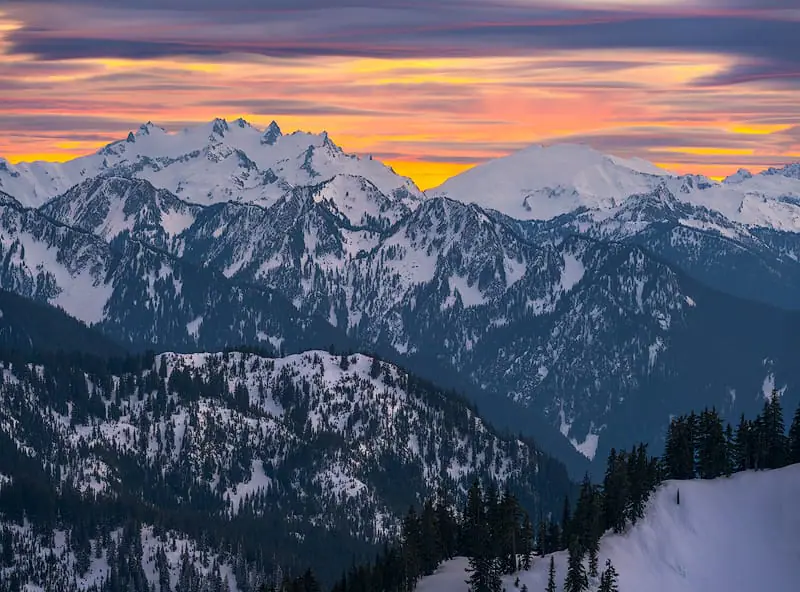
Remove as much useless junk as possible from your Lightroom Terminal.
Organize the stuff you do use so it’s very easy to access.
There are only 2 useful modules in the Lightroom Program:
- Library Module
- Develop Module
Let’s dive into both…
Library Module
Remove all of the other options besides Library and Develop. Red circle top right of graphic below.
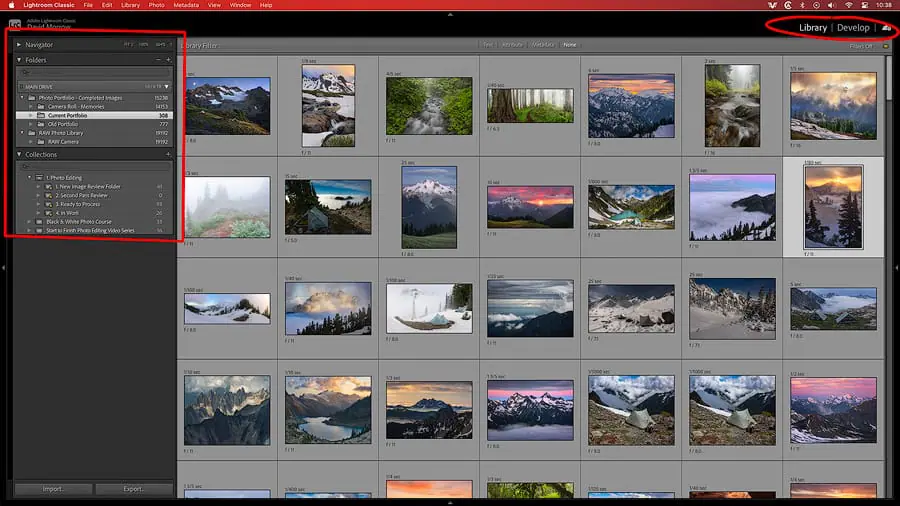
Step 1: Right-click on the Library or Develop Module.
Step 2: A box will pop up with options. Uncheck everything but Library and Develop.
Next, in the Library Module, you only need 2 options on the left-hand side. (see graphic above)
Step 3: Right click anywhere on this module and check folders and collections, only.
- Folders: This section shows your file folders on your hard drive. More on the organization in the next trick.
- Collections: This shows the Smart Collections which you have created. More on this later as well.
Develop Module
Next, you have the Develop Module as seen in the following graphic.
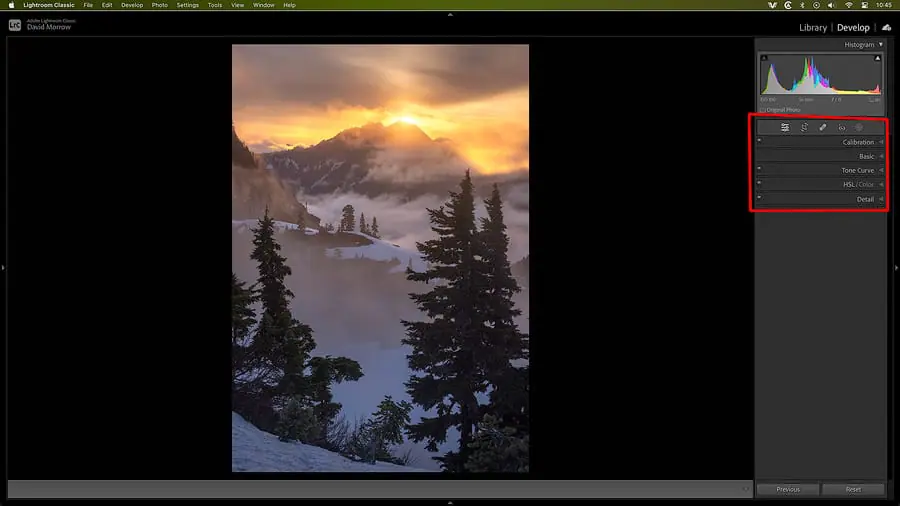
Notice how I have removed all of the useless options, as denoted in the red box on the right. (Graphic above)
I’ve also organized the options that I do use into the order in which I use them. (Steps below graphic)
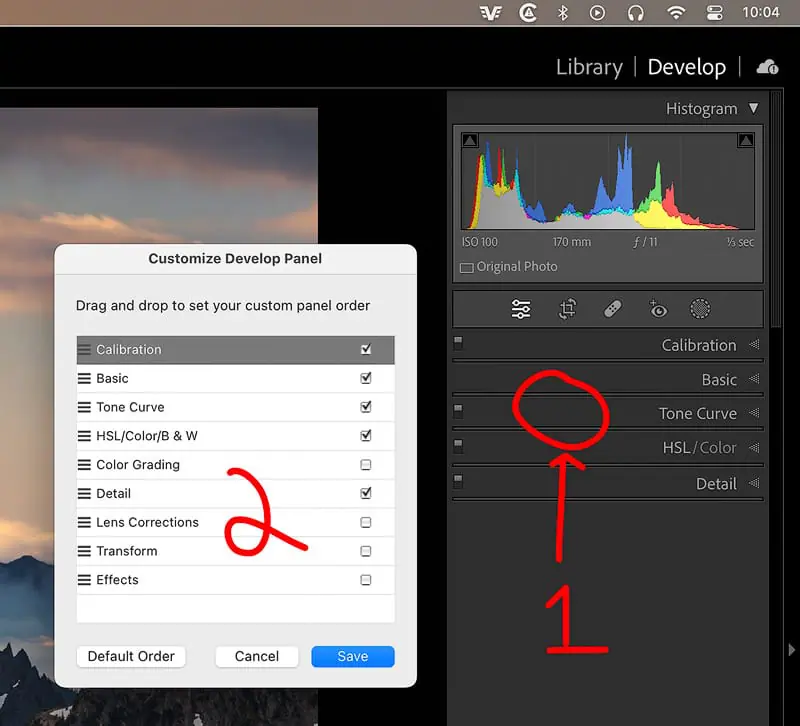
Step 1: Right-click on the Develop Module editing options.
Step 2: Uncheck all the items you don’t use & reorganize them, from top to bottom, in the order in which you use them during editing.
I don’t use Lightroom to edit my images, but I do use the develop module at times while filtering the photos as discussed in the next section.
When you’re deciding if the image is worth keeping to edit or not, it’s sometimes necessary to see what type of color and tonal values you can pull out of it.
That’s the only thing I use the Develop Module to do.
Tips to Optimize Photoshop
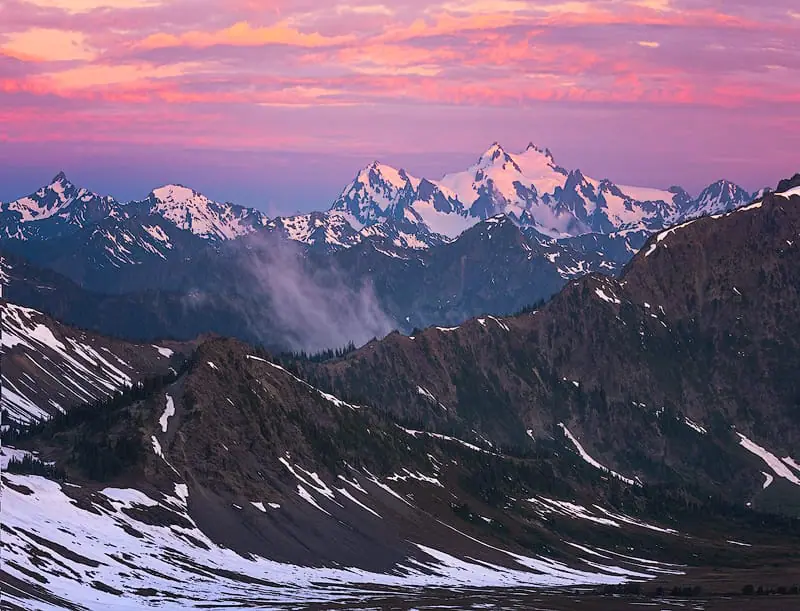
Photoshop is a very easy program to use.
The reason you may not think so is because it has a very overwhelming terminal, with too many options!
As discussed above, there are only 2 adjustments you can make to any photo:
- Change the Color
- Change the Tonal Value
The problem is there are a thousand different ways to make these 2 changes.
I only use 5-10 different tools in Photoshop.
Remove everything you don’t use from the Photoshop terminal.
Here’s how I set mine up, reference the graphic below.
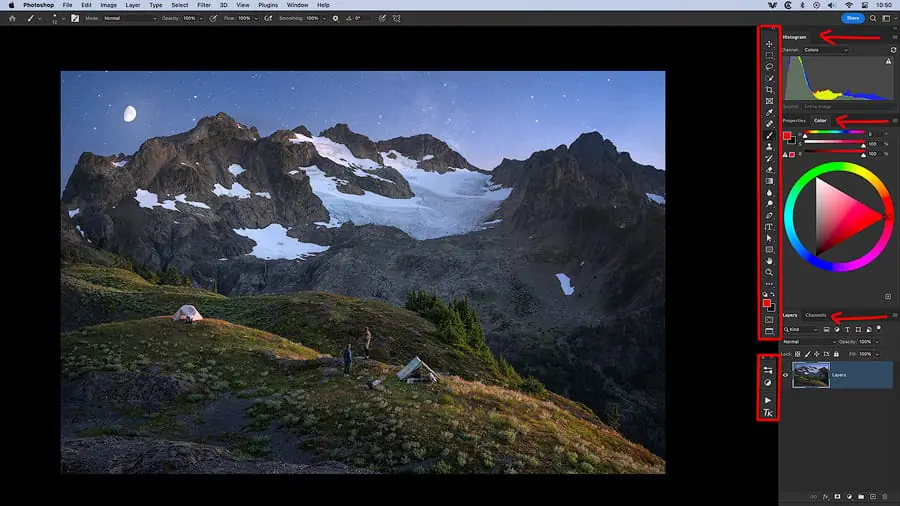
Step 1: Drag the toolbar to the right side of the screen, so you don’t have to constantly traverse the screen to click it.
I’ve outlined this with a long red vertical box in the graphic above.
Step 2: There are only a few windows that you’ll ever need to access.
I’ve noted these with red arrows in the graphic above, they are:
- Histogram
- Properties & Color: Put these next to each other.
- Layers & Channels: Put these next to each other.
You can update these in the top menu, WINDOW.
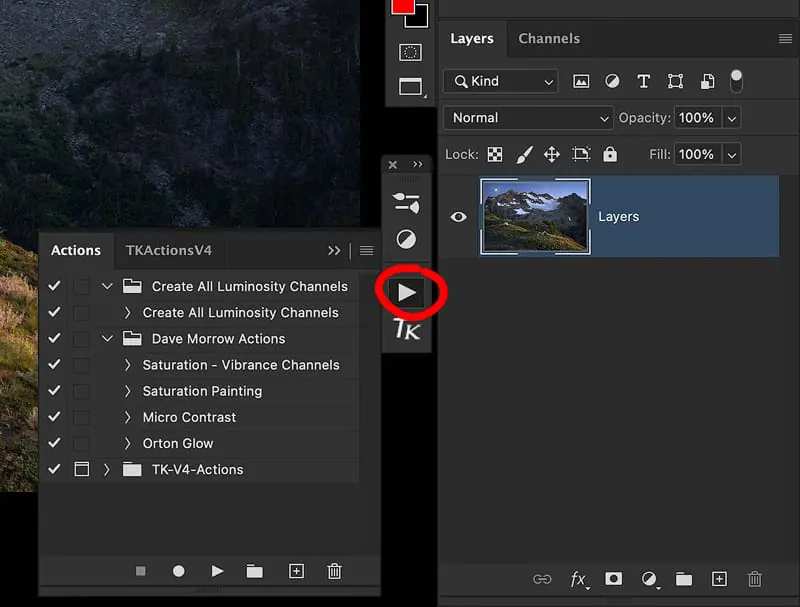
Step 3: Create a new quick access window for the following.
I’ve outlined this with the small red box next to layers.
Go into full-screen mode, by clicking F on the keyboard a few times, and drag this box right next to layers.
Now, it will stay there when you go full screen, which is how all editing should be done.
Here they are, in order from top to bottom.
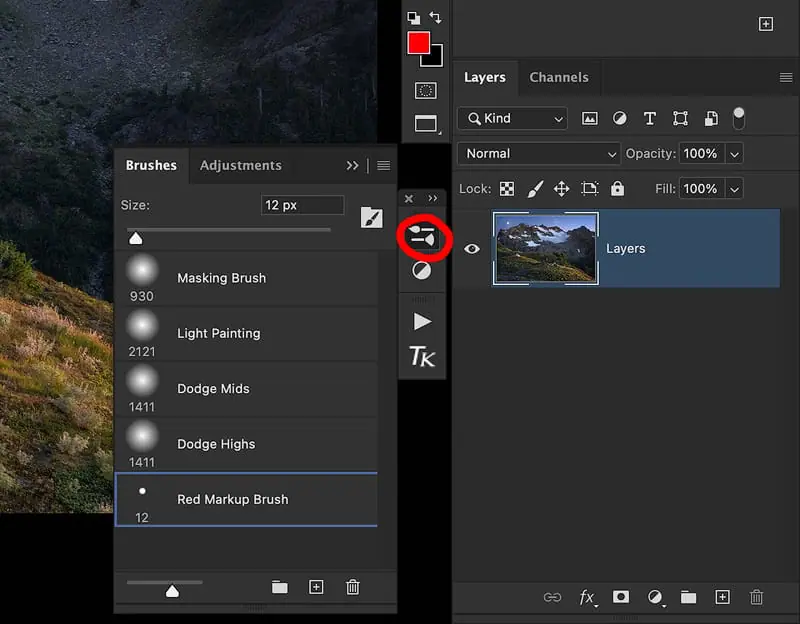
- Brush Presets
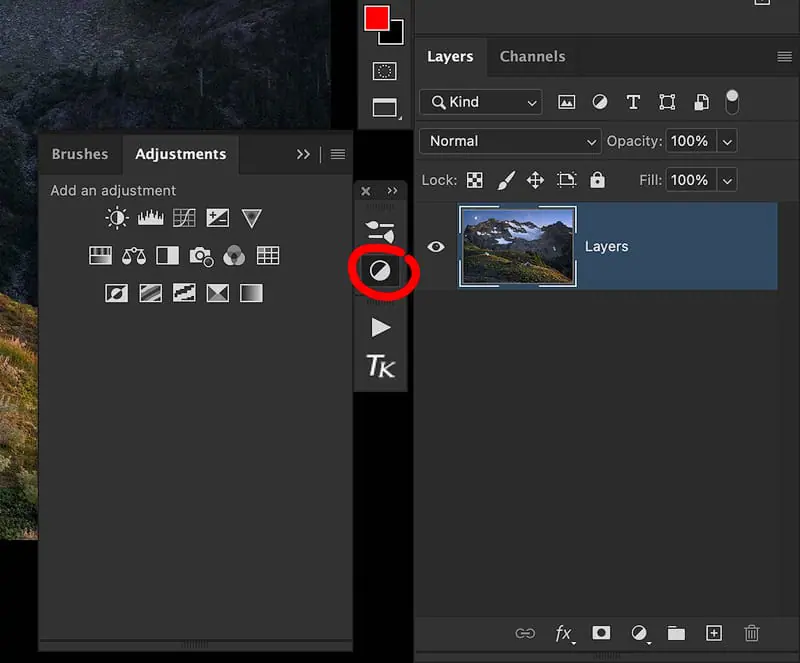
- Adjustments
- Personal Actions
- TK Actions
Here’s the logic…
Brush Presets
It’s insane to make manual starting adjustments to your brushes each time you change them.
Instead, make presets of the brushes you use to edit.
You can make small adjustments to these brushes after you select the preset for each adjustment.
I’m usually either masking or light painting, which is technically dodging and burning.
Here are my presets. This saves so much time!
Adjustments Panel
This is just your standard adjustments panel. I like to keep it in this small quick-access list right next to my layers so I can easily jump back and forth.
Personal Actions Panel
I prefer to use my own Luminosity Mask actions.
Why? Because the software you can buy to produce luminosity masks constantly changes and you have to relearn it with each new update.
There is no new technology behind luminosity masks.
Nothing is worthwhile in the new action panels created in the past 5 years.
All downside, no upside.
I do use the TK actions for web sharpening. They work great for this!
You don’t need to update to the latest versions once you have them.
Trick 3 – Upgrade Your Chaotic Photo Organization System
You should not be using more than 2 folders for your entire photo organization system.
More screams and yells from the crowd, “but I have to use folders to organize my photos..”.
You might not believe this, but I only use 2 file folders to organize all of my photos, they are:
- RAW Photos Folder
- Final Portfolio Photos Folder
Folders are an outdated method for organizing any digital item that has lots of metadata attached to it.
THE BIG PROBLEM WITH FOLDERS is, that the file can only exist in one folder at a time, unless you want to make duplicates which becomes a mess.
- If you want to change where the photo is located, you have to move it to a new folder.
- This causes syncing errors in your photo organization program.
- Anytime you move a photo it also has the chance to become corrupted or lost.
- It takes a lot of time to create folders and organize images into them.
My photo organization process takes 60 seconds max after returning from a trip!
Smart Collections that use metadata to automatically organize your photos are the best way!
You never have to move the actual image file to different folders.
You can create multiple Smart Collections, and a single image file can exist in all of them, or whatever you choose without ever moving the file or resyncing it in the organization program.
Image files have more metadata than about any other type of file, this includes:
- Date & Time
- Lens & Camera
- Shutter Speed
- ISO
- Exposure
- File Type
- Much much more…
Ask yourself this: Are there any folders in your photo organization system that contain images without the exact same metadata already there for you?
For example,
Many people organize their photos into folders by trip names, or dates, manually.
Every photo already has the date and time taken automatically embedded in it.
How to Organize Trips with Smart Collections
First off, when I plug in a memory card, all of my new RAW files are automatically imported into the same RAW Photos Folder.
After that, the organization is easy. See the steps below graphic.
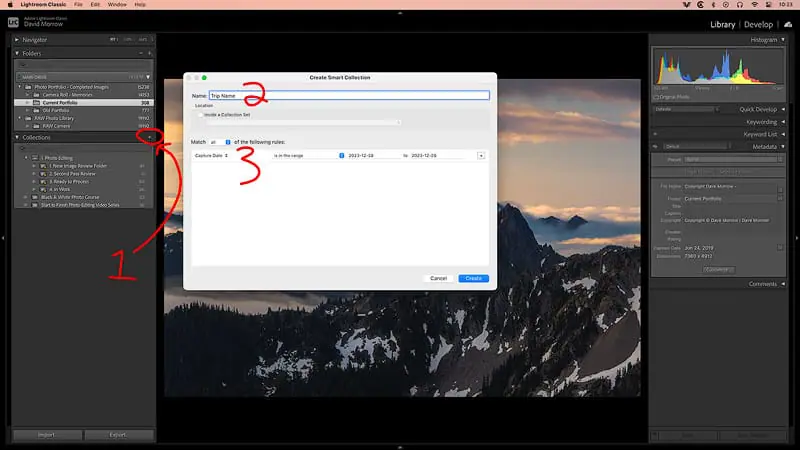
Step 1: Click the “+” button in the “Collections Module” & “Create New Smart Collection”
Step 2: Name the Trip
Step 3: Set the Capture Dates to “is in the Range” of the trip dates.
DONE!
This is Important!
- None of the images are moving around on the hard drive.
- This makes organization very fast in the future if you want to change up your organization setup!
- When you change computers or hard drives, all you have to do is drag the 2 folders to the new hard drive.
- You’ll never have to resync your photos since they never move locations on the hard drive.
- You can delete a Smart Collection anytime you want and it doesn’t touch the RAW files or any adjustments made to them.
How to Organize Your Photos for Editing Efficiency
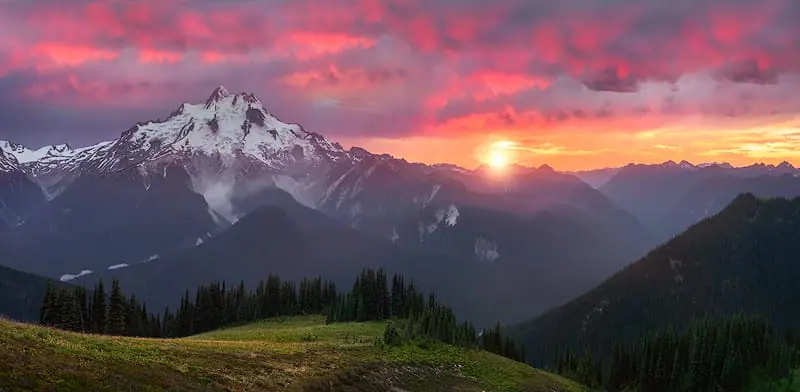
Photo organization is the foundation for all creativity and improvements in photo editing.
If your photos are unorganized and depend on a non-automated organization system, you won’t have easy access to your “world-class” unedited photos.
If you can’t easily access all your best-unedited photos, you’ll never create better photos.
There are only 4 types of photos on your computer:
- Unreviewed photos
- Trash
- Ready to Process (Unedited RAW Files)
- Processed (Portfolio Images)
If your photo organizing system does not directly show you each type of photo, then you’ll constantly be wondering what to work on.
I have 4 different “smart collections” in Lightroom which automatically divide up photos that are in the editing process.
Smart Collection 1 – New Image Review
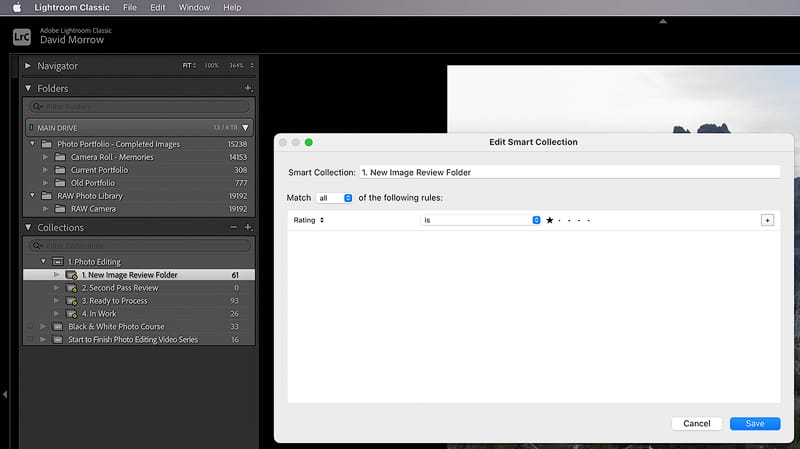
This includes every photo you have not reviewed yet.
There are bad photos, which will go in the trash, and great photos that you’ll edit and publish in your portfolio.
When you’re uninspired to edit, review this set of photos, and organize them into the “trash” or “Ready to Process”.
When I come back from a photo trip, with 1 button push, all of my unreviewed photos go into this “Smart Collection”.
I use the STAR RATING = 1 as my setting for this smart collection.
You can create a preset that automatically applies a 1-star rating to all photos upon import. They automatically go to this smart collection.
Make Decisions in 5 Seconds or Less
If the photo does not make you scream “Heck Yeah” or you are not excited to edit it, throw it in the trash.
If the photo IS NOT a 9/10 or BETTER rating in your mind. Throw it in the trash!
No one wants to look at 8/10 photos. We’re all busy. There is too much important stuff to work on.
NO ONE CARES ABOUT 8/10 PHOTOS!
Organize the Photos
There are 3 decisions to make for each photo in this collection.
- Decision 1: Trash: In Lightroom, just hit “x” on the keyboard and it will mark the photo to be thrown away.
- Decision 2: Smart Collection 2: Second Pass Review
- Decision 3: Smart Collection 3: Ready to Process
For each decision, just push 1 button on your keyboard and the photo automatically moves to the new smart collection.
NOTE: The photo is not moving locations on the hard drive. This makes the workflow very fast!
Smart Collection 2 – Second Pass Review
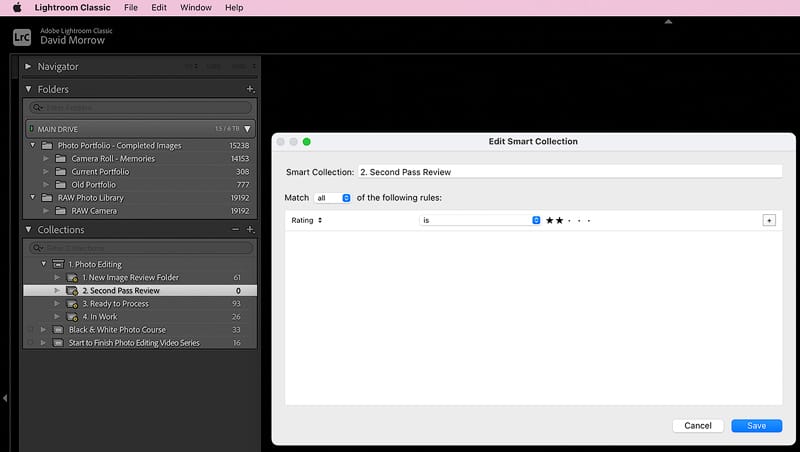
This set of photos includes anything I’m unsure of at the time.
They might end up in the trash, or they might end up in the “Ready to Process Folder”.
Come back at a later date and decide after some time has passed.
I use STAR RATING = 2 for this smart collection.
Just push 2 on your keyboard while reviewing the photos in Smart Collection 1 and it will move to this collection.
Organize the Photos
There are 2 decisions to make for each photo in this collection.
- Decision 1: Trash: In Lightroom, just hit “x” on the keyboard and it will mark the photo to be thrown away.
- Decision 2: Smart Collection 3: Ready to Process
Smart Collection 3: Ready to Process
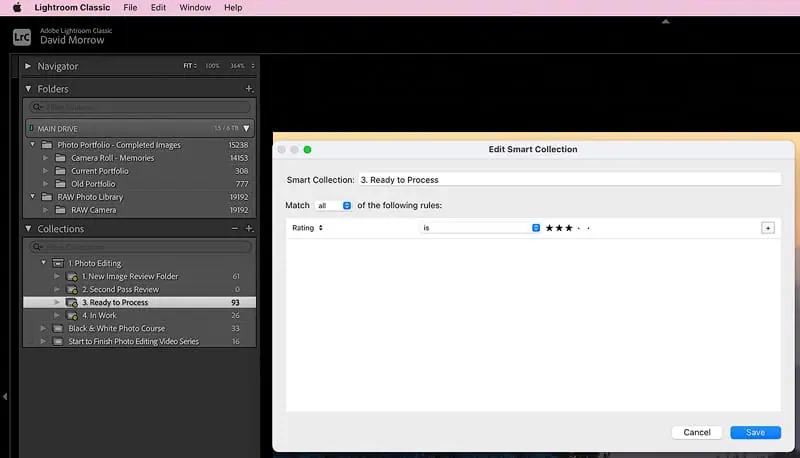
These photos are why you go on photography trips and put in all the work to learn about photography.
They are the “Heck yeah” photos.
9/10 or better.
When you see a photo like this, you can’t wait to edit it!
When it’s time to edit photos, this makes it very easy.
Just go to your “Ready to Process” folder, pick one, and get to work.
Organize the Photos
I use STAR RATING = 3 for this smart collection.
Just push 3 on your keyboard while reviewing the photos in Smart Collection 1 or 2 photos and it will move to this collection.
There are no decisions to make in this collection. Just pick the photo you want to work on & edit it.
For any photo that I’m editing, I move from Smart Collection 3 to Smart Collection 4.
Smart Collection 4: In Work
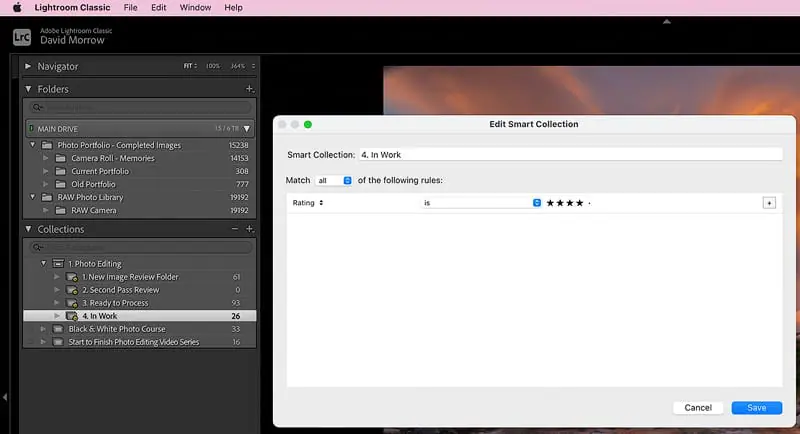
After selecting a photo to work on in the steps above, it’s time to export it into Camera RAW & Photoshop.
Export Your Photo to Edit
I export a duplicate RAW file from this collection onto my desktop to work on it in Camera RAW & Photoshop.
This is important for 3 reasons:
- Opening from Lightroom directly into Photoshop will autosave the Photoshop file into your RAW photo folder. This is messy & takes constant effort to clean up.
- Editing RAW files from an external hard drive is very slow, compared to one that’s on your desktop. (Files for storage go on an external hard drive – in work files go on computer HD)
- Making a copy of the file ensures the original never moves and is never corrupted or damaged.
Many won’t follow this advice and continue to open directly into Photoshop… Eventually, they will see the problems with it and use my method.
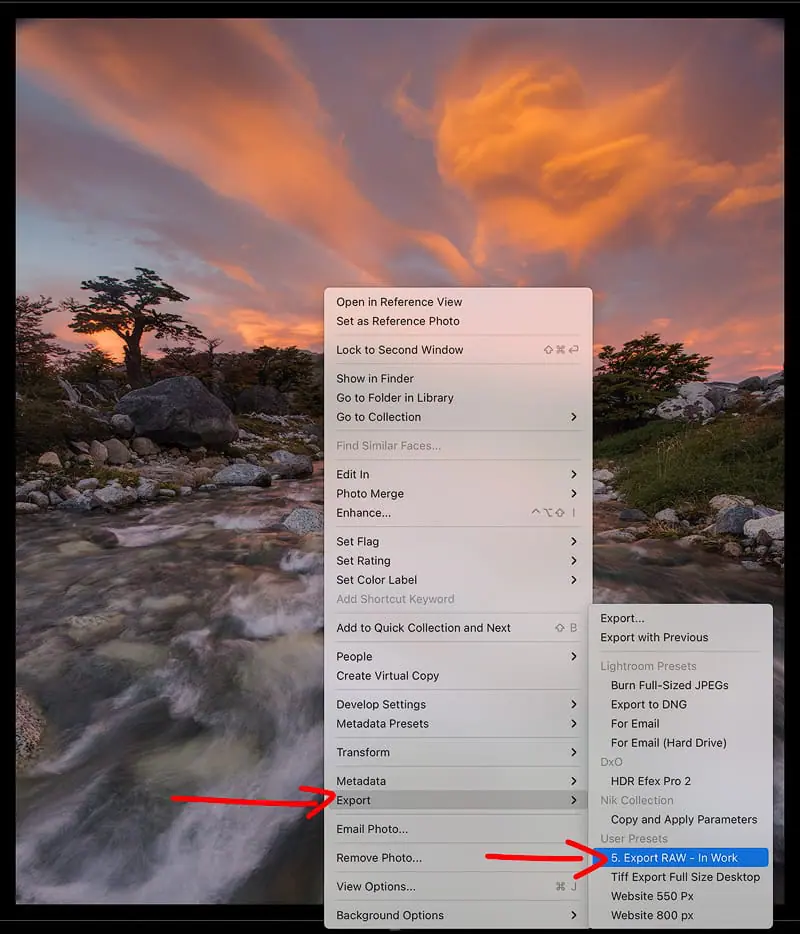
Right-click on any photo you’re ready to work on and scroll down to Export to create an export preset.
After clicking on Export follow these steps to create the preset.
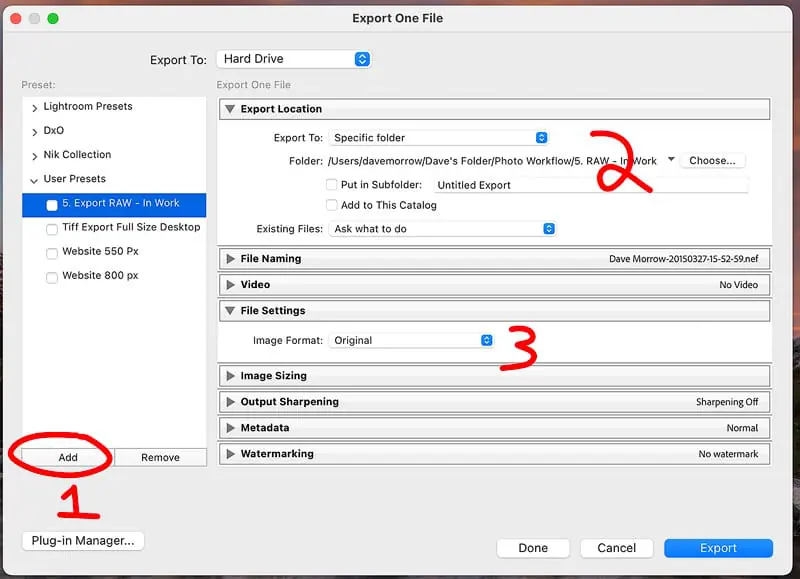
Step 1: Click Add & Name
Step 2: Choose a location on your COMPUTERS HARD DRIVE to place the file.
Step 3: Select Original for file settings. This ensures it exports a duplicate of the RAW file. Now Click EXPORT.
Now, whenever you want to export a RAW file to work on, just right-click on the image in Lightroom and scroll down to export presets, then click the button.
Final Portfolio Images Folder & Clean Up
After I think I’m done editing an image, I give it 30 days to make sure I like it.
Then, I compress all of the layers and save it as a TIFF file.
If you’re 100% sure you’re done editing the image there is no need to keep your Photoshop file with all of the layers.
After you’re done editing your photo you will only have 2 files:
- The original RAW file. I keep these files since they are the base layer for all editing.
- The Final TIFF file. This is the file that’s used for printing the image or sharpening the image to display on the internet.
Next, I import the final tiff file into Lightroom, to the folder Final Portfolio Photos, or whatever you want to call it.
Last, I go into to it’s RAW file match in the “Smart Collection 4: In Work”, and click “0 – zero” while on the photos.
This gives the RAW file a zero-star rating.
This removes the RAW file from the smart collection workflow. It’s still in the RAW Photo Folder, where it will always stay.
Trick 4 – You Won’t Believe This…
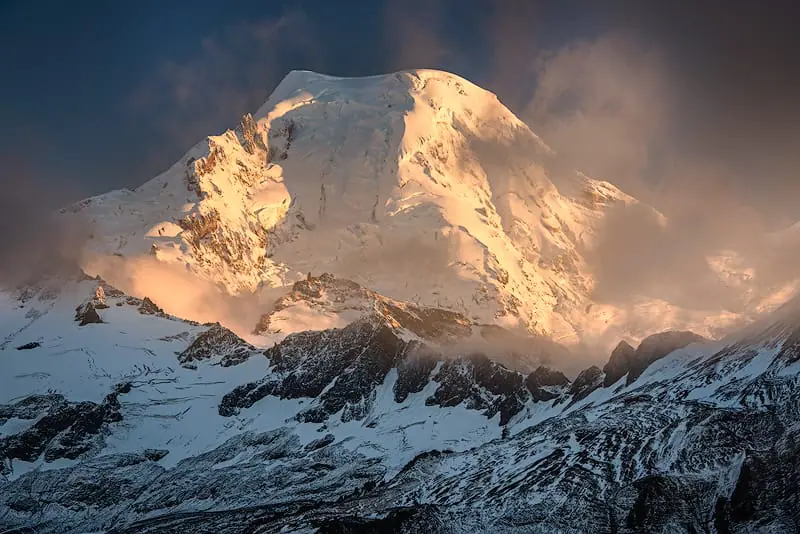
There are only two actual photo editing adjustments you can make to any photo!
Choice 1: Adjusting the tonal value of a pixel (Learn about pixels and light here)
Choice 2: Adjusting the color of a pixel.
Every photo editing adjustment you have ever done only changes the color or tonal value of a pixel.
The hard part is knowing when and how to make these adjustments so your photo looks good.
This is why I don’t recommend using very many photo editing tools or programs.
They all do the same thing.
The hard part isn’t the photo editing adjustments.
It’s knowing what adjustments to apply, where & when.
Tonal Value Adjustments
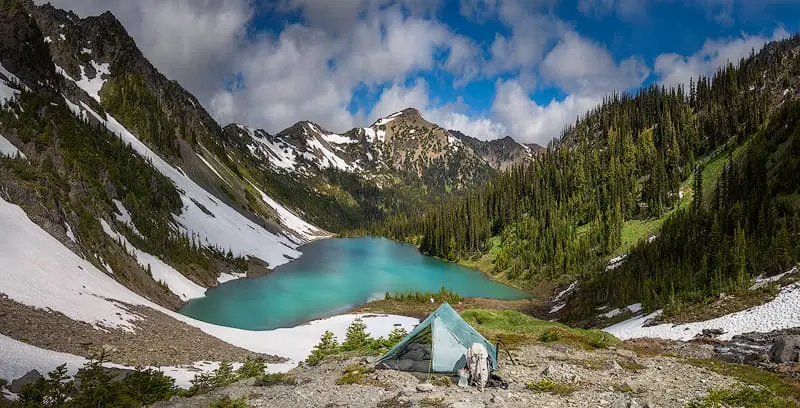
Each pixel has a tonal value rating, going from black to grey, to white.
Tonal values are colorless.
Although each color does have a tonal value.
Let me explain,
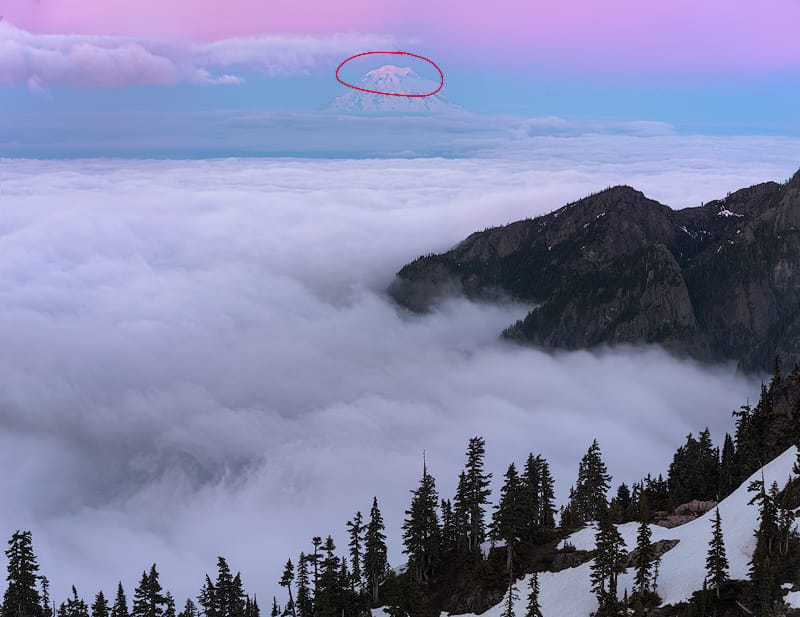
First, look at this photo, you can’t see the pixels, but let’s zoom in on the red circle until we can.
Now, I’ve zoomed in enough to start to see the pixels on the mountain.
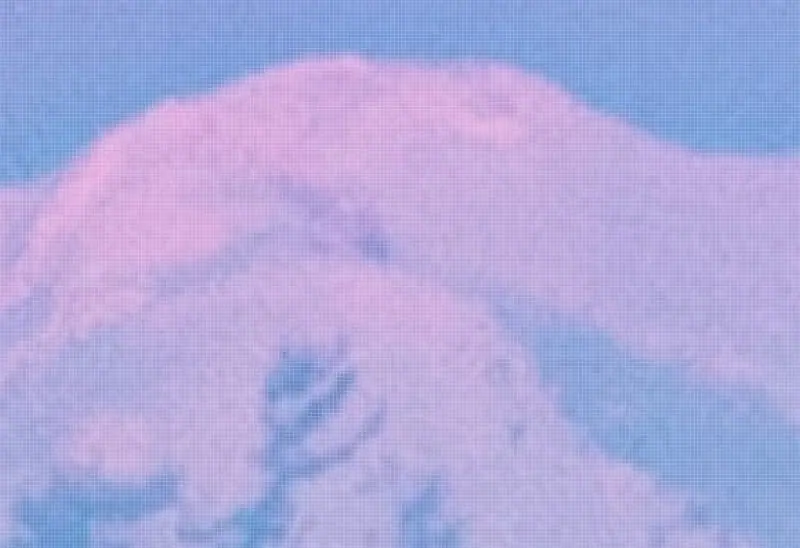
Zooming in to 100% resolution you can see each box or pixel.
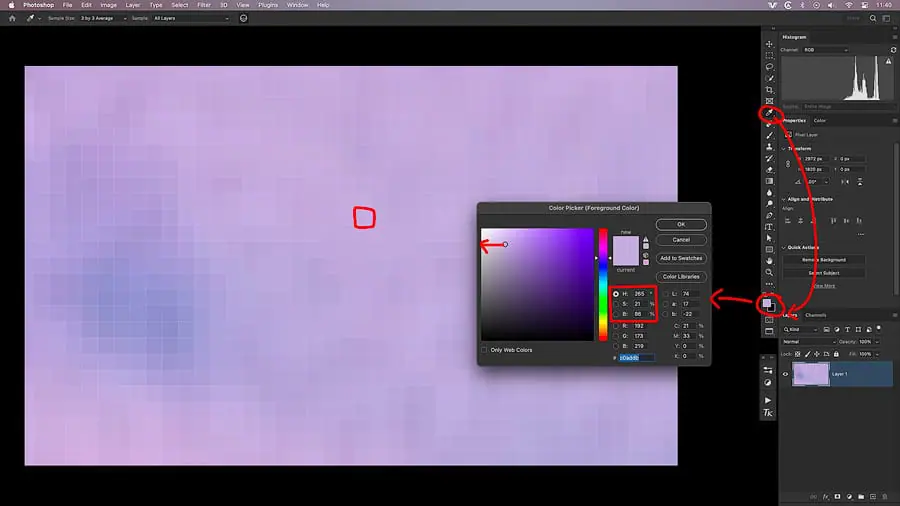
They are only a single color.
I have outlined a purplish pixel in red on the photo.
Using the “color picker” tool, I can select that specific color and show its data in the color picker box.
This specific color has HSB values of:
- Hue: 256 degrees
- Saturation: 21%
- Brightness: 86%
The tonal value of this color is 86% as bright as pure white on the scale from black to white.
You can see the dot on the color picker menu shows the pixel color selected.
Directly left of this color is its tonal value on the scale of black to white.
You can see it’s 86% of the way to white.
Color Adjustments
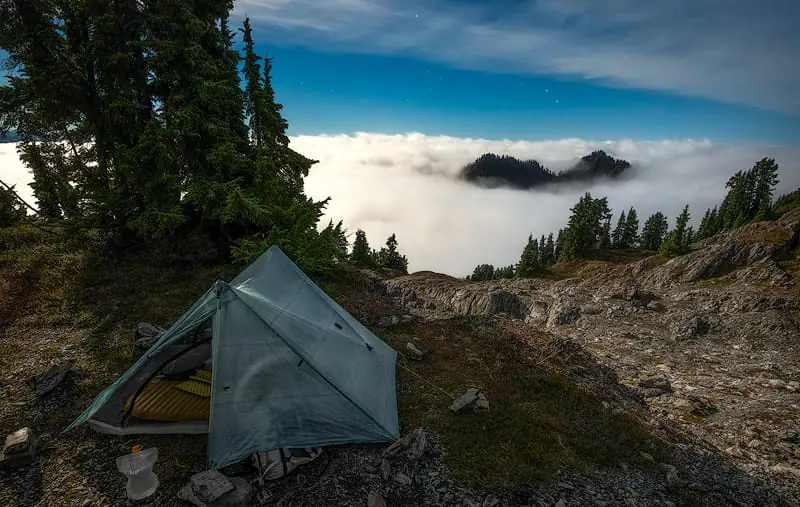
You can change this tonal value, which will also change the color or the pixel.
Hue and Saturation are the color values for this pixel.
You can also change these.
HSB is a 3-dimensional coordinate system.
- When you change 1 coordinate it can also change the other 2.
- You can only change the color and tonal value of each pixel!
- When you change color it changes tonal value.
- When you change tonal value it changes color.
How to Adjust the Color and Tonal Value for Photo Editing
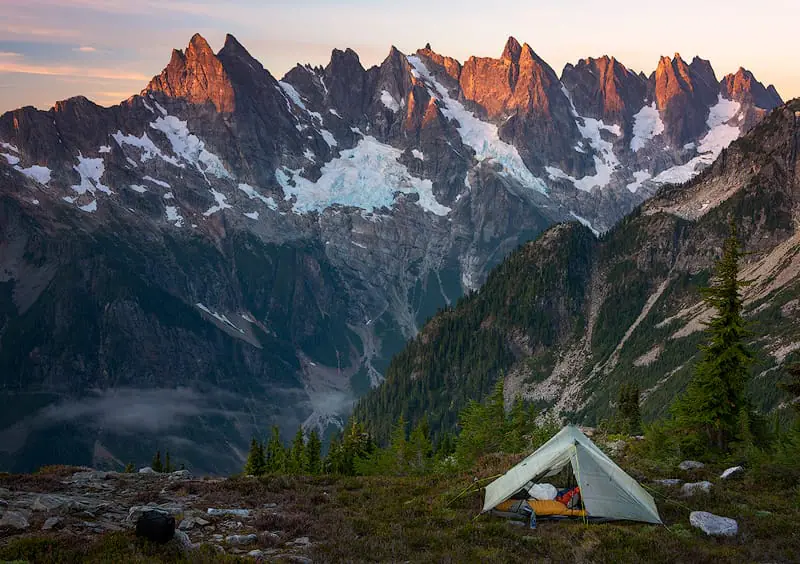
I recommend editing each photo to adjust the tonal values first.
After adjusting the tonal values and getting everything to look good, then adjust the color.
- Adjusting the tonal values makes big changes to the colors.
- Adjusting the colors slightly doesn’t make big changes to the tonal values.
By adjusting the tonal values first, and getting the light to look nice in the photo, only small color adjustments will be required to perfect the photo.
Trick 5 – Blend Mode Magic
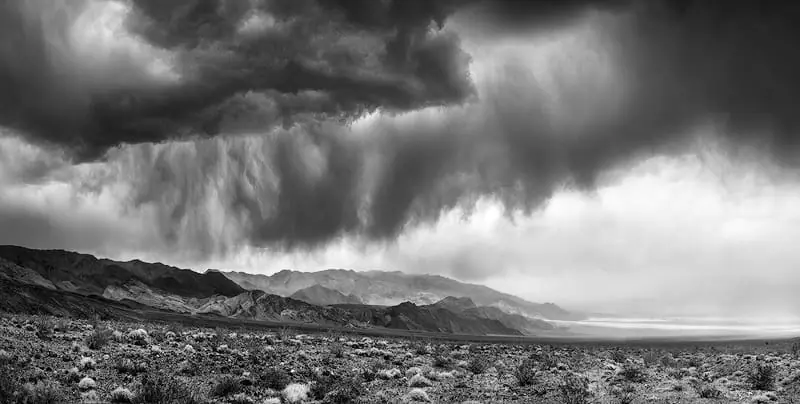
Blend modes are one of the most powerful and least used tools in Photoshop.
There are many different ways to use them, but the easiest way is as follows.
Ask Yourself: What part of the image do I want to adjust & how do I want to adjust it?
Create a new LEVELS adjustment layer as shown in the graphic below.
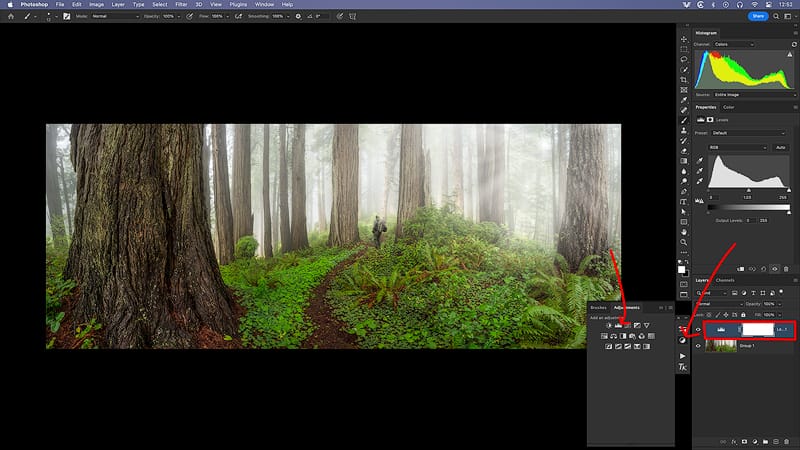
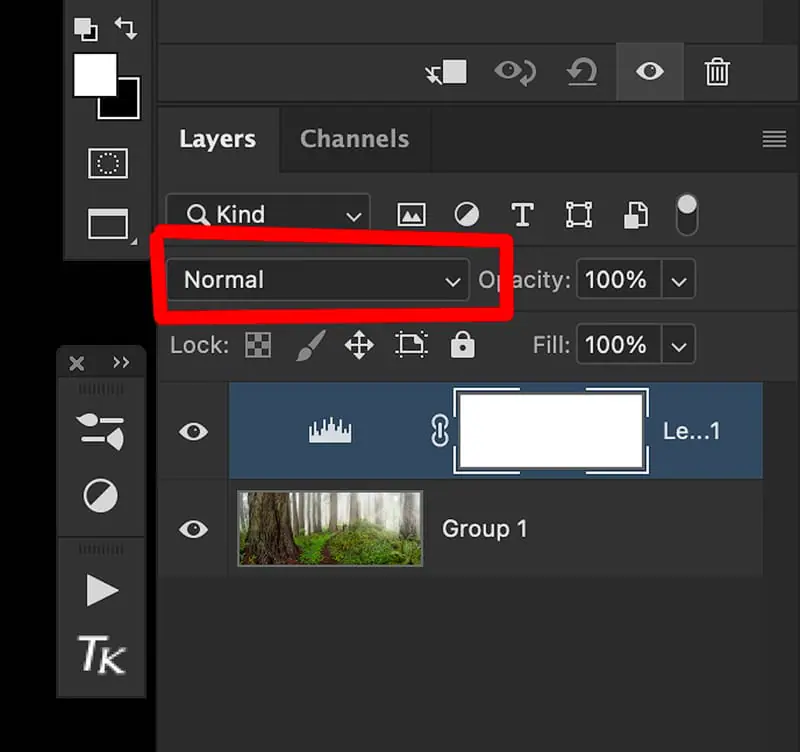
Now, select the blend modes option, right above the new layers as shown in the graphic below.
Currently, it says NORMAL (graphic below), scroll down the options to see the effects it has on your photo.
There is no right or wrong option.
Your goal is to keep your eye on the specific parts of the photo you want to adjust while keeping in mind how you want to adjust them.
It doesn’t matter that the blend mode affects other parts of the photo. Just keep an eye on the area you want to adjust.
We will fix the rest in the next steps.
For my example: (graphic below)
- What do I want to adjust? The tree trunk
- How do I want to adjust it? Make it brighter
I’ll just scroll down the blend modes until this adjustment is achieved.
For this photo, I ended up using the SCREEN blend mode.
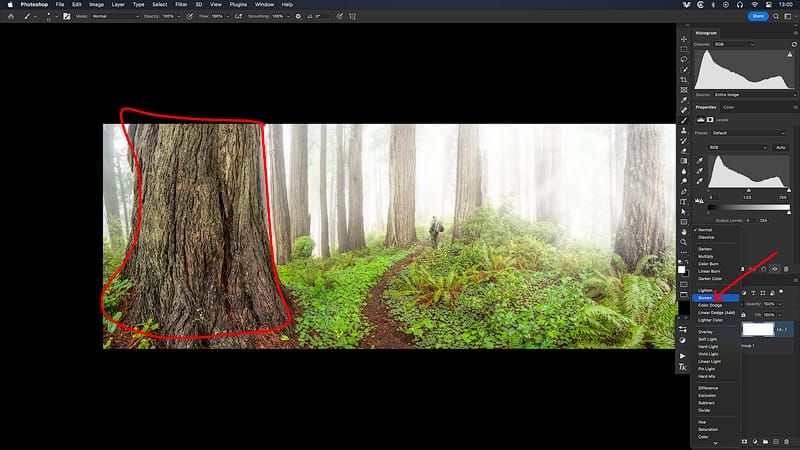
NOTICE how the adjustment is applied in many other different places where I don’t want it to exist.
Fixing this is easy.
The steps are shown in the graphic below.
Step 1: Click on the white layer mask. NOTE it will still be white until you invert it with step 2.
Step 2: Click Invert, in the properties right above it. Now the layer mask will be black and hides the adjustment.
Step 3: Select your white masking brush and paint in the area you want to reveal over the tree trunk. This reveals the underlying adjustment.
Step 4: Adjust the opacity of the layer to dial in the final brightness. Just drag this slider back and forth. There isn’t a right or wrong number, it’s whatever looks good!

You can use this type of adjustment and combine it with changing the LEVELS adjustment that underlies it as well.
It’s also fine to use any other adjustment type or any other blend mode you like.
Experiment around and become an expert at these.
How to 10X Your Learning Speed
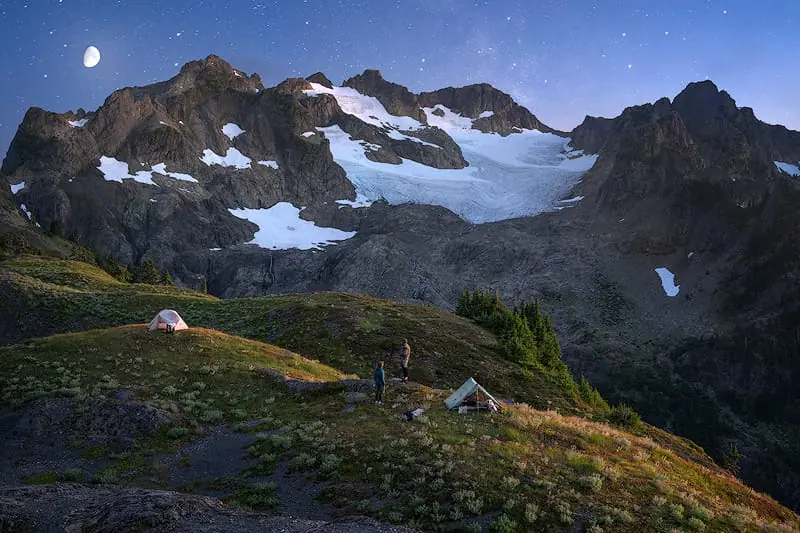
The fastest way to master landscape photography is by learning firsthand from someone who has spent over a decade optimizing these skills through trial and error.
Blogs and videos are great for theory, but they cannot replace real-time, field-based instruction.
I offer high-intensity workshops and tours designed for all skill and fitness levels.
In a single 3-day session, I can teach you my entire system—start to finish.
You will receive 1-on-1 feedback in the field that will improve your skills faster than years of self-teaching ever could.
My students often learn more in three days than they have in the previous 20 years on their own.
Stop guessing and start creating portfolio-grade images.