Most photographers don’t improve quickly because they waste time working on the wrong skills in the incorrect order.
Many examples include people shooting for 30 years and never creating great photos.
It took me 3 years from first picking up a camera to doing landscape photography full-time.
I don’t say this to brag, but to teach an efficient way to learn & improve that will be 10X faster & more enjoyable.
This guide simplifies everything I’ve learned over the past decade, into 7 steps, that will drastically improve your photos.
Table of Contents
- How to 10X Your Landscape Photography Skills
- Step 1: Throw Away 80% of Your Photo Equipment
- Step 2: Quit Shooting Manual Mode & Upgrade Your Shooting Technique
- Step 3: Unlearn Bad Composition Habits
- Step 4: Become an Expert at Weather & Maps
- Step 5: Don’t Take 99% of Potential Shots
- Step 6: Stop Running Away from Photoshop
- Step 7: Learn to Go Hiking & Backpacking
- How to 10X Your Learning Speed
How to 10X Your Landscape Photography Skills
90% of the landscape photography tips taught online will not actually improve your skills.
- They are created by brands incentivized to mass produce content for traffic, instead of teach skills that work.
- Most of them haven’t been optimized & battle-tested in the field either.
There are no shortcuts, but there are correct paths and dead ends.
If you spend all your time following dead ends, it will feel like learning, without ever improving.
This is guaranteed to destroy motivation & you will quit!
Without a system to determine if you’re following the correct path, it’s impossible to create better photos.
This guide will show you how to avoid dead ends and produce world-class results.
Let’s dive in…
Step 1: Throw Away 80% of Your Photo Equipment
The biggest mistake photographers make is owning too much equipment.
If a piece of camera gear does not improve your photos by 10X, get rid of it:
- It takes a specific amount of time to master each piece of photo equipment.
- The more equipment you own, the longer it takes to master photography.
Buy the best camera gear you can afford, then shoot with it for 10 years, or until your skills outgrow the gear.
It’s much cheaper to buy the good equipment upfront, and keep it, versus buying cheaper gear, then upgrading.
After purchasing, stop paying attention to new gear releases and work on skills instead!
Here are my recommendations for landscape photography gear, along with the logic of each decision:
Camera Body for Landscape Photography
All of my camera gear, minus tripod, with a lighter shown for scale, is shown below.
All of the photos I’ve created with this equipment are right here.
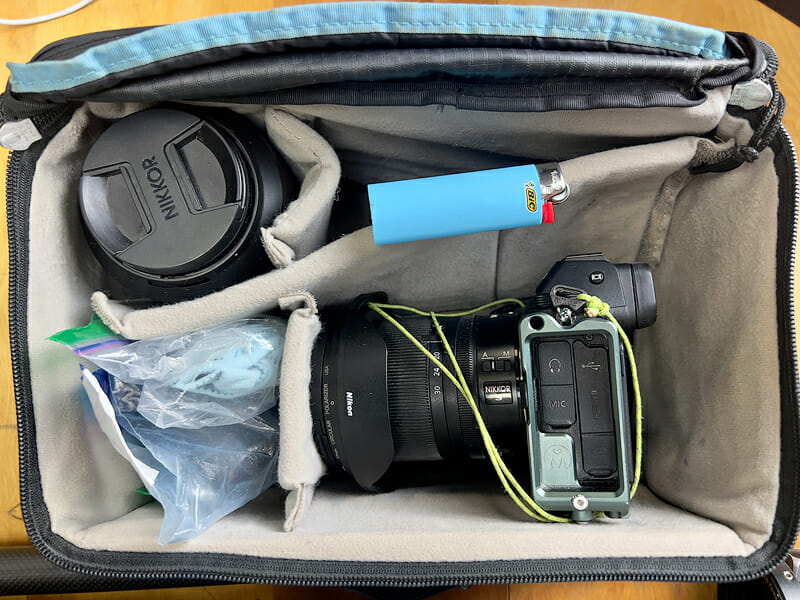
Camera Body: Nikon Z7 + Memory Card + L-Bracket for Tripod (discussed in tripod section)
Buying a good full-frame camera is the best move.
It will last for a decade or more. (Approx. $250/year – cheaper than your phone or internet!)
Your skills will not outgrow it & you won’t wonder if the camera is holding you back.
Crop sensors don’t work well for landscape photography and destroy image quality.
Nikon & Sony make the best cameras for landscape photography because they have the highest dynamic range.
Dynamic range is the most important feature of a landscape camera:
- You can look up the dynamic range on DXO Mark.
- My ISO Photography guide covers the physics of dynamic range.
Remove the camera strap and add a 2mm cord to reduce weight & the camera shake from the wind.
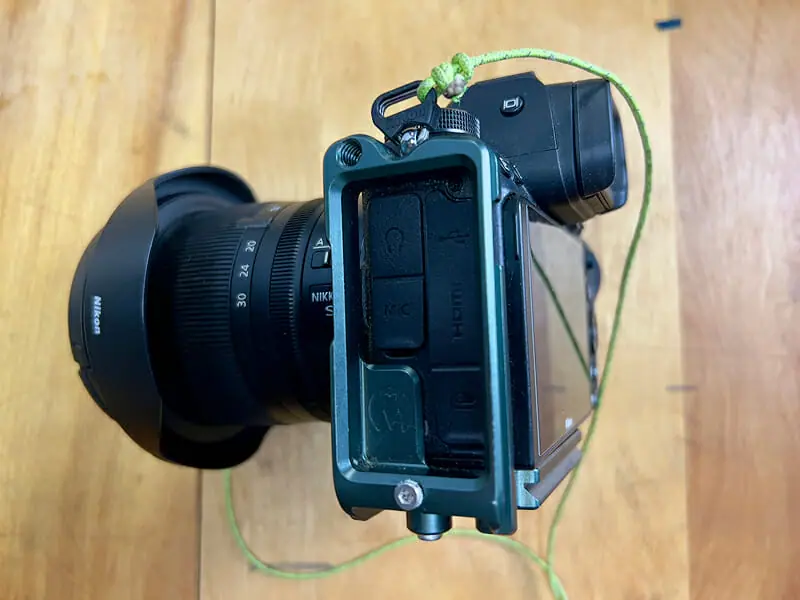
I know what you’re going to say, “Dave, buy the new Peak Design Camera Strap Clip.”.
It’s heavy and has failure points. If the clips fail, the camera drops and the trip is over.
It also introduces another decision into your photography process. Strap on, or strap off?
Keep it simple!
Camera Case for Landscape Photography
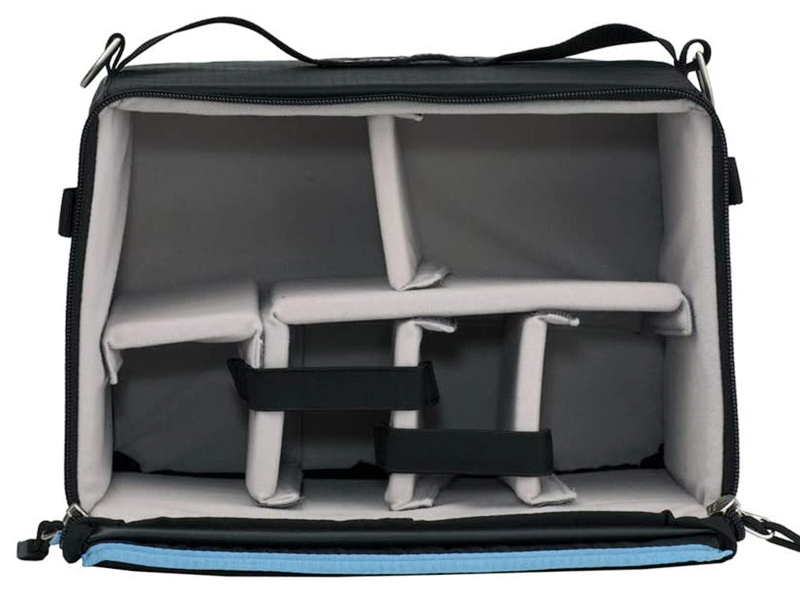
Camera Case: Small F-Stop ICU
Photography backpacks are heavy and don’t work well.
Instead, use a small camera case such as the f-stop ICU.
You can keep this ICU inside of a hiking backpack, near the top.
Wide Angle Lens for Landscape Photography
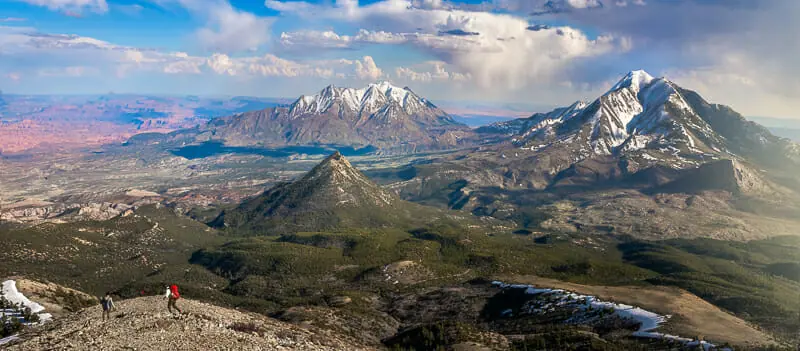
Wide Angle Lens: Nikkor 14-30mm f/4 + Circular Polarizer
A good set of two lenses will last your entire life!
The circular polarizer should stay on the lens at all times when the sun is above the horizon.
This produces the best color & also protects the lens.
I would highly recommend a 14mm, but no wider.
A 16mm is not wide enough for landscape photography.
An f/2.8 max f-stop isn’t required if you have a good full-frame camera.
F/2.8 is much more expensive and too heavy.
Buy an f/4 and increase your ISO by 1 stop for night sky photography.
Good full-frame cameras handle the noise just fine.
Telephoto Lens for Landscape Photography
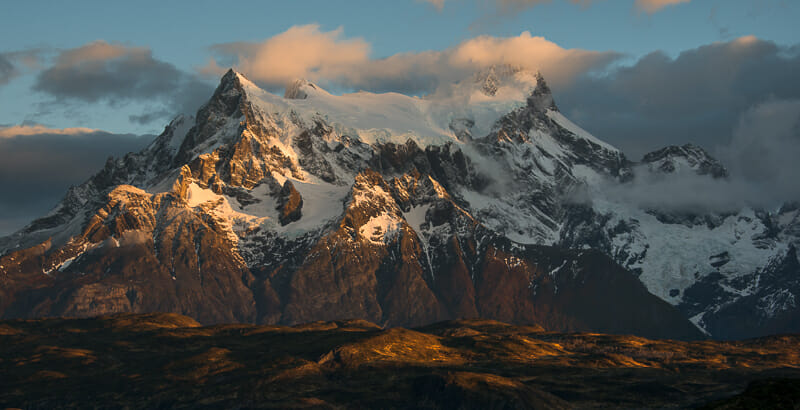
Telephoto Lens: Nikkor 24-200mm f/4-6.3+ Circular Polarizer
A telephoto lens only needs to cover from your wide angle lens max focal length to 200mm.
With a good full-frame camera, you can crop into 300mm from the 200mm RAW file.
Reducing the focal length makes the lens cheaper, lighter, and it works just as well.
Tripod & L-Bracket for Landscape Photography
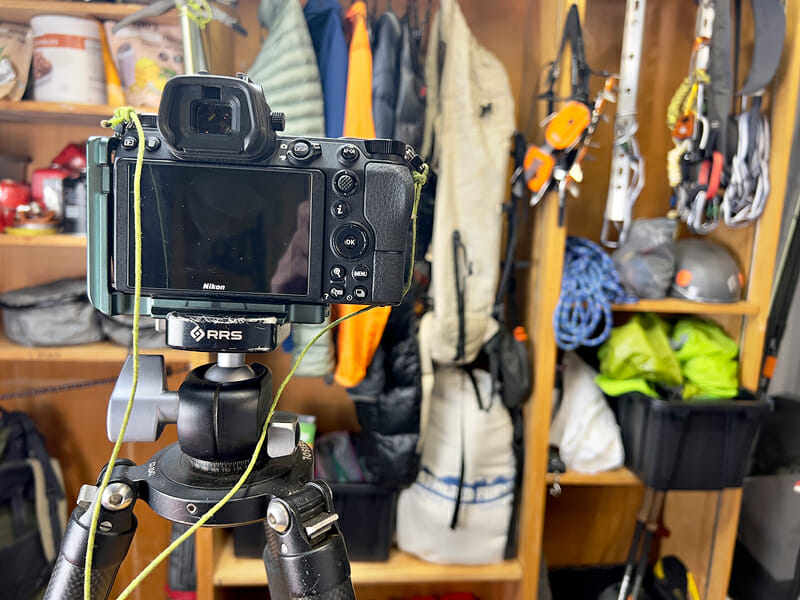
Tripod Setup: Feisol Tournament CT-3342 + Really Right Stuff BH-30 Ball Head with Lever Release & L-Bracket
Buy one nice tripod setup and keep it forever. It won’t wear out.
A cheap plastic tripod, without an L-bracket, will ruin your photos more than a cheap camera.
The L-Bracket is essential!
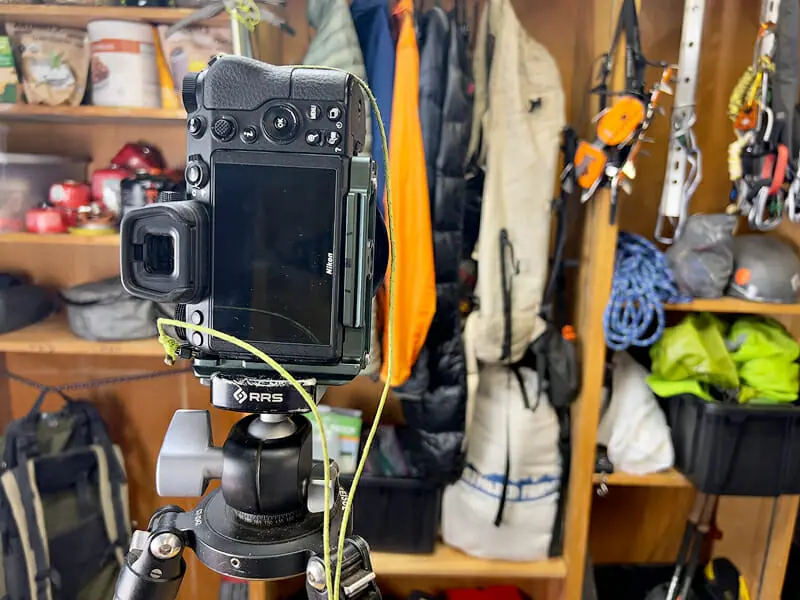
It allows vertical shots to be centered over the tripod, instead of out to the side.
This drastically increases image sharpness and the stability of the tripod.
It also makes setting it up much quicker.
The tripod should be a simple ball head with a single movement lever clamp to install and remove the camera.
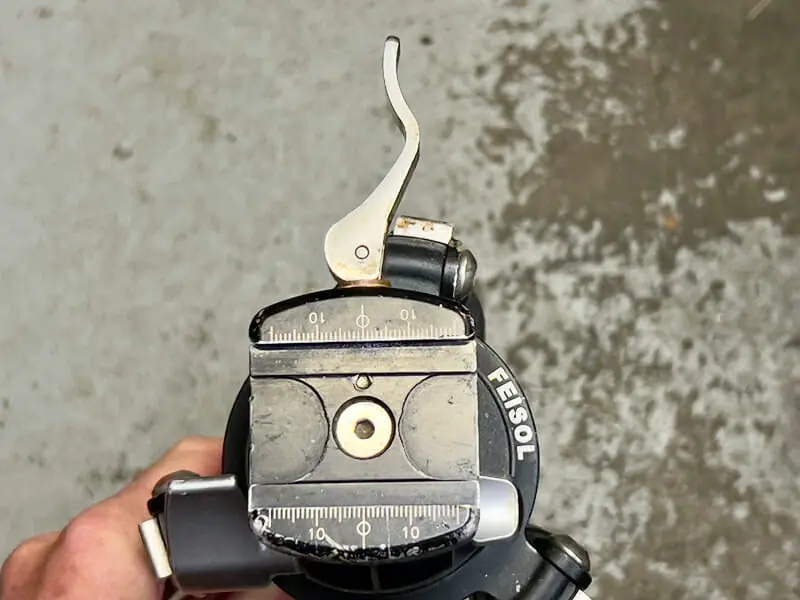
Screw tighteners are very slow and not as stable.
Screws are also much more prone to failure than a lever.
There should only be 1 camera adjustment knob on the ball head.
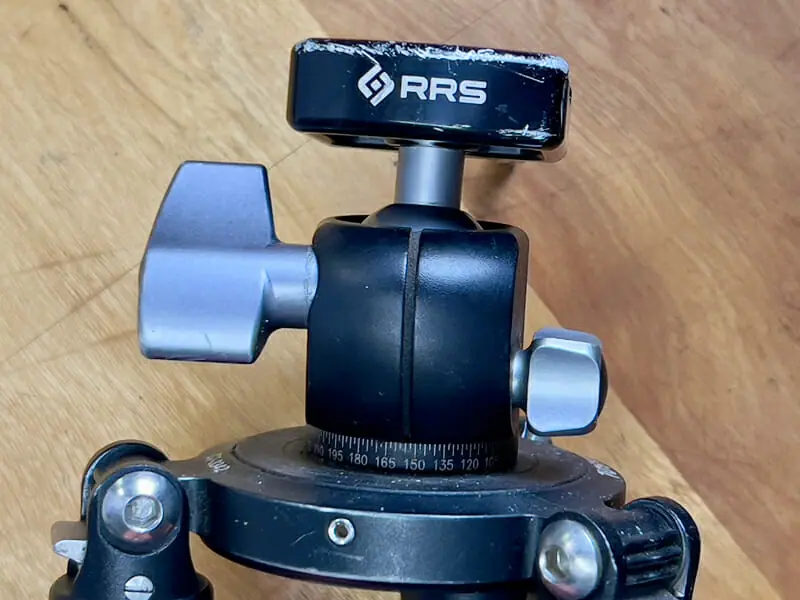
The knob on the right never moves. It fixes the ball head to the tripod.
The knob on the left controls all movement of the camera on the tripod.
The goal is to control the camera with your right hand and adjust the composition using the tripod knob with your left hand.
More than 1 knob is too complicated & adds more decisions to your creative process.
The biggest pain point I see when teaching workshops is the battle with a complex or unstable tripod head.
The tripod should only have 3 sections of lightweight carbon fiber.
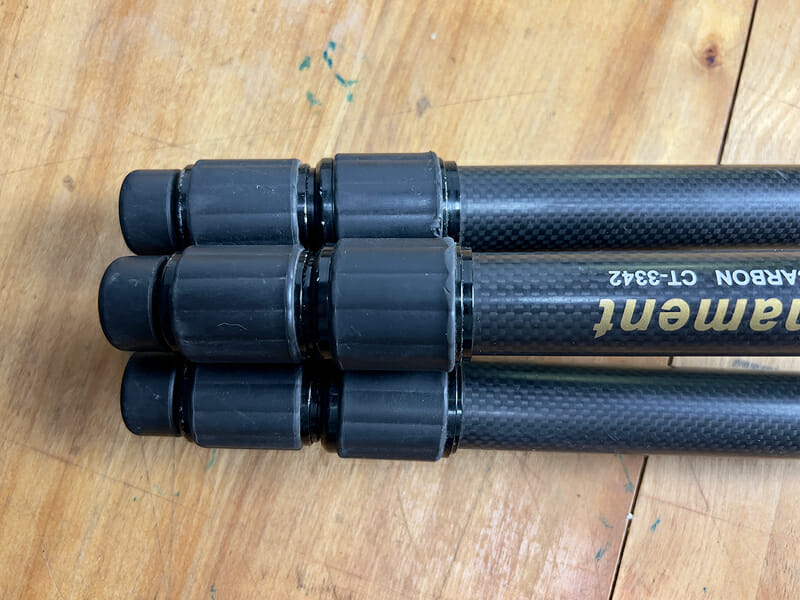
Notice how there are only two adjustment knobs for each leg.
This makes setting it up much quicker and there are fewer points of failure.
4 section tripods are not as sturdy and cause images to be out of focus due to motion blur.
Carbon fiber is not only lighter, but it also dampens shake which improves image sharpness.
Do not buy heavy & overpriced tripods like Really Right Stuff.
They are overkill.
Other Landscape Photography Gear
There isn’t a need for sensor cleaners, brushes, wet wipes, camera protection hoods, or anything that’s not included in this list:
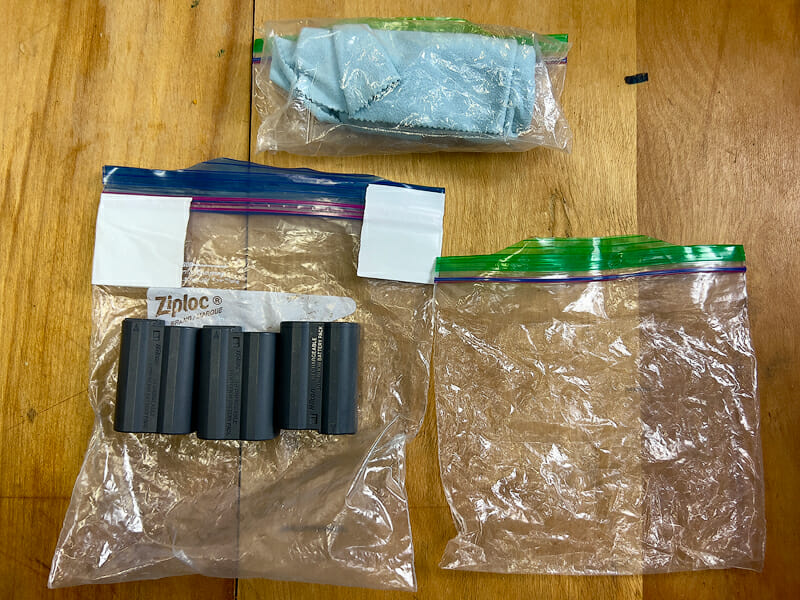
- 3 Batteries: I also carry a USB-C charger that plugs into my camera for long backpacking trips. This recharges the batteries.
- 2 ziplock bags: 1 for charged batteries and 1 for dead batteries.
- 2 small microfiber lens cloths inside a plastic bag. (cut linked cloths in half)
- 1 Allen wrench/hex bit: Only carry the size for your tripod and L-Bracket.
Video: Optimize Your Camera Setup for Landscape Photography
After a few months of mastering the essential pieces of equipment, determine if there are any major problems with your current setup.
If there is a major problem, then buy a new piece of equipment to solve the problem.
New equipment should only be purchased when it solves a major problem & 10Xs your outcome.
Step 2: Quit Shooting Manual Mode & Upgrade Your Shooting Technique
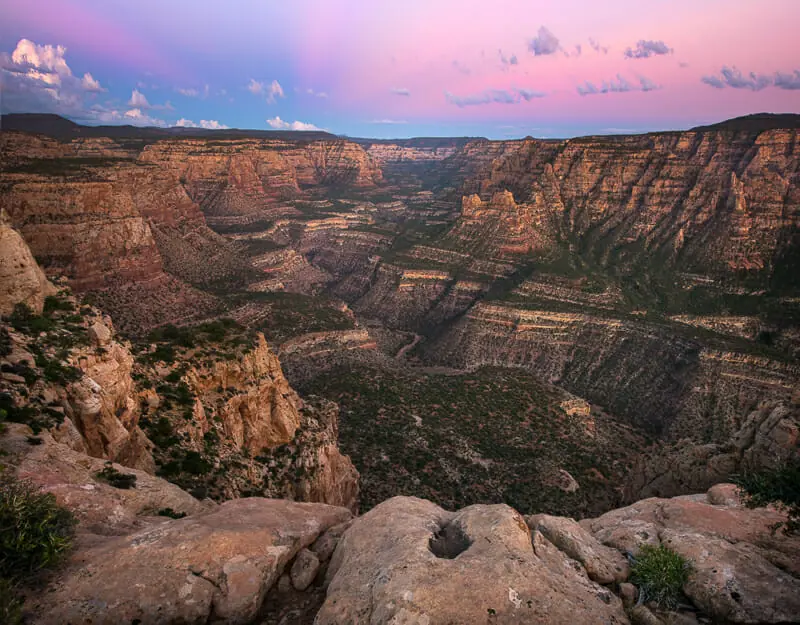
Manual Mode is not ideal for landscape photography unless it’s dark out.
When shooting your hands should be subconsciously selecting the settings without even thinking.
There is no point in improving at composition until you no longer have to think about camera settings.
Here are the Steps – Download my Camera Technique Workflow & Free PDF:
- Shoot in Aperture Priority Mode
- Always Start at Base ISO
- Choose the Best F-Stop Settings & Focus
- Set the Exposure & Histogram
- Control the Shutter Speed with ISO
- Take the Shot
- Final Image Review
In my camera technique PDF I explain why the sequence of these steps is so important.
The video below also covers it.
Video: Step-by-Step Shooting Workflow
Step 3: Unlearn Bad Composition Habits
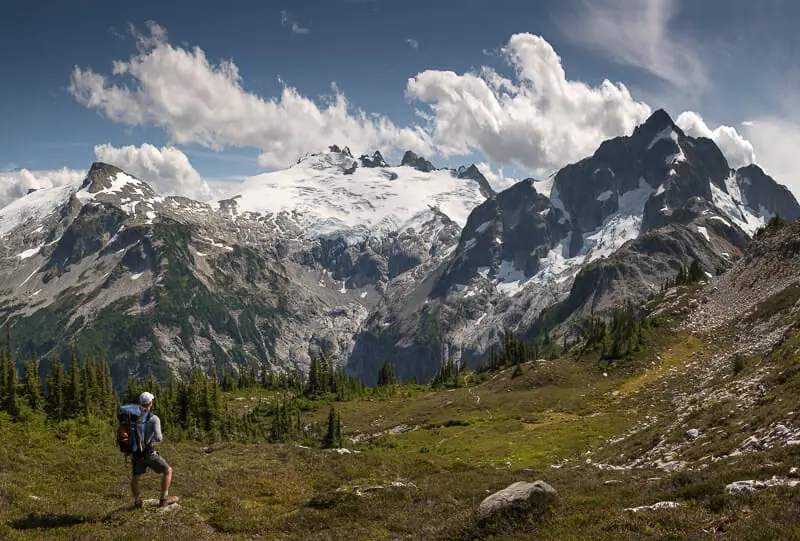
It’s impossible to improve at composition, without having a constant feedback loop, learning from mistakes.
It makes no sense to take hundreds of photos, then skip reviewing them, for what worked and what did not.
How to Improve at Composition:
- Read my Composition Guide & step-by-step framework.
- Shoot every day using the framework.
- Review each image you take. Do not skip any!
- Determine which images worked and which ones did not.
- Define why each image worked or did not.
- Discard the bad techniques, keep the good ones.
- Repeat.
Let’s cover some basic composition skills & landscape photography examples:
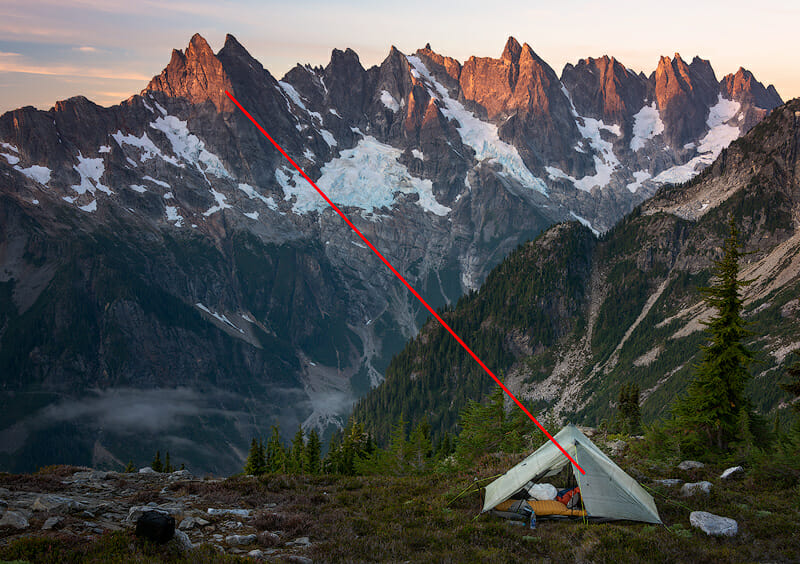
Leading Lines
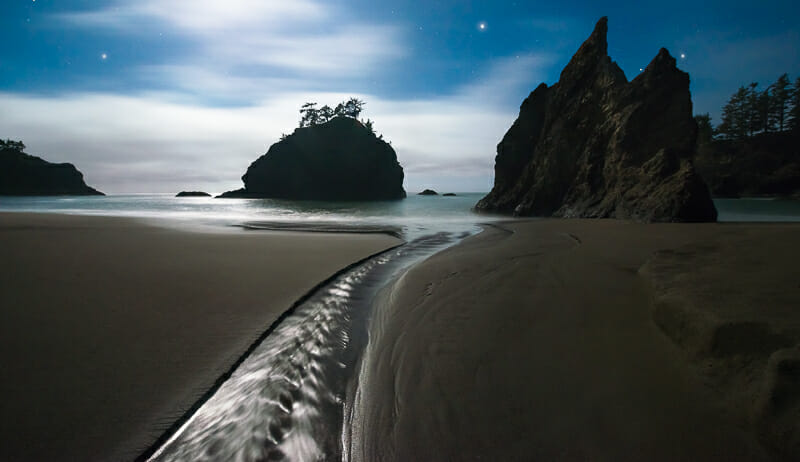
Leading lines are an important element of landscape photography composition used to create depth & flow, allowing the viewer’s eyes to easily move through the photo.
Subconsciously these lines should move the viewer’s eyes to different points of interest including the main subjects of the photo.
Perspective
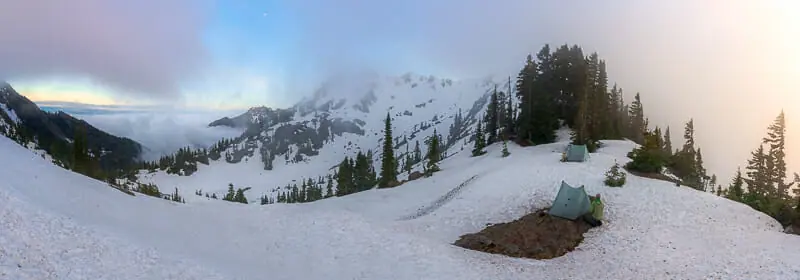
Perspective refers to the visual effect created by the relative position of objects within the image.
Like leading lines, perspective also creates depth within the image.
Emphasizing the relative size and distance of objects within the landscape creates a sense of scale that draws the viewer into the image.
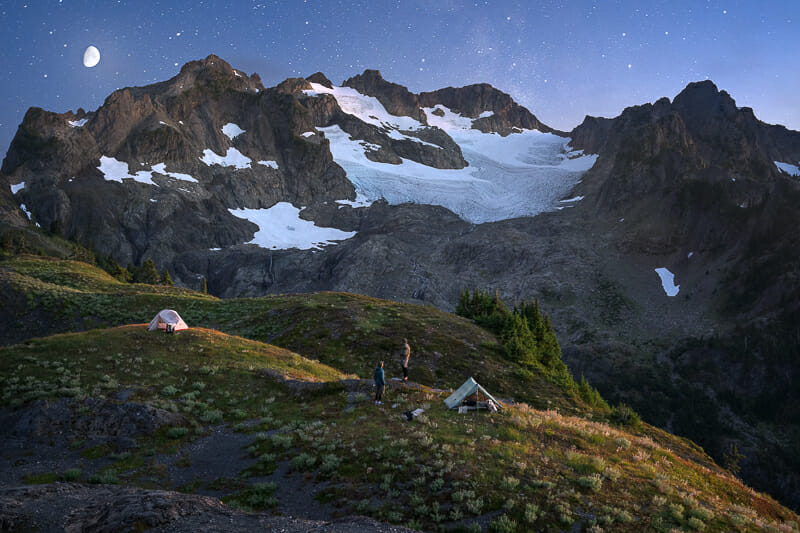
One common technique is to include a foreground element, such as a tent, rock, or tree, that provides a sense of scale and depth to the image.
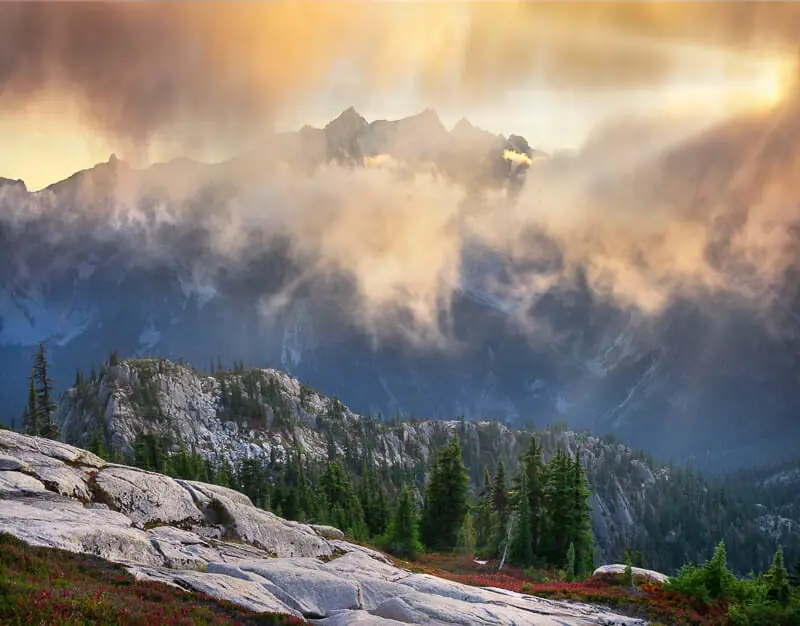
This foreground element can act as a lead-in, drawing the viewer’s eye into the image and towards the subject in the distance.
Additionally, using a wide-angle lens can exaggerate the perspective and create a sense of depth and dimension within the image.
Another technique is to use layers within the image to create depth and perspective.
This can be achieved by positioning elements at different distances from the camera and using leading lines to draw the viewer’s eye through the layers of the image.
Making the viewer feel as if they could walk into the image is a great way to produce interesting compositions.
Symmetry and Balance
Symmetry refers to creating a sense of balance and similarity between two or more elements within the image.
Balance is used to create stability between the main interesting objects within the image.
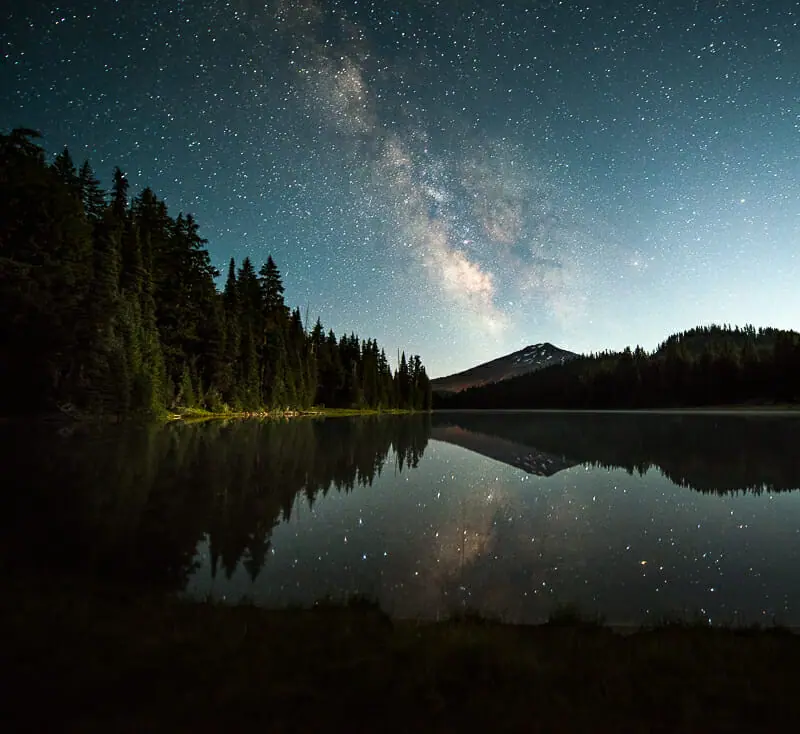
Reflections in still water are a great way to produce balance & symmetry.
In the image below, I used the symmetry between the milky way & it’s reflection, on the right half of the image, to balance the trees and dark space on the left side of the image.
Another great technique to create symmetry and balance is the offset technique.
Use a foreground element in the bottom right or bottom left of the photo, and offset a main element in the back right or left, opposite the foreground object.
Framing
Framing is simple.
Select the center of attention in the photo where you want the viewer’s eye to travel.
Use other elements within the landscape to create a frame around the main subject to subconsciously move the eyes there.
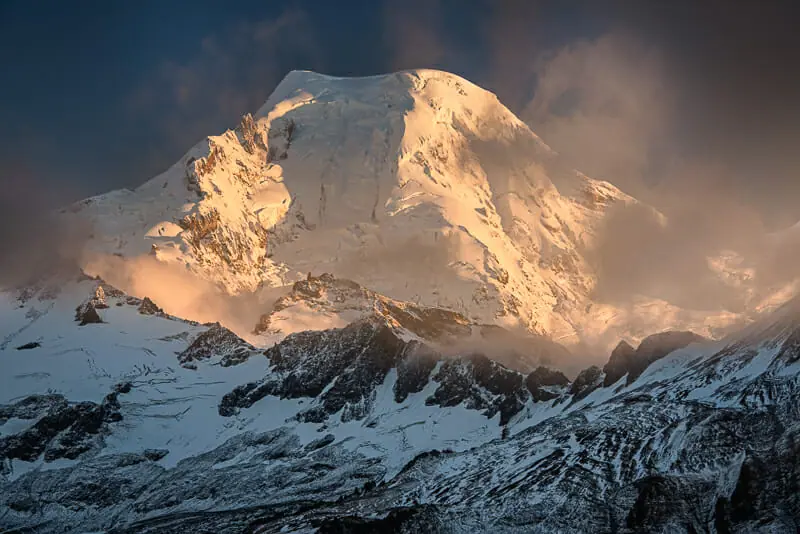
In the photo below, I used dark contrast around the outside, as well as clouds and the ridgeline to frame the peak.
Bright & saturated areas draw the eyes, whereas dark & desaturated areas push the eyes away.
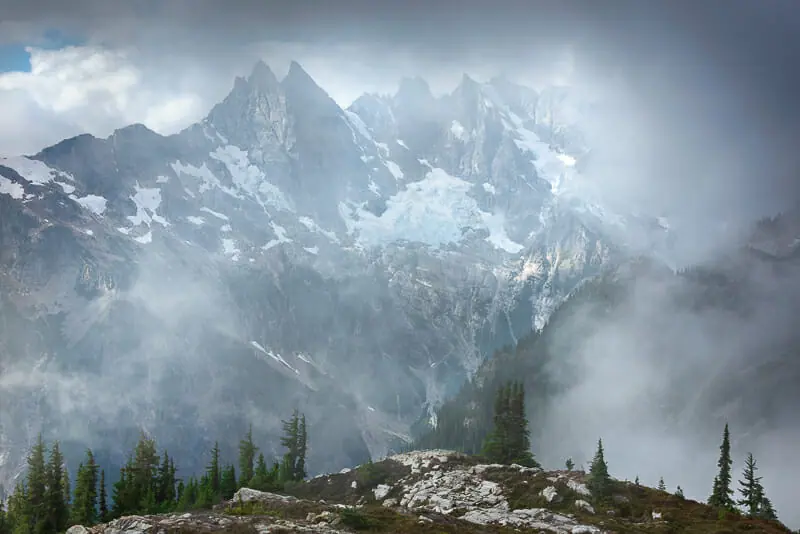
In the next photo, I used clouds and contrast to frame the peaks in the background.
The trees at the bottom of the image also frame the peak and show scale.
Framing can also be used to create a sense of depth and distance within a 2D space.
Contrast
Contrast refers to the difference between two elements within an image, whether it be in terms of color, tone, texture, or shape.
For example, capturing the contrast between the bright, warm tones of the sunrise or sunset against the cool, dark tones of the landscape can create a dramatic and visually striking image.
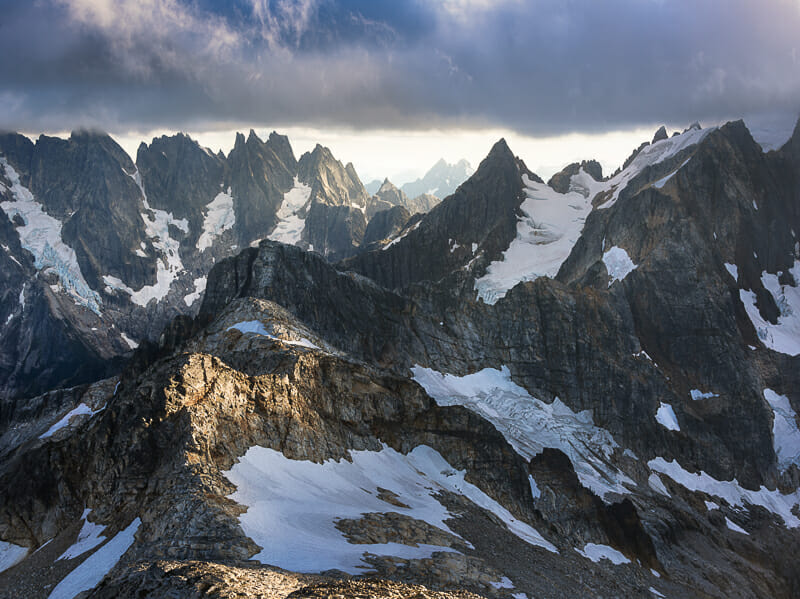
Contrast can also be used to emphasize the texture of the landscape.
In addition to visual contrast, contrast can also be created through the use of complementary colors & color harmony.
By placing complementary colors next to each other within the image, photographers can create a sense of vibrancy and energy that draws the viewer’s eye toward the subject.
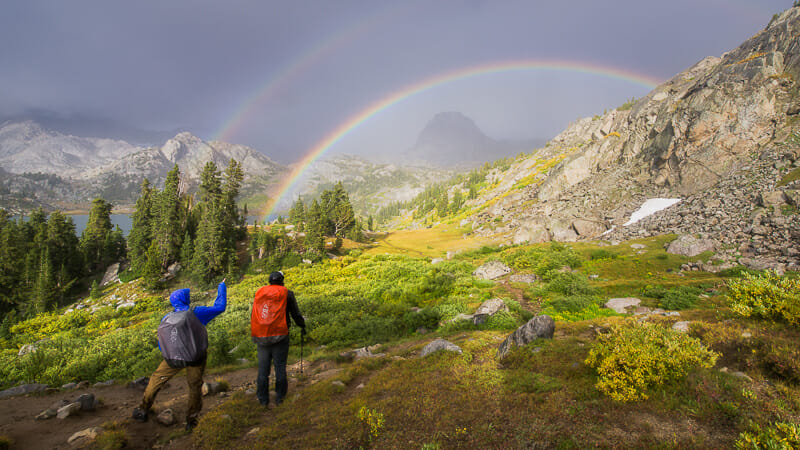
Contrast should be used intentionally.
Too much contrast can create a sense of chaos and overwhelm the viewer, while too little contrast can create a flat, uninteresting image.
Step 4: Become an Expert at Weather & Maps
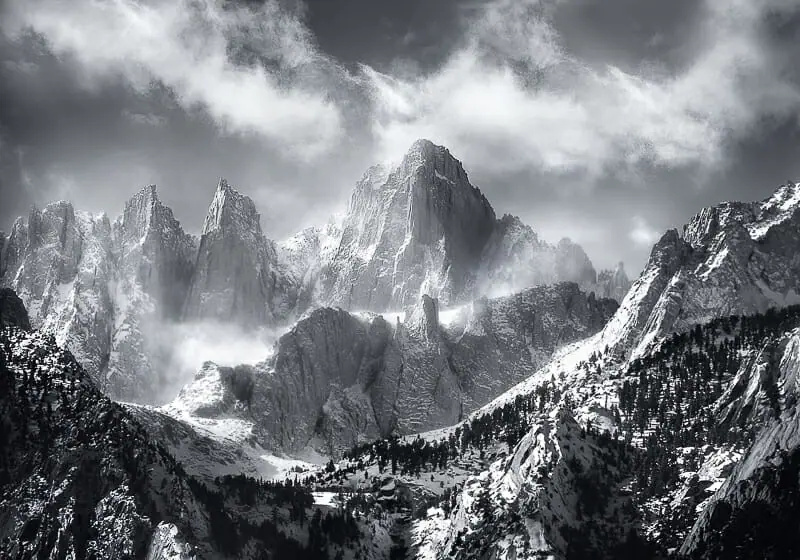
If you don’t know how to predict the weather & read maps, all of your time will be spent shooting under bad photo conditions in boring locations.
There is no point in going on a landscape photography trip if there isn’t a chance of great photo conditions.
The best landscape photos come from extreme weather & rugged locations.
The ideal time for photography is the transition from stormy weather to clear or partially cloudy skies.
During this time the light can poke through on the horizon and create fantastic colors in the sky.
The diffuse light can also result in even lighting across the landscape, making it easier to capture details in both the highlights and shadows.
Video – How I Plan Photography Trips
All the programs used in this video are provided in the following section of this guide.
Windy Weather App (Link)
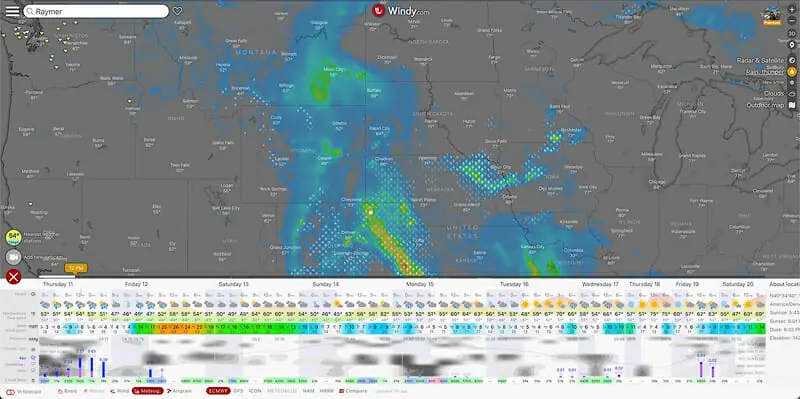
I recommend becoming an expert at using the website and app, Windy.
It’s the best weather program I have ever seen.
You can use it on a computer or phone.
It takes some time to learn, but the improvement in photos is well worth it!
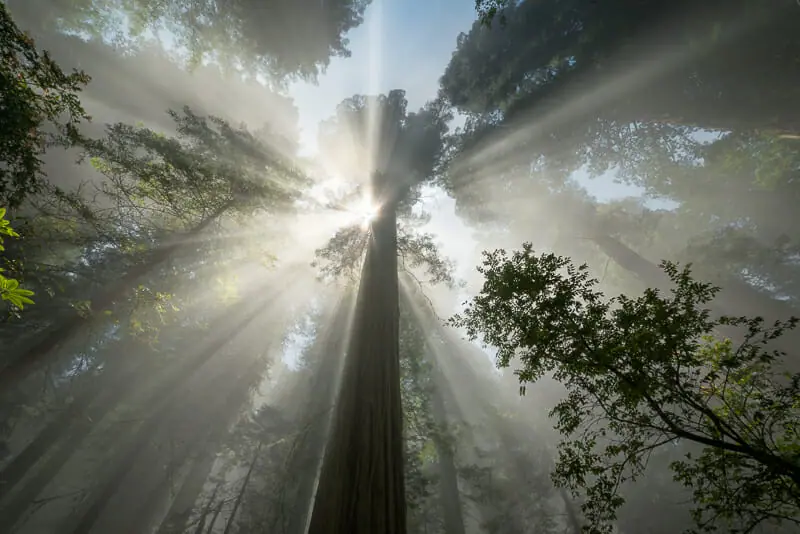
Windy has a fog prediction layer that’s fantastic. I used it to plan for this shot.
GAIA GPS (Discount Link)
You can try the Free version of GAIA first, but it’s nowhere near as good as the paid version.
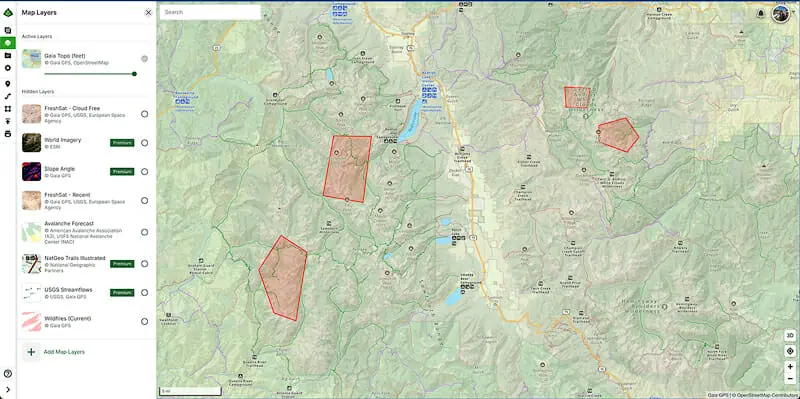
Now, you need to find a great location during the best photo-weather.
This is not an easy skill to master.
I use GAIA GPS to plan all of my photography trips.
It includes all of the hiking trails in the USA plus many other countries.
You can also save layers of locations you want to explore and waypoints of useful info about the terrain.
Download the maps to your phone for offline use when on photo trips.
Google Earth / Desktop Version (Link)
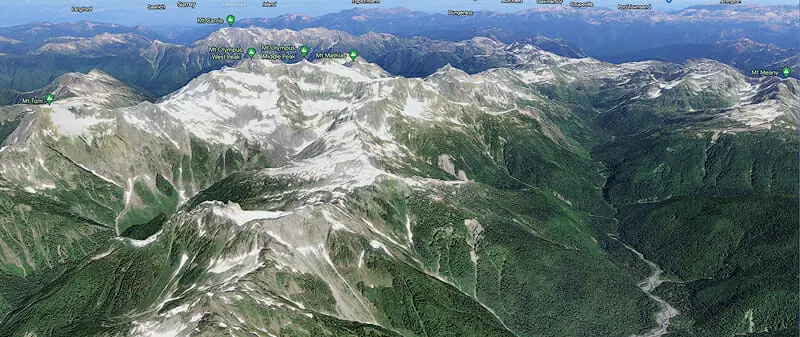
After scouting a location on Gaia GPS, Google Earth can be used to get a better look at the actual terrain.
It’s also a great tool for brainstorming new locations.
Make sure to use the Free Pro Version that you download to your computer.
Step 5: Don’t Take 99% of Potential Shots
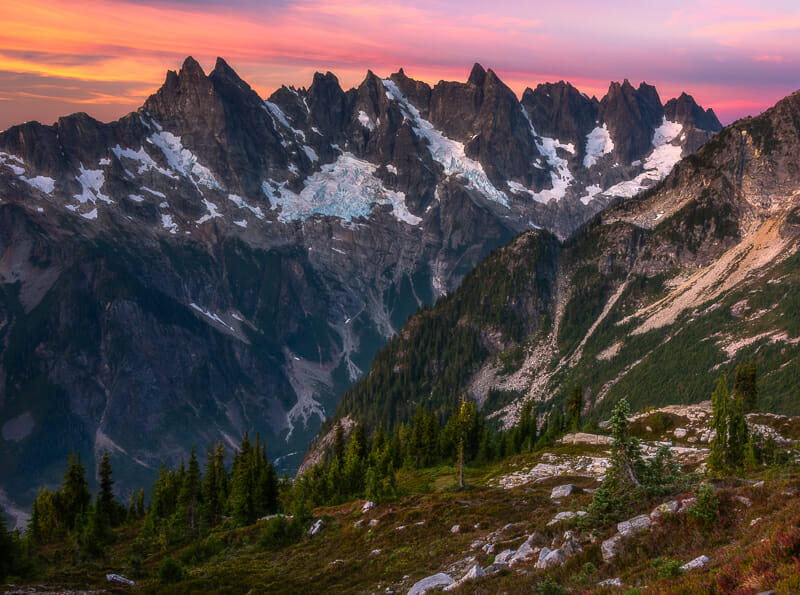
After mastering the steps above, stop shooting 99% of shots!
There is no point in taking a photo if it won’t end up in your portfolio.
I’ll go on a 10-day backpacking trip and come home with 3-5 RAW files on my camera.
You should only shoot when the color and light are world-class:
- You’ll know when this is happening because the level of excitement will go through the roof.
- If you’re not excited by the color and light, then don’t shoot!
- When the light is good you’ll be nervous and anxious about missing the shot.
Understanding the quality, direction, and color of light is key to taking great landscape photographs.
Understanding Light in Landscape Photography
“Good light” in landscape photography refers to the ideal lighting conditions that bring out the colors & textures, creating a sense of atmosphere within the image.
There are several types of lighting conditions that are considered to be ideal for landscape photography, including:
Golden Hour
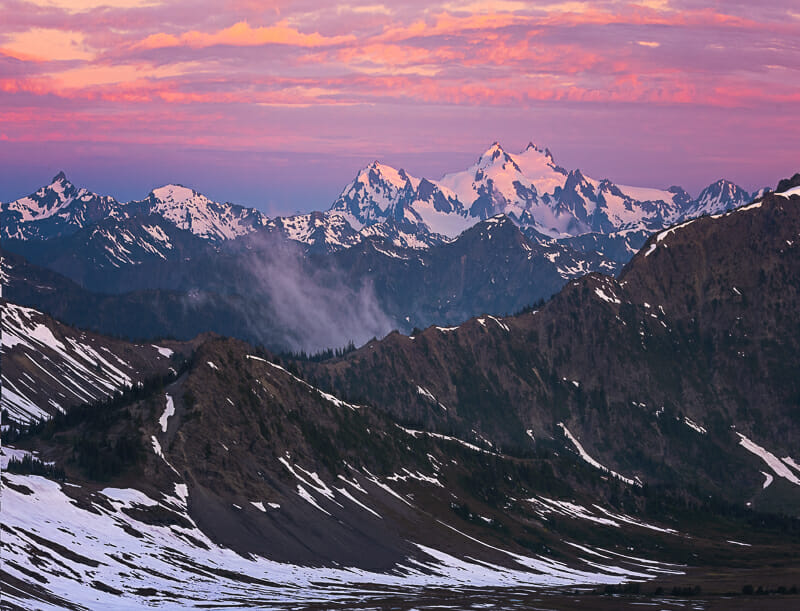
This is the time shortly after sunrise and just before sunset when the light is soft, warm, and golden in color.
Storms combined with golden hour are the best time to take landscape photos.
When the sun is low in the sky & close to the horizon, the light is diffused and creates long shadows, which can add depth and dimension to the landscape.
Inversion Layers / Fog / Haze
An inversion layer is when the temperature increases with elevation, instead of the norm, where it decreases.
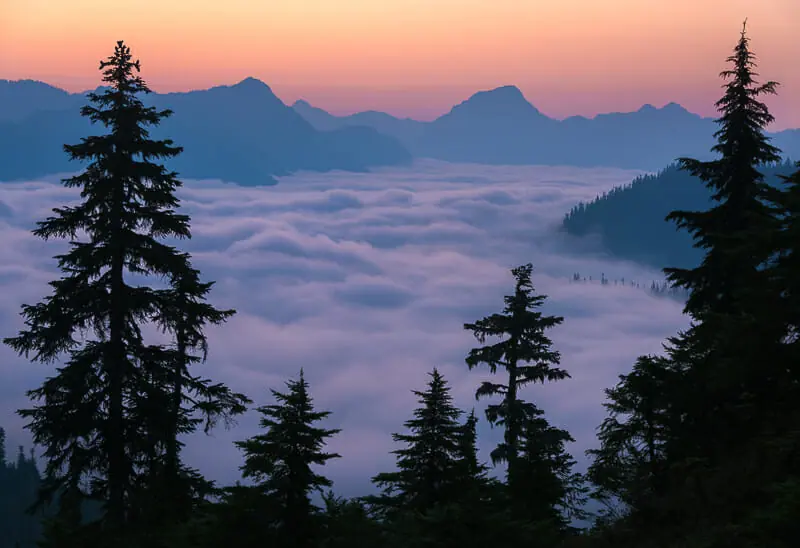
Clouds condense in the lower elevation cooler air.
This is one of the best conditions for photography.
Learning Windy gives you the ability to predict when & where inversions & fog will take place.
Fog creates a dreamy and ethereal feel to the landscape, adding a sense of mystery and depth.
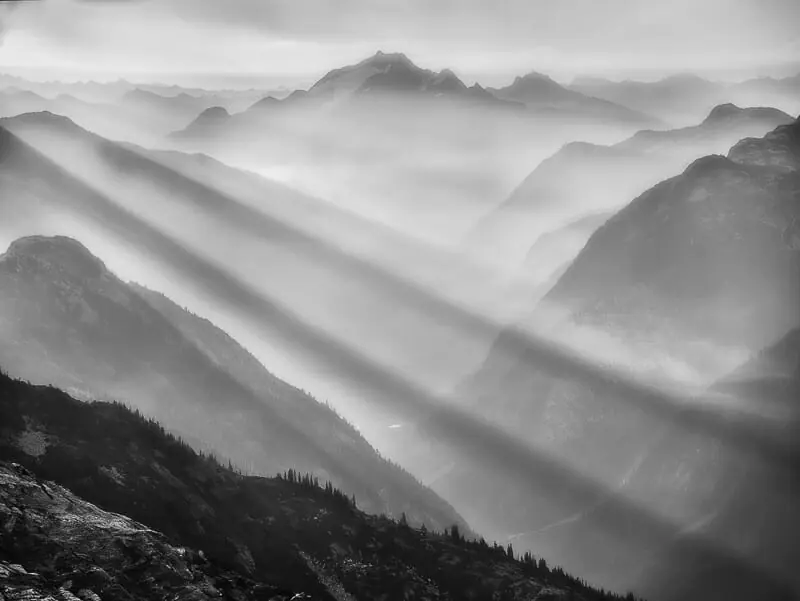
Fog can also create soft & even lighting making it easier to capture details in both the highlights and shadows.
Storms
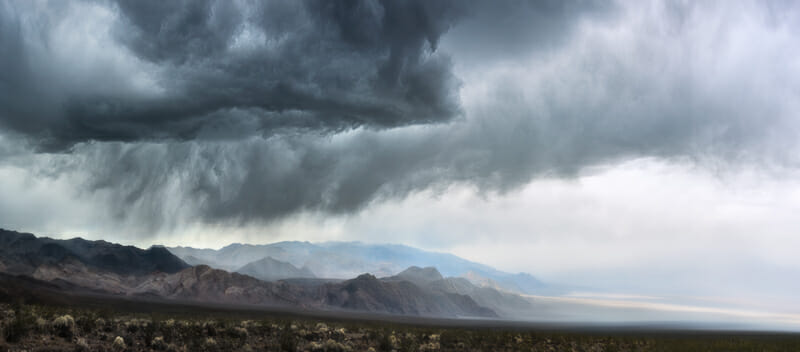
Storms are some of the best conditions for landscape photography.
Look for conditions when storms roll in and out quickly, leaving a horizon open for light to poke through.
Completely socked in storm conditions, with no light, should be avoided.
Blue Hour & Twilight
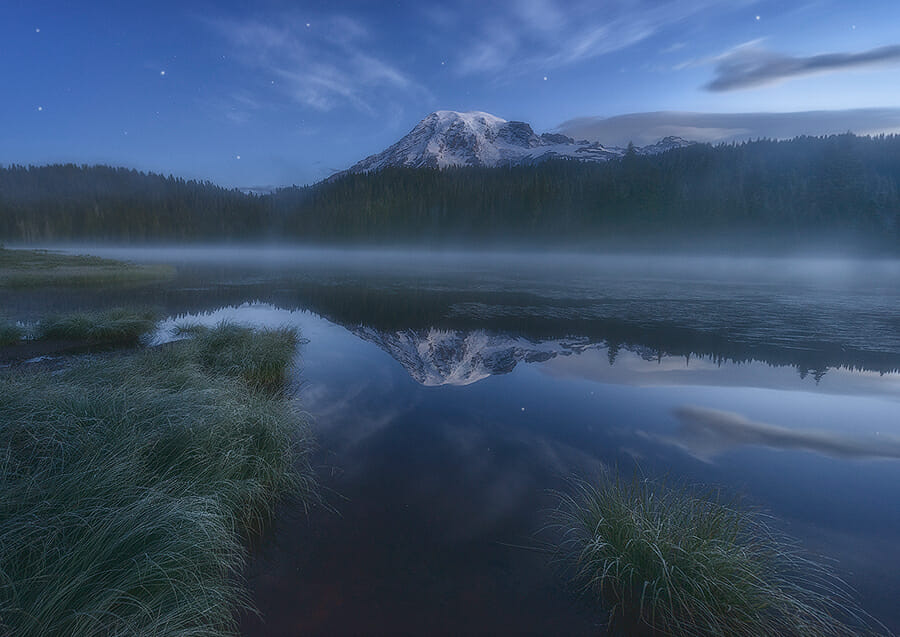
This is the time shortly before sunrise and just after sunset when the light is diffused and takes on a blue hue.
During this time, the light is soft and even, creating a sense of calm and tranquility within the landscape.
When the sun is below the horizon it reflects off clouds in the upper atmosphere, creating a “lightbox” effect on the landscape.
Some of the best color & light is found during blue hour.
Take your circular polarizer off anytime the sun is below the horizon.
Overcast
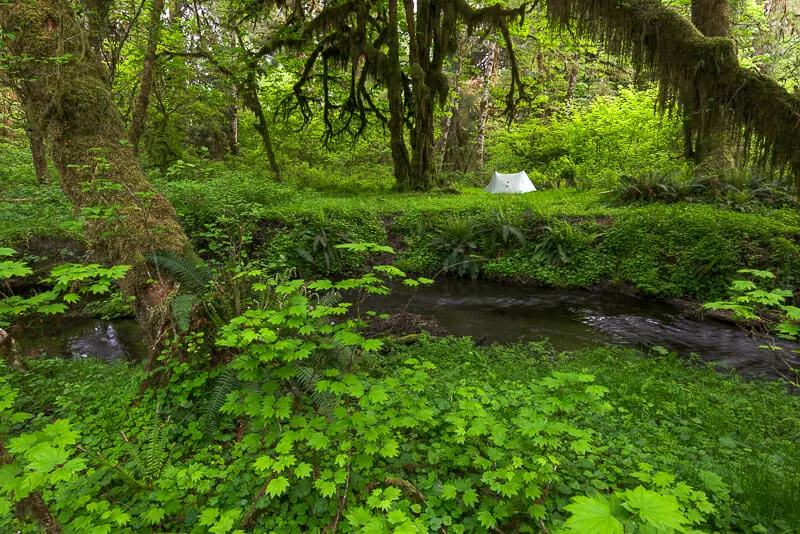
Overcast lighting can create a soft and diffused light that can bring out the colors and textures of the landscape.
The even lighting can also create a sense of calm and tranquility within the image and is especially useful for capturing waterfalls or other scenes with flowing water.
It’s ideal for shooting in the forest!
Daytime
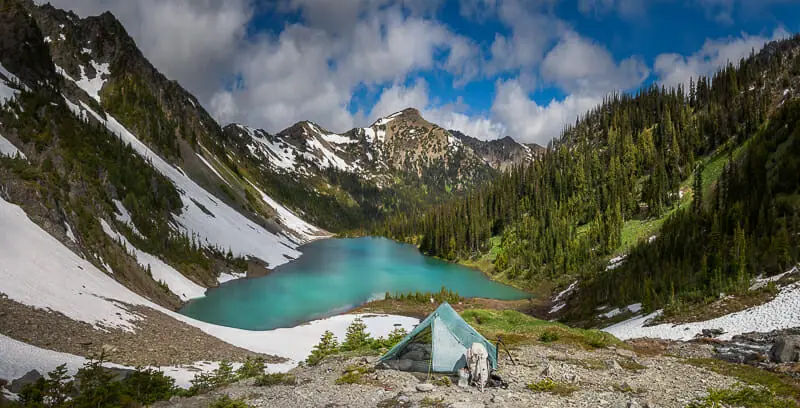
Shooting during the day, under clear skies, is not worth your time.
Spend this time hiking & looking for compositions to shoot when the light is good.
- Only shoot during the day if there are interesting clouds in the sky & nice light on the landscape.
- Wait until the sun is behind a cloud that produces diffuse light on the landscape.
Clouds create dappled & uneven soft lighting producing a large pallet of color and contrast.
This can produce ideal photo conditions.
Clear Skies
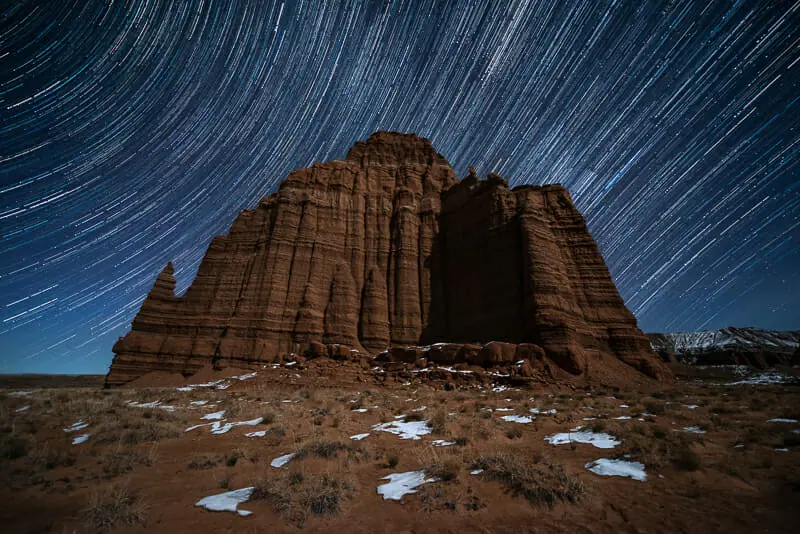
Milky Way, Northern Lights & Star Trails photography are ideal under these conditions.
If you’re aiming to shoot sunrise or sunset, clear skies are the absolute worst, don’t even bother!
Understanding Color in Landscape Photography
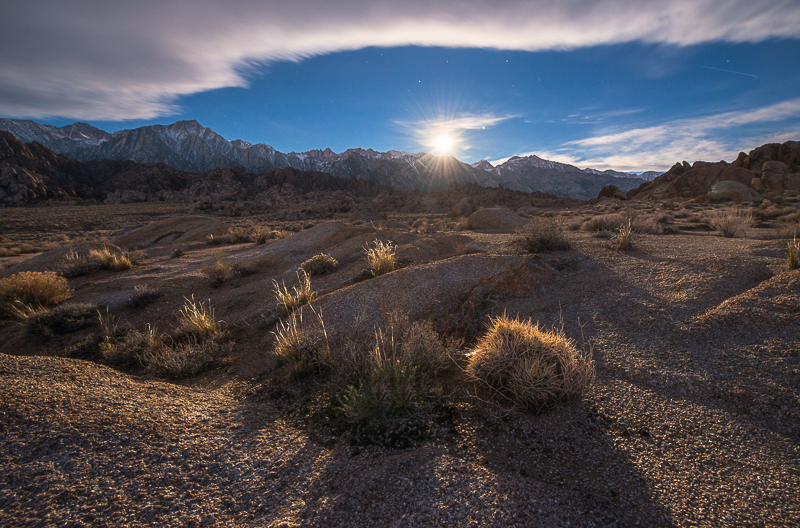
Color theory in landscape photography refers to the first principles of color and how they can be used to create visually appealing and impactful images.
It can influence the mood, atmosphere, and overall impact of the image.
Read my complete guide on color theory, right here.
Video – Color Theory Photo Guide
Step 6: Stop Running Away from Photoshop
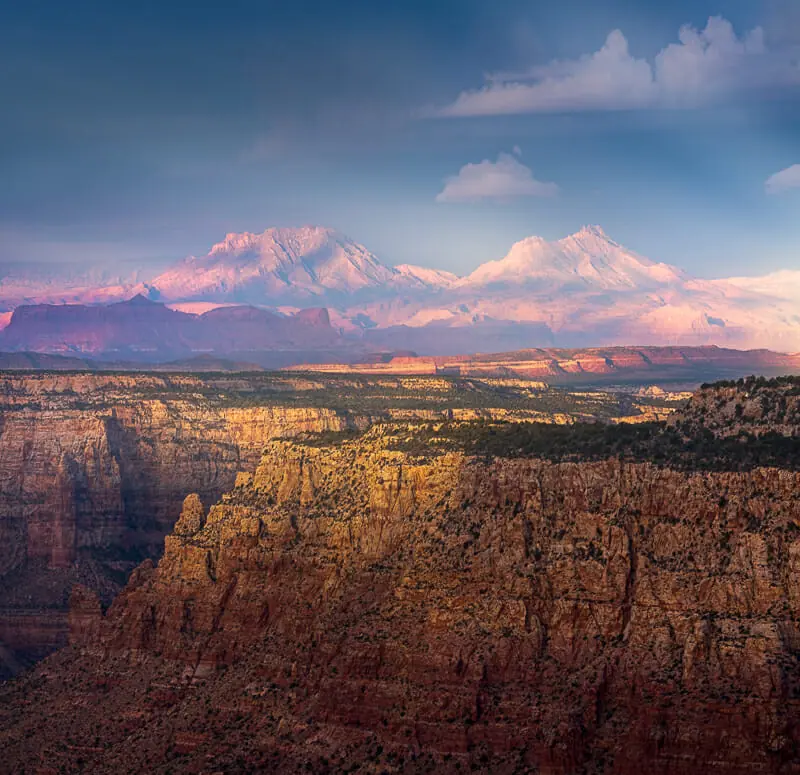
A huge factor holding photographers back is their unwillingness to master photo editing.
I had an aversion to learning it but forced myself into it anyway…
After learning the basics, it becomes very enjoyable!
You only need 2 programs to edit photos:
- Adobe Camera RAW (part of Photoshop)
- Adobe Photoshop.
You can not skip using these programs.
You don’t need any extra plugins.
Always shoot in RAW image format to produce the highest quality results.
Why You Need to Edit Your Photos
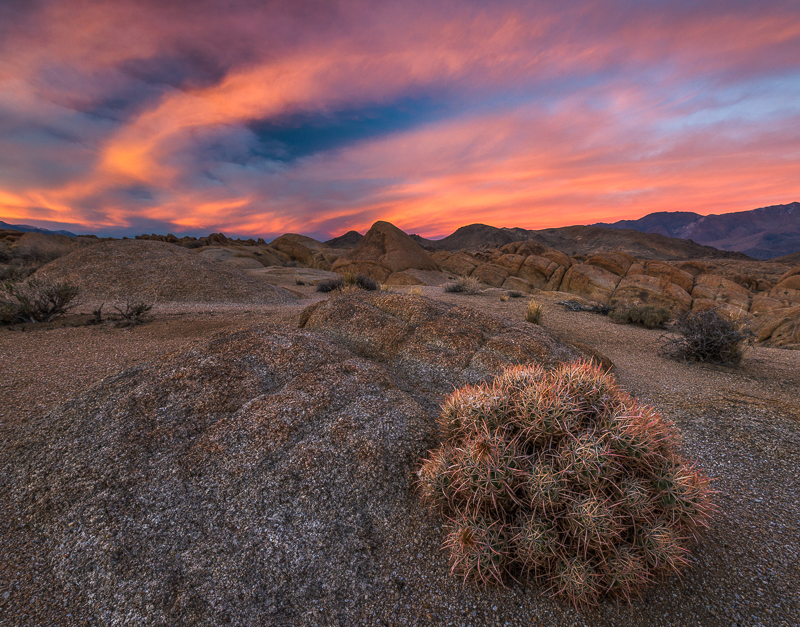
Here are the most important reasons to edit your photos:
Create a Unique Style
Each photographer must create a style that is all their own.
Otherwise, your photos will never stand out & no one will want to look at them.
It’s impossible to do this through camera technique & composition alone.
Photo editing is just as important as composition and camera technique.
The goal is to create images that people know are yours, without seeing your name tied to them.
Enhance Colors and Control Contrast
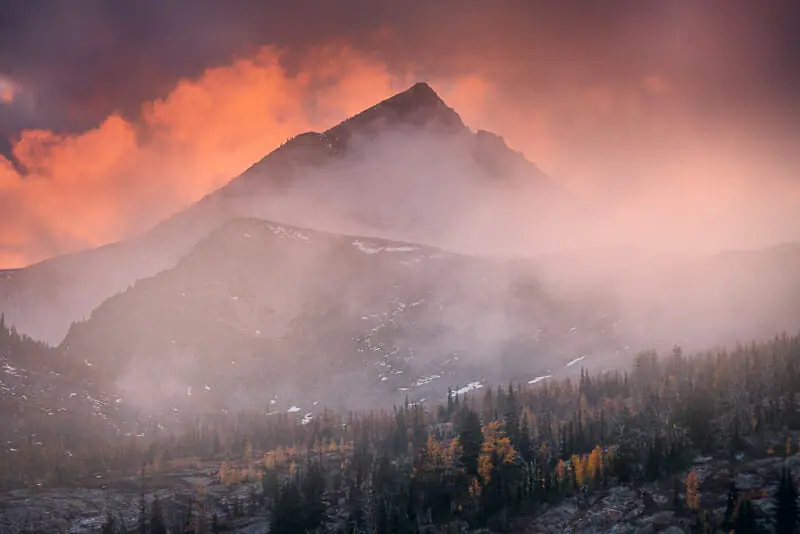
Landscape photography involves capturing scenes with varying lighting conditions, which can affect the colors and contrast in the image.
Even under the best light, not all parts of the scene are lit perfectly.
To correct for this you must control the shadows & highlights using a RAW photo editor.
Photo editing also allows you to adjust the saturation, hue, and brightness of specific colors.
This is essential to producing color harmony within each image.
If you don’t edit the image, you’ll never have color harmony!
Sharpening

Each photo must be sharpened specific to the output, this can only be done via photo editing software.
A print needs to be sharpened differently than a photo displayed on the web.
Correcting Exposure from ETTR
Using ETTR for the perfect exposure, it’s important to darken the RAW file in photo editing.
I created a RAW import preset that automatically darkens the photo by 1 stop and brings up the whites, to compensate for ETTR.
RAW files produced with ETTR provide the best image quality.
This is pure physics there is no argument.
To produce the best image quality, you must edit the photo.
Remove Distractions
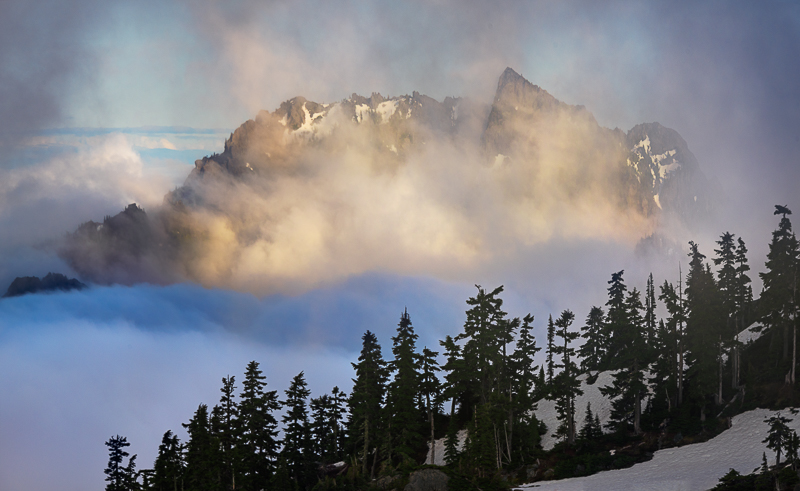
Sometimes, elements in the image, such as dust or debris on the lens, can detract from the final image.
It’s also important to remove natural objects in the image that distract from the overall composition.
These small objects can easily be removed in Photoshop.
Improve Composition
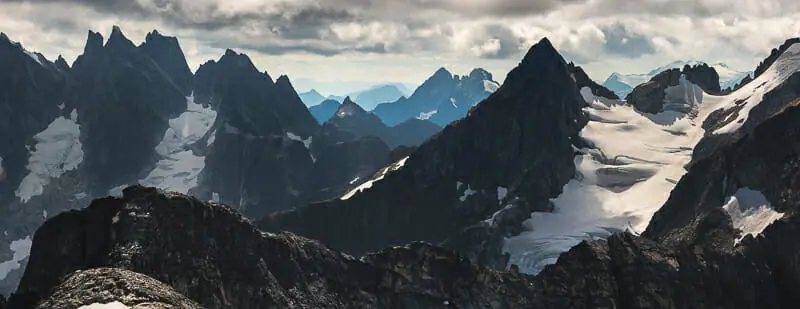
Photo editing is also important for removing the distortion caused by wide-angle lenses.
This can be easily done in Photoshop.
Cropping is also an essential skill for creating world-class images.
Step 7: Learn to Go Hiking & Backpacking
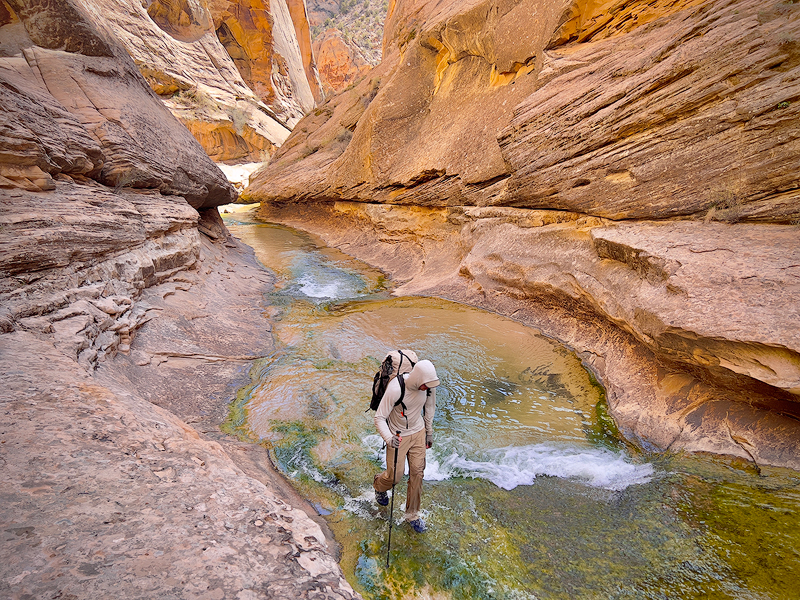
Landscape photography is very hard, but hiking is the cheat code!
Hiking & backpacking make it easier to get better shots because you can get into unique locations that no one else shoots.
This allows you to set yourself apart from the crowd & produce interesting images.
Here are the main reasons hiking improves landscape photography:
Access & Time Spent In Wild
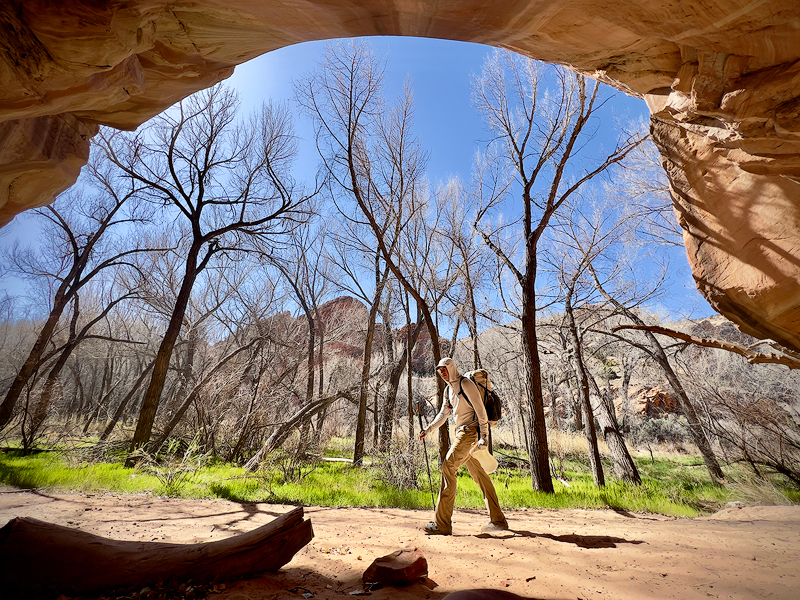
All of the most beautiful and remote landscapes are only accessible by foot, requiring a hike to reach.
In 10,000 miles of hiking, I’ve never seen anything close to a road that gets even close to what can be found in the wilderness.
The more time you spend in great locations, the higher your chances of great shots.
Hiking gives you 8-10 hours a day to search for compositions.
Spending half of your photography trip in a car, RV or motel room reduces the potential for great shots by half.
It’s purely a numbers game!
Perspective
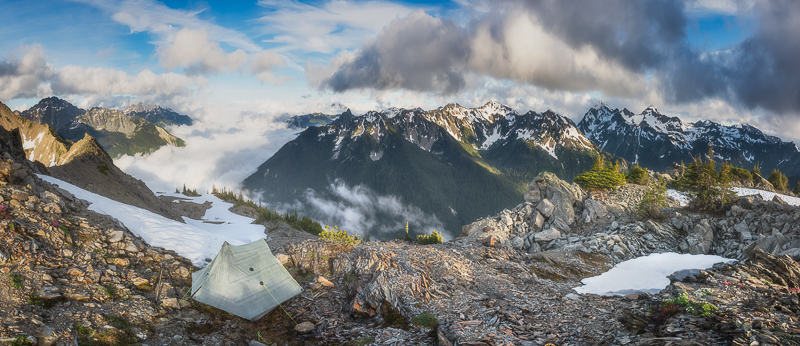
Hiking can provide a unique perspective of the landscape that cannot be achieved from other vantage points.
Getting into high elevations is the easiest way to improve your shots, without having to improve your camera technique or photo editing skills.
Adventure and Exploration
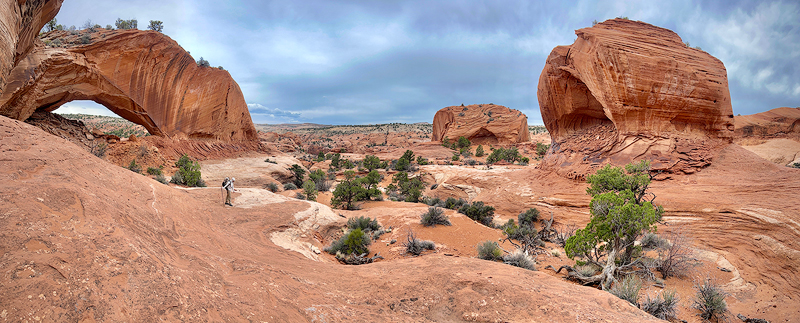
I never loved landscape photography until I started backpacking.
The sense of adventure from being out on a 10-day hiking trip, living out of a backpack, is a life-changing & addictive experience.
The motivation that comes from completing a challenging trip ensures you’ll go back out and shoot again and again.
If you want to 10X your photography, get out on a real adventure!
Hiking & Backpacking Gear, First Aid & Food
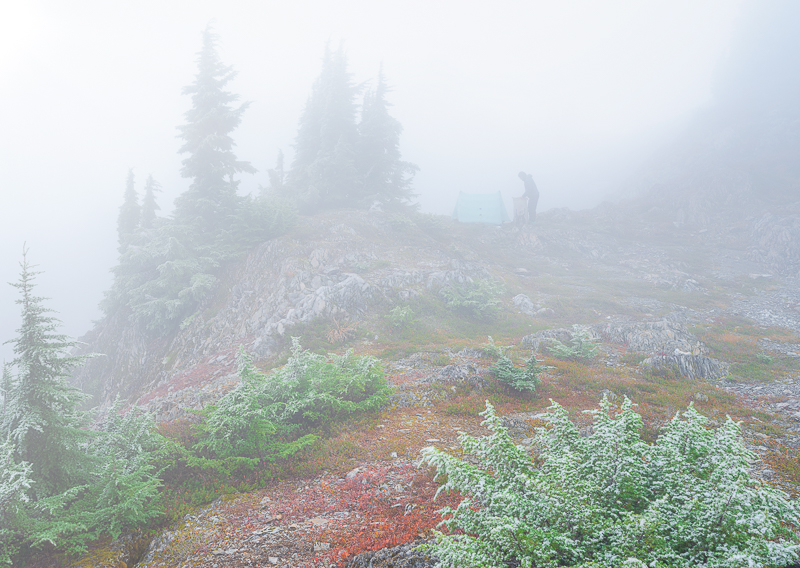
Included below is everything you need to get started with hiking & backpacking.
- Start small with a day hike that’s easy.
- Slowly increase your day hike distance.
- After you’re comfortable hiking, try a 1-night backpacking trip.
- Add more nights as your skills grow.
Watch the videos below & download my backpacking gear checklist, here.
Video – My Favorite Hiking Gear
Video – Hiking First Aid
Video – Hiking Food
How to 10X Your Learning Speed
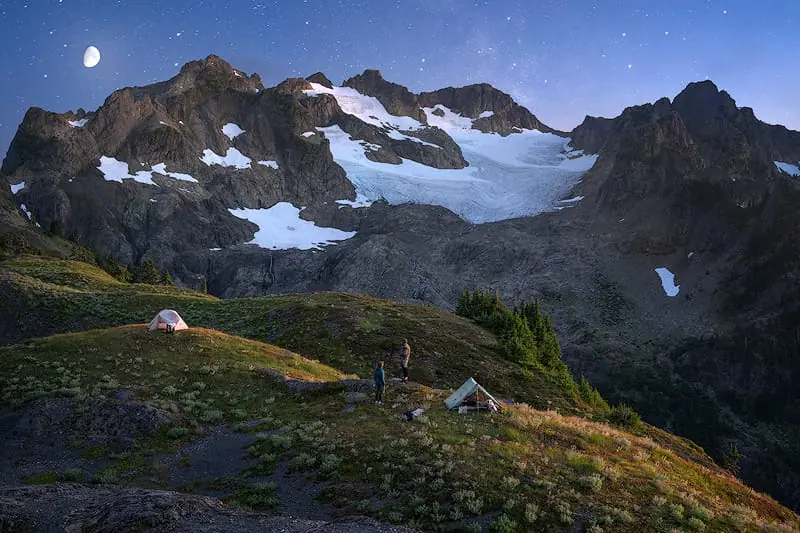
The best way to improve quickly is by learning firsthand from someone that’s optimized their skills, over a decade or more through trial and error.
You can’t read blogs and watch internet videos to do this.
I offer workshops & tours for all skill, fitness, and age levels.
Over a 3-day weekend, I can teach you everything I know, plus provide 1 on 1 feedback that will quickly improve your skills.
I’ve seen students learn more in a 3-day trip than they have in 20 years of trying to learn on their own.
Check out my workshops & tours, right here.