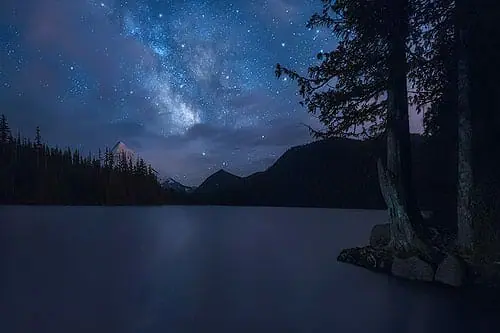
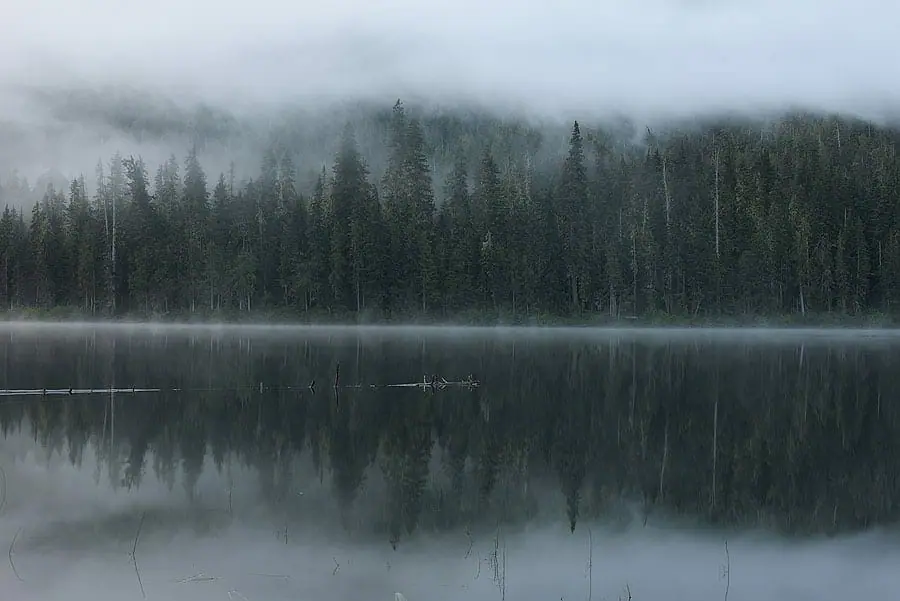
ISO photography settings are required for extreme shooting conditions, where aperture diameter (controlled by f-stop) & shutter speed alone, can’t collect enough light to produce the optimal exposure.
ISO Photography Settings Control Two Important Factors:
- Amount of Scene Lighting required to produce the optimal exposure.
- Image Noise & Image Quality.
Below, you’ll learn how ISO works & the best ISO photography settings to produce the correct exposure for any shooting situation.
Table of Contents
ISO Photography Video
This video shows my complete camera technique, including ISO adjustment. Each of these techniques is covered in the written guide below.
Prior to reading the in-depth guide below, watch my ISO Photography Test Video and learn how different ISO settings affect image quality & dynamic range.
ISO Photography Basics
ISO does not change the light sensitivity of the camera sensor, contrary to what many believe.
The camera sensor always maintains the same sensitivity.
Here’s An Overview of How ISO Actually Works:
The camera sensor, also known as an image sensor, is an electronic device that collects light information from the scene being photographed.
The camera sensor depends on shutter speed, f-stop & ISO to determine the overall exposure (brightness) of the image.
- F-stop and shutter speed determine how much light information is collected from the scene being photographed, via aperture diameter & length of exposure time.
- The term signal is used to denote the communication of light information into the digital world.
- ISO determines the amplification this light information (signal) receives as it’s conveyed from the real world into the digital world.
- When light information is amplified so is image noise. Increased ISO = increased image noise.
ISO is a function of signal amplification, not sensor sensitivity!
Let’s discuss…
ISO, Noise, & Image Quality
All cameras have a standard or base ISO which is the value selected for normal operation.
For most cameras, this is ISO 100 or 250. Professional model cameras often provide ISO values all the way down to 25.
The lower the ISO value the less noise the image will exhibit.
- Base ISO is used for approximately 90% of images.
- Base ISO provides the optimal image quality with minimum noise and grain (ref example images below).
Below, you’ll learn why Base ISO isn’t always the preferred setting & when to increase or decrease ISO settings.
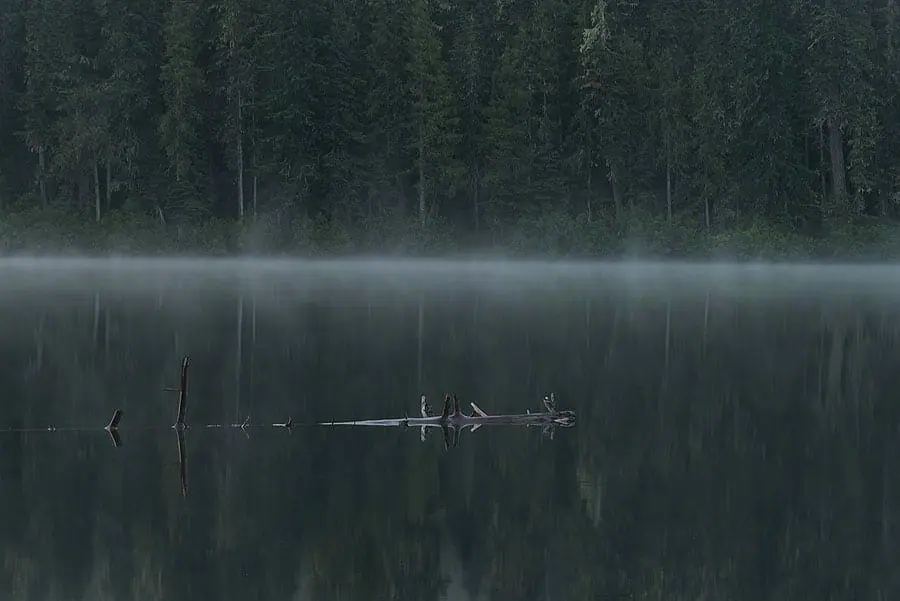
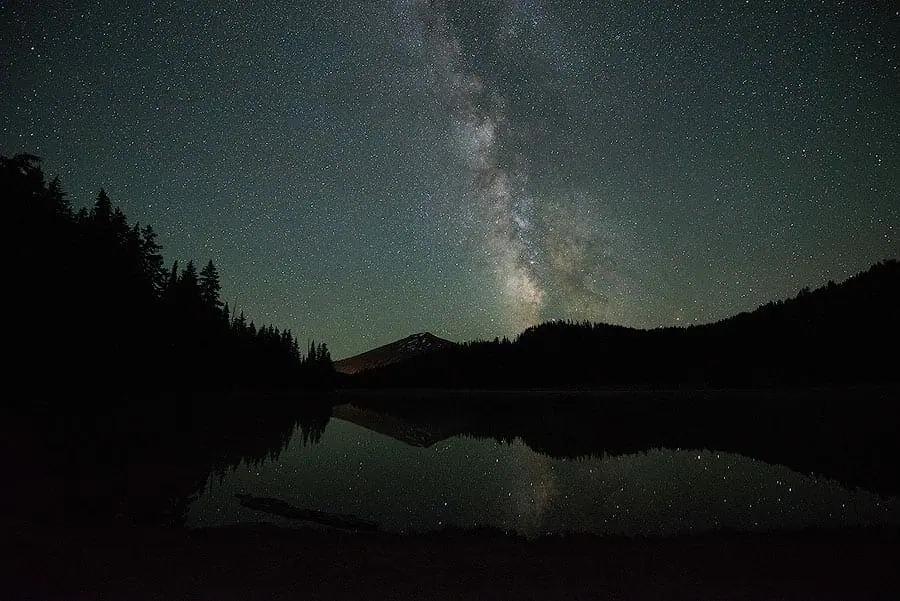
The following unedited RAW files show the results of Base ISO settings and High ISO Settings.
The first image set was taken at base ISO.
Here is a zoomed-in view.
There is no noise.
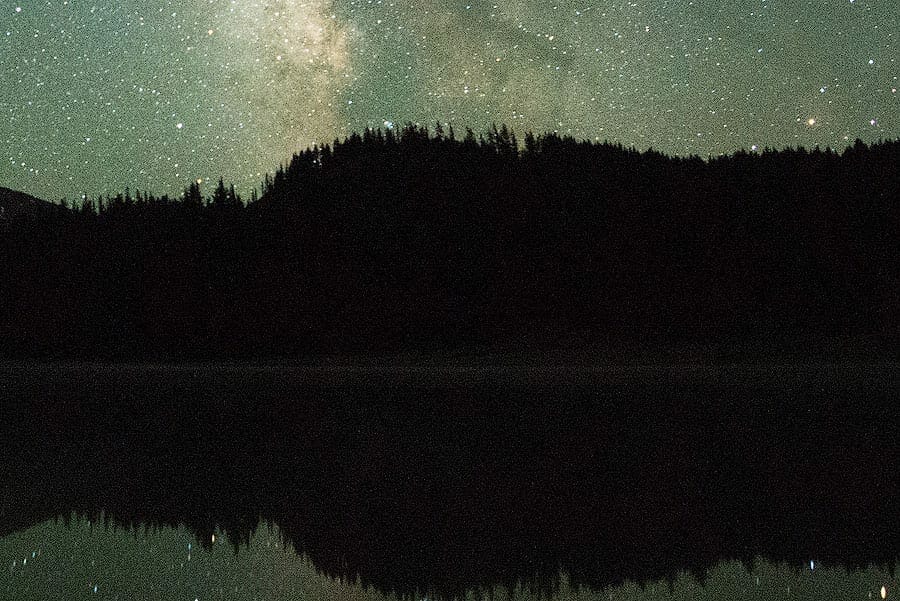
The next image was taken at high ISO.
There is much more noise.
You can really see this when zooming in.
How Does ISO Affect Exposure?
When there isn’t enough light information in the scene being photographed, such as the night sky example above, ISO is increased to amplify the light information in-camera, in turn, producing the same outcome as a scene with more lighting.
Scene lighting is also known as scene luminance.
- All images have a very small amount of inherent noise, even at base ISO.
- Although not the same, this could be compared to the small amount of noise heard on the radio at very low volumes.
When the light information is amplified by increasing ISO to higher values, the baseline inherent noise is also amplified.
This is why higher ISO images have more noise.
The following graphic is not meant to show exact values, only concepts, as discussed in the following section.
Visualize the process in this section. Learn the technical details in the next section.
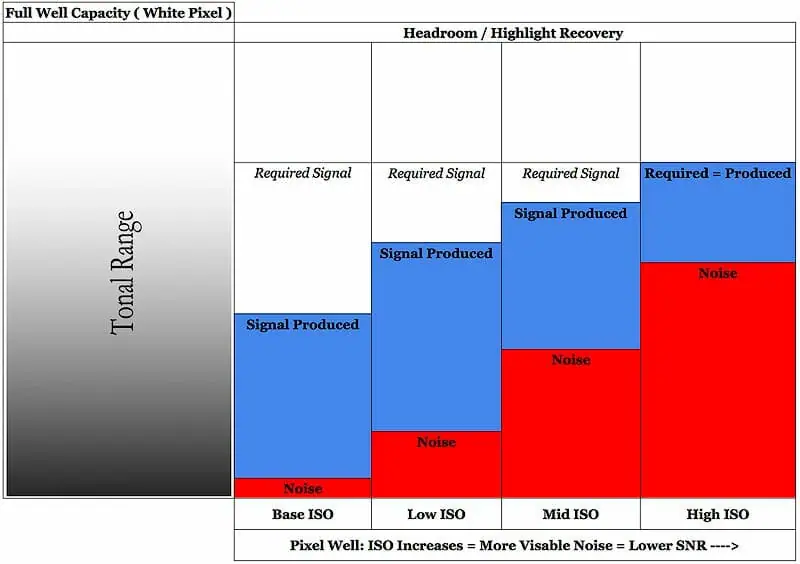
In the night sky scene above, there is a very minimum amount of light information, producing a very small signal. Without increasing ISO beyond base, this creates an image that is too dark. (Base ISO column in graphic above)
To increase the image brightness, without collecting more light from the scene, this small signal is amplified by increasing ISO. (High ISO column in graphic above)
During the amplification of the light information (signal), the noise is also amplified.
By increasing or decreasing ISO settings the photographer can effectively change how much overall scene luminance or signal is required to produce the optimal exposure. This comes at the cost of noise.
Exposure Stops & ISO Settings
An exposure stop, stop for short, provides a universal scale to measure the increase and decrease in light, exposed to the image sensor, due to changes in shutter speed & f-stop.
For ISO, exposure stops provide the increase or decrease in signal (light information) amplification, thus how much light is required to produce the optimal exposure.
Overall, stops provide an easy way for the photographer to increase or decrease image brightness or adjust specific f-stop, ISO, and shutter speed settings while balancing the exposure triangle.
To make things clear the following examples discuss stops for ISO settings, while assuming shutter speed & f-st0p settings remain constant.
Upon understanding the concept, read the Photography Exposure Triangle Guide and learn to adjust all settings simultaneously, using stops.
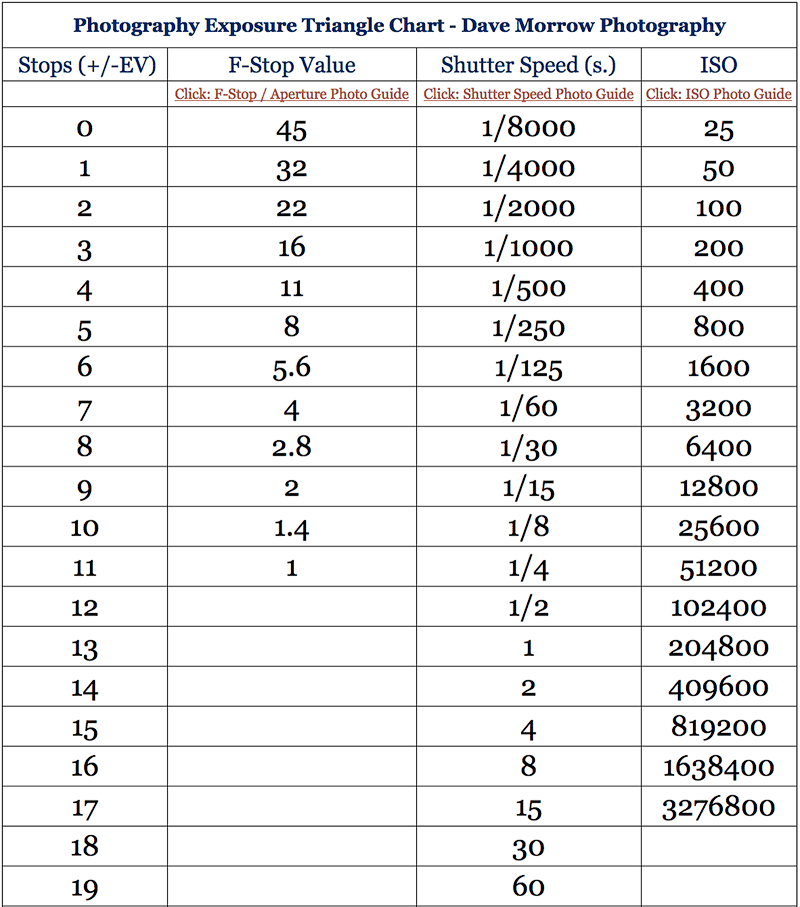
Click Here & Download the chart as a PDF to reference while reading.
The Stops Column shows the difference in stops between varying ISO values.
The ISO Column shows different standard ISO values in 1 stop intervals.
Specific stops don’t directly correlate to specific ISO values.
Stops allow you to easily compare the signal amplification of one ISO setting compared to another, in turn, the image brightness & overall exposure.
Increasing the ISO, thus producing more noise & higher signal amplification, produces a brighter image without collecting more light information from the scene. This is known as stopping up.
Decreasing the ISO, thus producing less noise & lower signal amplification produces a darker image without a change in light information being collected from the scene. This is known as stopping down.
For ISO, Exposure Stops Work as Follows:
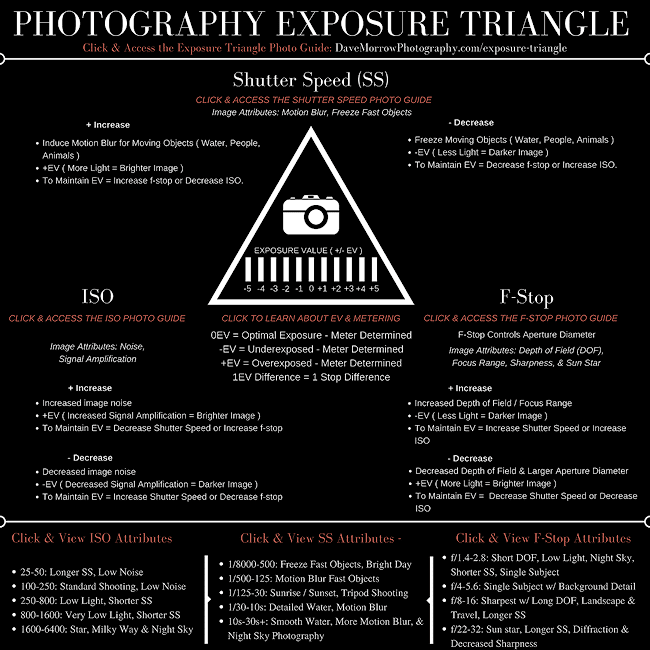
- A 1 stop increase in ISO doubles the signal amplification producing a brighter image with more noise.
- A 1 stop decrease in ISO cuts the signal amplification in half producing a darker image with less noise.
In the following example images, f-stop and shutter speed remain constant while ISO increases in 1 stop intervals from 200 through 800.
Notice that the ISO setting simply doubles while stopping up and halves while stopping down.
Each image collects the same amount of light information with constant f-stop and shutter speed settings. The image brightness is only increased due to the amplification this light information receives in camera.
The noise also increases as the ISO increases. The noise is very hard to see unless zooming in full size at 100%. The Nikon D810 used to take these images does not produce much noise, even at ISO800.
Settings: ISO 200, f/8, 1/1000 second
Settings: ISO 400, f/8, 1/1000 second
Settings: ISO 800, f/8, 1/1000 second
To maintain constant image brightness, while increasing or decreasing ISO, changes in shutter speed or f-stop must be made by the same number of stops in the opposite direction.
For example, a stop up in ISO would require a stop down in shutter speed, f-stop, or a combination of both, to maintain the same image brightness.
This is taught in the Exposure Triangle Photography Guide.
When to Change Your ISO Settings – Shooting Examples
Base ISO or ISO100 works very well for 90% of images.
At times, in extreme shooting conditions, ISO must be increased or decreased to aid f-stop and shutter speed in producing the optimal exposure.
Increasing ISO decreases image quality, thus ISO should only be increased when 100% necessary.
There are three specific situations where ISO should be increased beyond base.
Each are covered in-depth, below:
- Shooting Requirement: Shorten Shutter Speed
- Action: Increase ISO to Shorten Shutter Speed.
- Shooting Requirement: Brighter Exposure
- Action: Increase ISO to Increase Image Brightness.
- Shooting Requirement: Increased Depth of Field
- Action: Increase ISO to Increase F-Stop.
Requirement 1: Shorten Shutter Speed
Shooting Situation: Required to obtain shorter shutter speed while maintaining constant image brightness.
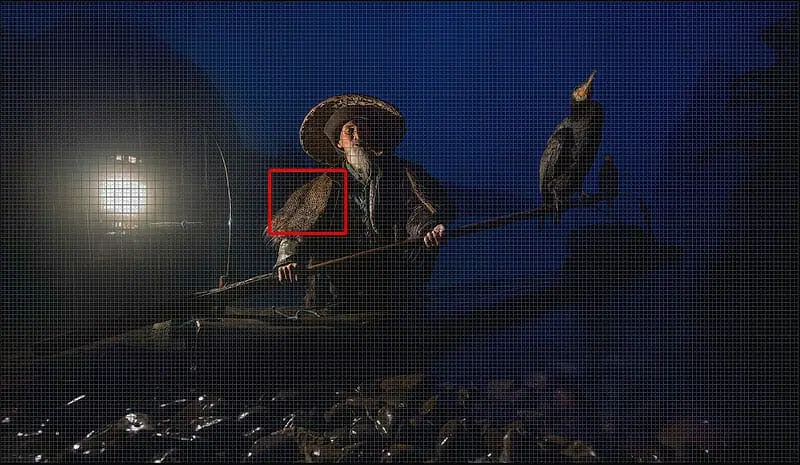
I’m out shooting in the early morning, on the Li River in China, as shown below.
Here is my thought process:
- Choose the widest f-stop value possible for my lens, f/2.8. This allows the maximum amount of light to enter my lens while maintaining focus on the fisherman and boat.
- Choose a shutter speed of 4 seconds to start out.
- To ensure near maximum image quality ISO200 is selected.
The image is taken at f/2.8, 4 s., and ISO 200 with the following result:
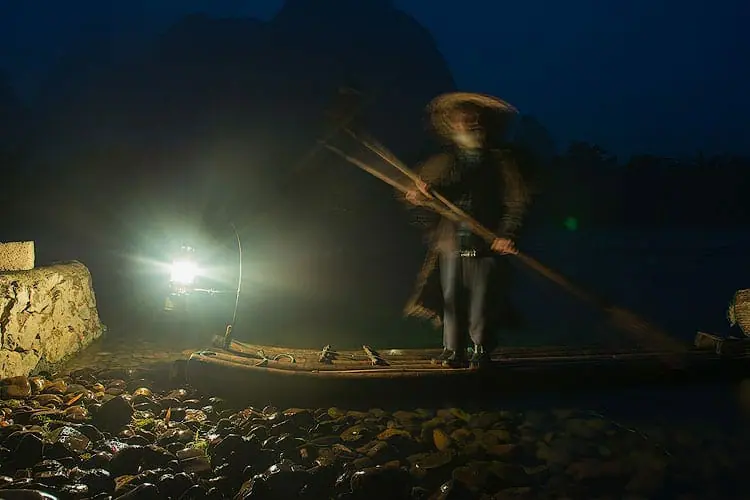
I’m satisfied with the image brightness but want to reduce the shutter speed ensuring that the fisherman is not blurry due to motion blur.
My goal is to use a 1/4th-second shutter speed, freezing the fisherman in place, without motion blur.
To shorten the shutter speed while maintaining the same image brightness, I must open the aperture diameter (decrease f-stop) or increase the ISO.
I can’t decrease or change the f-stop, it’s at the minimum of f/2.8, producing the widest aperture diameter possible.
I have to increase the ISO.
Here’s How It Works (Reference the Chart):
To maintain the same image brightness, a 1 stop increase in ISO requires a 1 stop decrease in shutter speed.
- ISO 200 = 4 second shutter speed = Current settings
- ISO 400 = 2 second shutter speed
- ISO 800 = 1 second shutter speed
- ISO 1600 = 1/2 second shutter speed.
- ISO 3200 = 1/4 second shutter speed.
The new settings are, f/2.8, ISO 3200, and 1/4 s. Here are the results.
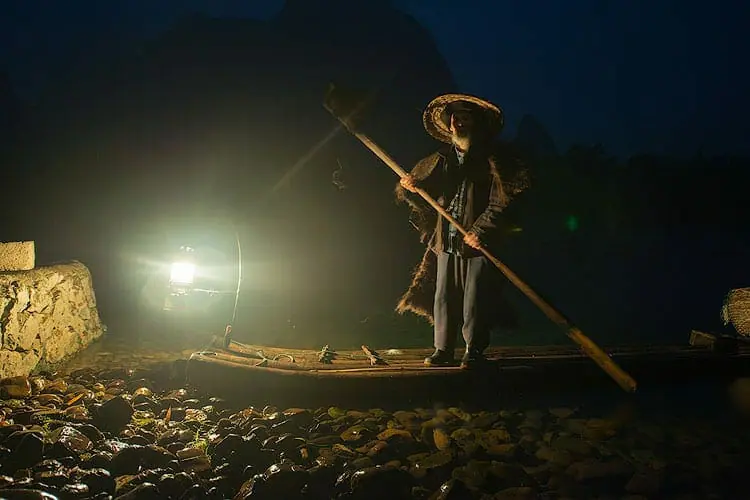
The image still maintains the same overall brightness which is what I wanted.
The fisherman is no longer blurry. The 1/4 second shutter speed ensures no motion blur for this specific image.
Since the ISO was increased to 3200 this image will contain much more noise than the first.
A blurry photo is useless, but a noisy photo can be fixed with Noise Reduction Techniques.
Requirement 2: Increase Image Brightness
Shooting Situation: Required to increase image brightness while maintaining constant f-stop and/or shutter speed.
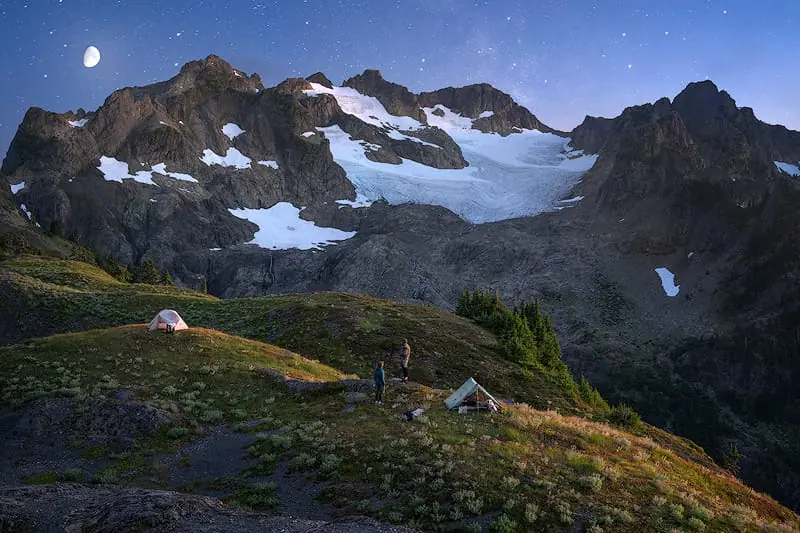
I’m out taking photos at Mount Rainier National Park, at night, under moonlight.
Here is my thought process:
- Keeping the shutter speed low, and aperture diameter wide, the most amount of light enters my lens, without producing star trails. In short, I have to maintain f/2.8 and 25-second shutter speed to get the shot I want, at night, without star trails for a 14mm focal length.
- The ISO is kept low attempting to produce the least amount of noise possible.
I take my first exposure at f/2.8, 25 s., & ISO400.
This first image was much too dark as seen below:
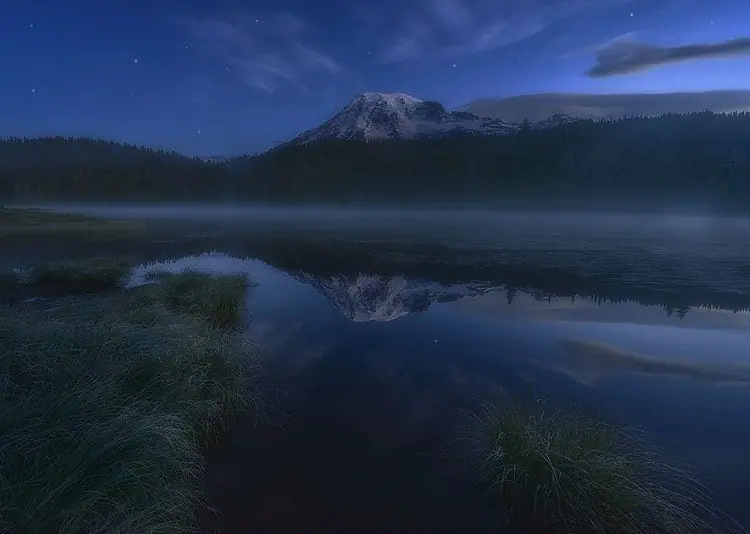
Confined by f-stop and shutter speed, as noted above, the only way to increase the overall image brightness is increasing ISO.
I think to myself, “If this image captured 4 times as much light it would be perfect.”.
I know that an increase in 2 stops, from ISO 400 to ISO 1600, will produce an image with 4X light information amplification, given f-stop and shutter speed remain constant.
This produces the same result as 4X more light information with a slight increase of image noise.
Here’s How It Works (Reference the Chart):
- ISO 400 = Current Image Brightness
- ISO800 = 1 Stop Increase = 2X light information amplification.
- ISO1600 = 2 Stop Increase = 4X light information amplification.
I select my new settings, f/2.8, 25 s. & ISO1600.
The image noise slightly increases, but now I have the correct exposure as seen below.
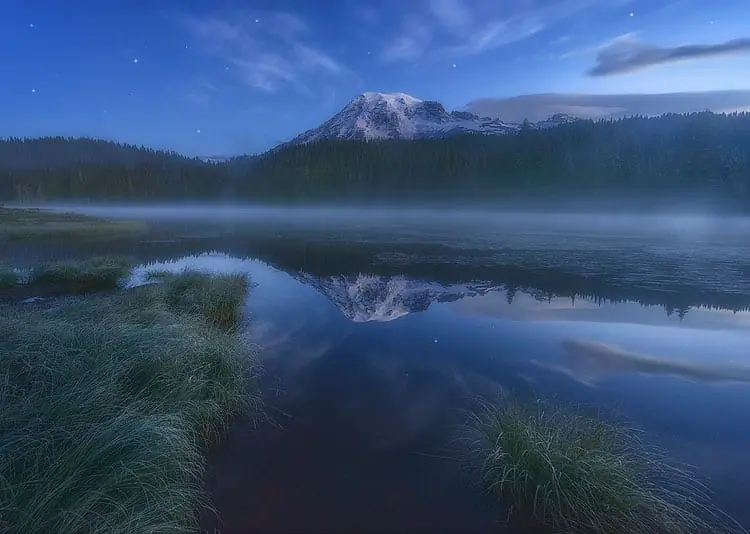
Due to my knowledge of stops I didn’t have to guess and take multiple exposures at ISO400, ISO600, ISO800 and so on to determine the perfect exposure.
Knowing the final desired outcome prior to shooting it was easy to select the correct settings for this image.
Always determine the desired final outcome prior to selecting any new camera setting.
Requirement 3: Increase F-Stop Value & Depth of Field
Shooting Situation: Used to increase the depth of field (focus range) while maintaining overall image brightness and/or shutter speed.
At times it’s required to increase the depth of field (focus range) while maintaining the same shutter speed and/or image brightness.
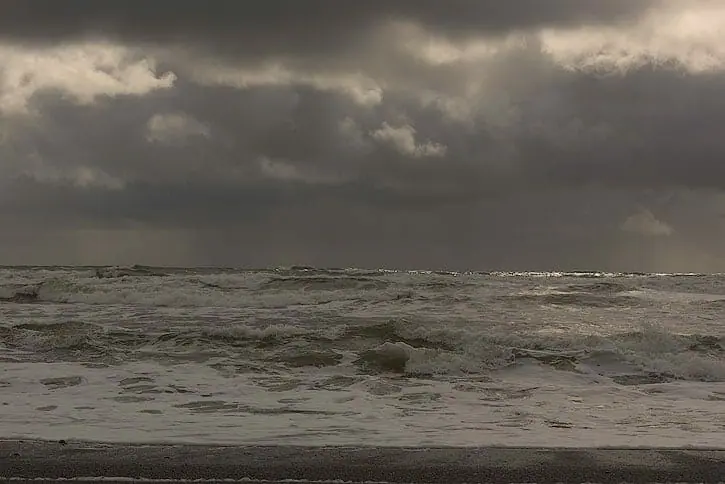
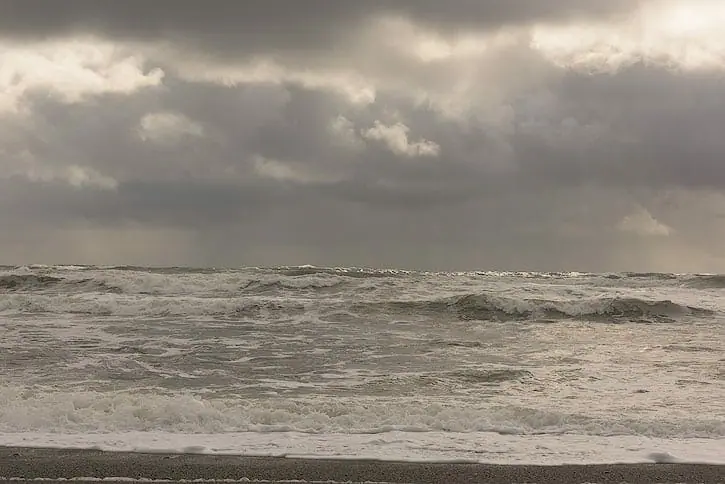
For example, in the shot below, I wanted to capture the nice wave movement in the foreground while extending the depth of field to focus the entire landscape.
The first image was exposed at f/5.6, 1 second, ISO100 with the following result:
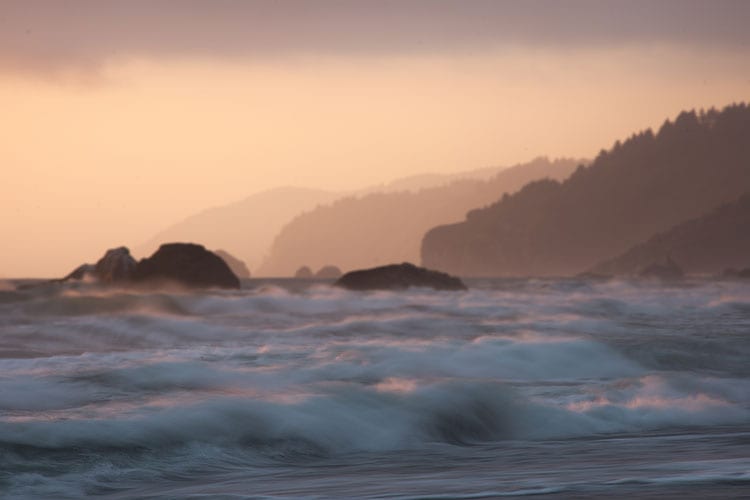
The foreground is in focus but the distant background is out of focus.
This is due to the wide aperture diameter and shallow depth of field produced by f/5.6.
My goal is to have the entire landscape in focus, with the same dynamic wave movement produced by the 1-second shutter speed.
To do so I must increase the f-stop value thus increasing the depth of field.
My goal is to increase the f-stop, from f/5.6 to f/11, while maintaining the same shutter speed of 1 second.
Referencing the Photography Exposure Triangle Chart above, I know that increasing my f-stop from f/5.6 to f/11 is a 2 stop decrease in light.
To balance out the exposure triangle while maintaining the same shutter speed I need to increase my ISO by 2 stops.
Here’s How It Works (Reference the Chart):
- ISO 100 = f/5.6 @ 1 second = Current Settings
- ISO200=f/8 @ 1 second
- ISO400 = f/11 @ 1 second = Desired Settings
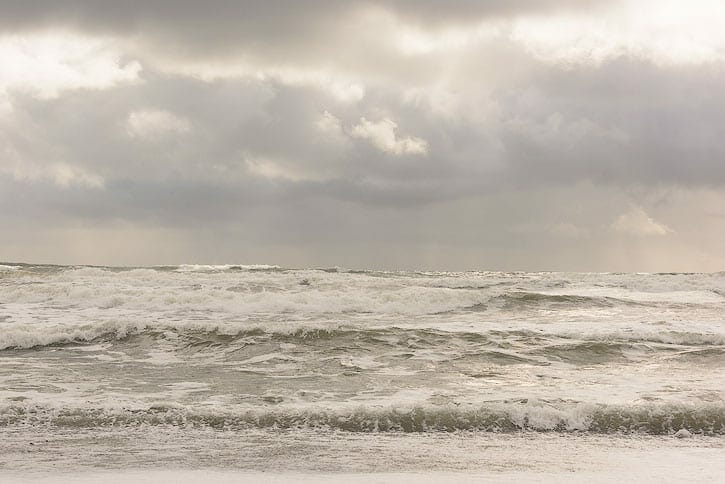
My final settings are f/11, 1 second, ISO400. here is the image produced.
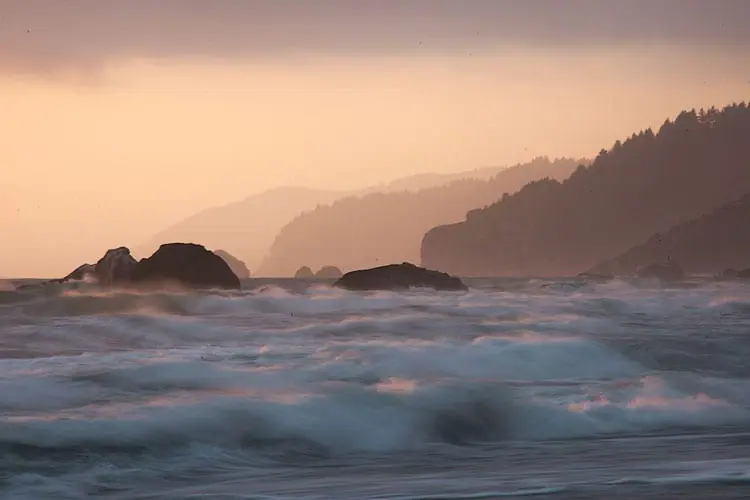
This image is exactly what I was looking to produce. The foreground and background are all in focus due to a larger f-stop of f/11 producing an extended depth of field.
The overall image brightness & shutter speed are still the same, producing the same wave motion as above.
How ISO Works – Technical Details
Prior to reading the following section, it’s required to learn How Pixels Work, in the Camera Sensor Size & Image Quality Photo Guide. For best results, read the entire guide!
The signal or light information produced by each pixel determines the pixels brightness, also known as value, on a scale of black to white.
The scale of black to white, known as the tonal range or tonal scale, is seen on the graphic below:
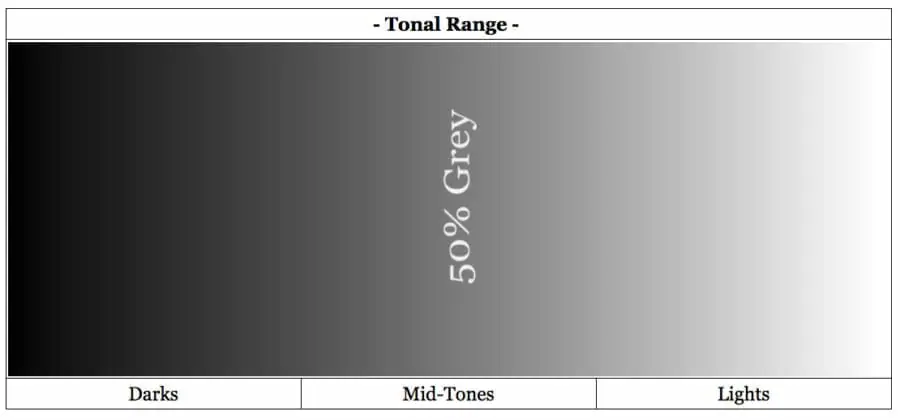
The more light information a pixel collects from the scene, the larger the signal it produces.
- The larger the signal a pixel produces the brighter it’s tonal value on the scale of black to white.
- A white pixel is produced by the maximum signal.
- A black pixel is produced by the minimum signal.
- All signals between maximum and minimum produce greyscale tonal values.
Pixels can also be called pixel wells. They are wells for collecting light information produced by the scene being photographed.
The following graphic shows 4 different pixel wells, each producing a different signal (signal produced), thus a different corresponding tonal value, found within the tonal range of black to white.
Reference the graphic while reading the following section.
The following graphic is not meant to show exact values or ratios, only concepts.

ISO & Signal Graphic
Technical Shooting Example
(Reference the Graphic Above During this Section)
I’m going to use the same graphics as used in the camera sensor size guide making things easier to understand.
The first picture below shows the entire scene being photographed as it actually looks through the photographer’s eyes.
Imagine this is what you’re seeing through your camera viewfinder. This is how the scene actually looks to the eye.
The photo was taken during early twilight, in the pouring rain, on the Li River in China. There is hardly any light in the scene.
![]()
Now imagine the scene has been divided up into individual pixels.
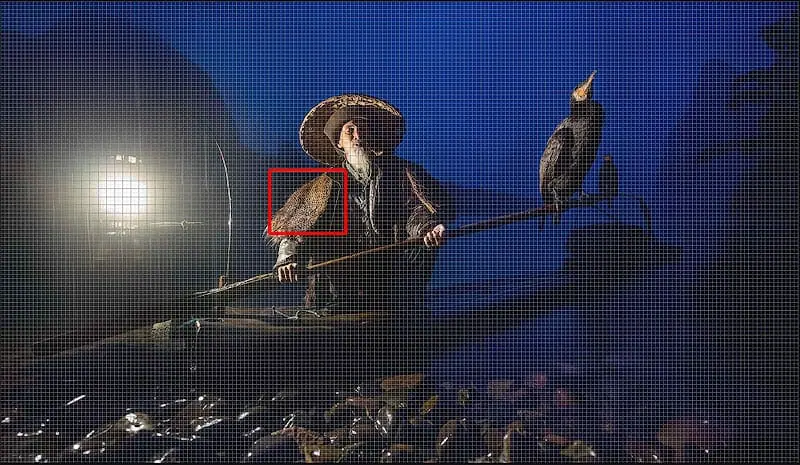
The next graphic is zooming in closer to individual pixels size.
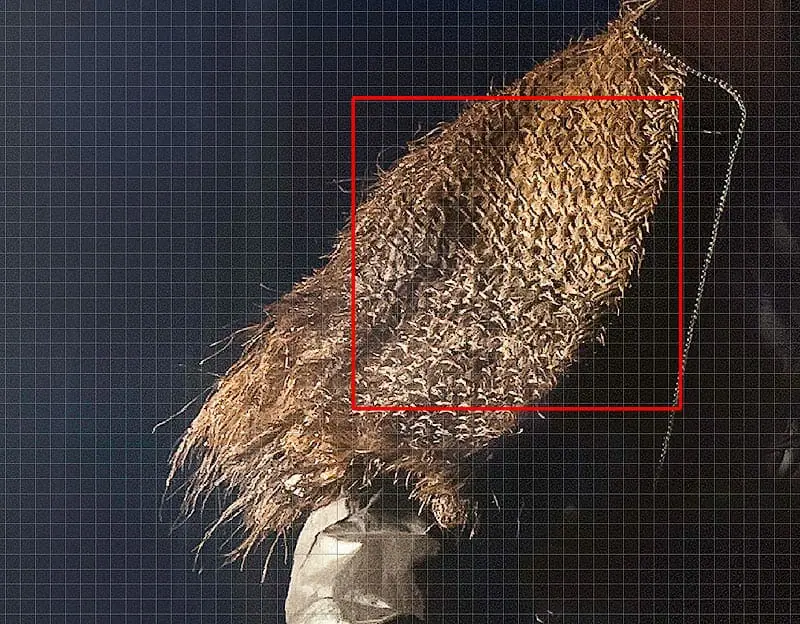
The last graphic shows the actual pixel level. Each pixel is a single color / tonal value.
![]()
By selecting the correct camera settings, ISO, f-stop, and shutter speed, the tonal values collected by the pixels on the image sensor match the real world tonal values produced by the scene.
The image above is the scene being photographed, now we have to select the correct settings to produce the desired results.
Technical Note: Always select ISO last, after shutter speed and f-stop.
ISO is the only noise inducing exposure triangle setting.
Always keep your camera at a base ISO of 100 or 250 manual setting & adjust it as required. DO NOT USE AUTO ISO!
Step 1: Determine the F-Stop
Get in a habit of leaving your ISO at the base of ISO100 or ISO250 to start out with. We will select & fine tune the ISO later on.
Since there isn’t much light in this scene I want to open the aperture diameter to the maximum value while ensuring the fisherman and his boat, over the entire depth of field, stays in focus.
If the aperture is too wide then part of the fisherman or his boat may be out of focus.
An f-stop value of f/2.8 is selected.
This allows the maximum amount of light to hit the camera sensor while maintaining a sharp focus on the fisherman, over the entire depth of field.
This scene has a very small focus range, so f/2.8 is acceptable.
Step 2: Determine the Shutter Speed
If the shutter speed is too long then the moving fisherman on this boat will be out of focus due to motion blur. If the image is out of focus, then it’s worthless!
A shutter speed of 1/6th of a second was selected. Any slower and the fisherman is blurry. Any faster and we lose out on some of the light in the scene.
Step 3: Fine Tune ISO Settings
Always increase or decrease ISO as the very last step.
For the scene above I start out with the following settings:
f/2.8, 1/6th s, ISO100.
Taking my first exposure of the scene, the following image is produced.
The first graphic is the full scene. The second is the pixel level.
Notice how the image is much too dark & doesn’t match the scene we actually see in the viewfinder above?
The entire image & the pixels are much darker in the image than they are in the actual scene.
This image represents the ISO & Signal Graphic, Base ISO Column.
![]()
Looking at the noted graphic you’ll see that the Signal Produced by the settings we used didn’t match the Required Signal for the scene. The image is underexposed.
The tonal values produced by the Signal Produced are much darker than the tonal values produced by the Required Signal for the scene.
The Next Shot…
Since the image was much too dark, I decided to increase my ISO to 3200.
All other settings remain constant.
Remember, they are held constant by the shooting situation from step 1 & 2!
I take another image at f/2.8, 1/6th s, ISO3200 & here are the results.
This picture is denoted by the ISO & Signal Graphic, High ISO Column. 
![]()
Using ISO, I was able to amplify the Signal Produced by each pixel, in turn creating a brighter image that matched the actual scene Required Signal.
Signal Produced = Required Signal = Correct Exposure
By increasing ISO the pixel tonal values now match the tonal values required by the scene.
This was done without having to capture more scene light information using shutter speed or f-stop.
There wasn’t enough light in the scene for this specific shooting situation.
ISO was used to amplify the signal, matching the Signal Produced to the Signal Required, as seen in the High ISO Column of the Graphic.
The image above matches the actual brightness of the scene, at the cost of noise!
In this case, the cost was worth it. The image could not have been captured otherwise.
Test Your Camera – ISO Performance
Knowing the maximum ISO your camera can handle is an essential piece of information.
- In the worst case scenarios, it’s better to increase your ISO & capture a sharp image with slight noise, than to keep your ISO low & have a blurry image without noise.
- It’s possible to fix high ISO noise with noise reduction software. It’s impossible to fix a blurry image.
- Out of focus images are NEVER useable where high ISO images many times are.
Knowing the maximum ISO your camera can handle, while providing acceptable image quality, will allow you to easily increase your ISO while shooting, without worry.
Here is a video that covers this test. You can read the step by step, below the video.
Here are the steps to find your maximum ISO value:
- Setup your camera during the day.
- Pick a random composition.
- Focus your composition.
- Take 1 image at your base ISO setting. This varies camera by camera.
- Take another image at ISO200
- Take Another Image at ISO400
- Continue to increase the ISO by 1 stop intervals taking pictures at each.
- Repeat with 10 or more images until you reach your maximum ISO setting.
- Load all images into Lightroom or Camera RAW.
- Compare images at 100% zoom / resolution.
- Determine the highest ISO which you deem acceptable and remember this value.
- For all images after the value apply noise reduction.
- Determine the highest ISO setting which provides acceptable image quality, with noise reduction applied.
Now you know the maximum ISO, which can be used in the field, without having to sacrifice image quality.
You also know the maximum worst case ISO, which you can recover using noise reduction software.
You also know the minimum ISO which your camera provides.
ISO, Noise & Dynamic Range
- As ISO increases the dynamic range of the image decreases.
- As the ISO increases the noise shown in the picture also increases.
The amount of dynamic range decrease and the noise increase, due to ISO, directly depends on your camera sensor model.
For the technical details of Dynamic Range & Image Noise Vs. ISO, reference the following sections of my Camera Sensor Size & Image Quality Photography Guide.
How to 10X Your Learning Speed
The best way to improve quickly is by learning firsthand from someone that’s optimized their skills, over a decade or more through trial and error.
You can’t read blogs and watch internet videos to do this.
I offer workshops & tours for all skill, fitness, and age levels.
Over a 3-day weekend, I can teach you everything I know, plus provide 1 on 1 feedback that will quickly improve your skills.
I’ve seen students learn more in a 3-day trip than they have in 20 years of trying to learn on their own.
Check out my workshops & tours, right here.
