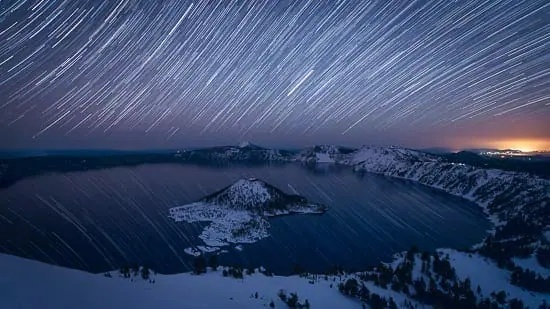
In this guide, you’ll learn star trails photography in 7 simple steps.
See what’s working in 2025 for:
- Camera settings
- Equipment
- Shooting locations
- And more
Scroll down & get started…
Table of Contents
Click on the section of your choice or scroll down & read the entire guide.
- Step 1: Camera Equipment for Star Trails Photography
- Step 2: Planning Your Star Trails Shoot
- Step 3: Focusing Your Lens at Night
- Step 4: Best Camera Settings for Star Trails
- Step 5: Best F-Stop Settings for Star Trails
- Step 6: Best ISO Settings for Star Trails
- Step 7: Best Shutter Speed for Star Trails
- Bonus: Photo Editing for Star Trails Photography
- How to 10X Your Learning Speed
Step 1: Camera Equipment for Star Trails Photography
I have provided an overview of each piece of equipment below.
To view the brands I use and recommend, reference the Night Sky Photography Camera and Lens Recommendations & What’s In My Camera Bag pages.
Best Camera for Star Trails Photography?
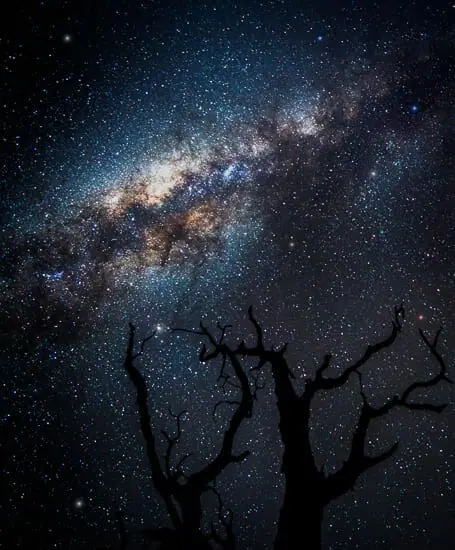 Any camera with manual mode is great for star trails photography.
The nice part is, you can use the exact same camera for star & Milky Way photography too.
Using manual mode you can independently control shutter speed, f-stop, and ISO by hand.
I recommend a full-frame camera such as the Nikon Z7.
Using a full-frame sensor, the camera can “collect” more light over the exposure time, increasing image quality, and reducing noise.
Bring at least 1 battery for each star trail shot you plan on shooting. 5-6 per shoot works well.
Best Lens for Star Trails Photography?
A wide-angle lens with f-stop values ranging from f/2.8 to f/5.6 will work best for star trails photography.
- Focal Lengths – Full Frame: 14mm – 20mm are recommended.
- Focal Lenghs – Crop Sensor: 10mm – 18mm are recommended.
The larger the aperture diameter, the more light the camera can collect over a standard exposure.
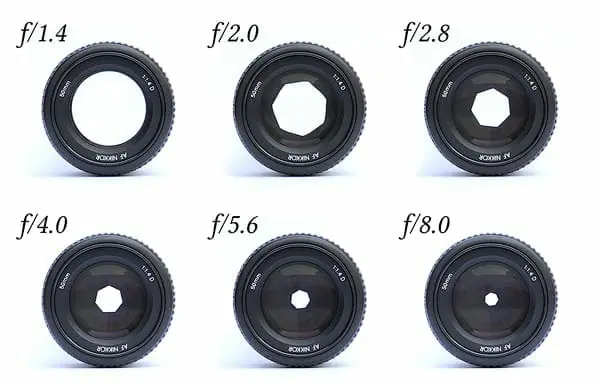
Opening the aperture increases image quality because you can reduce the ISO, thus inducing less noise in the image.
Below, you’ll learn why these lens attributes are so important.
Currently, I shoot with the Nikkor 14-24mm f/2.8 for all my night sky images.
Best Tripod for Star Trails Photography?
A carbon fiber tripod, with a sturdy, stable adjustable ball-head is the best for star trails photography.
Carbon fiber reduces tripod vibration providing sharper images.
You can try cheaper tripods, but they won’t produce the sharp images that more expensive tripods will.
If your tripod, or ball head, move even the slightest over the long exposure, your images will not be sharp.
Currently, I shoot with the:
- Feisol Tournament CT-3342 3-Tripod
- Really Right Stuff BH-30 Ball head
- Really Right Stuff L-Bracket
Best Intervalometer for Star Trails Photography?
An intervalometer connects to your camera allowing you to take exposures longer than 30 seconds.
It also allows you to take multiple images, one after another, all at the same settings, for an extended amount of time.
Any intervalometer will work, so long as you can control:
- Shutter speed
- Time between shots
- Number of shots total
I’ll cover the technique in the following sections.
Step 2: Planning Your Star Trails Shoot
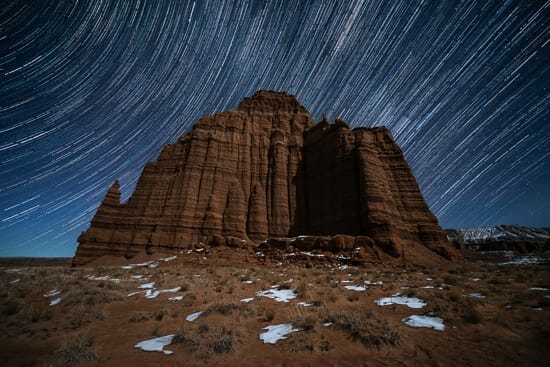 Doing some basic planning before the shoot will greatly improve the chances of coming home with a good shot.
The following videos cover my step by step planning technique for star trails photography and milky way photography.
I’ve also included each of the steps, written in detail, below the videos.
Covers Steps 1-3 Below
Covers Steps 4-5 Below
Step 1 – Determine the Moon Phase
You can shoot star trails under any moon phase, but the results will drastically differ.
Find the current moon phase, here, and determine your trip dates from this information.
During the full moon, it’s almost too bright to shoot star trails at all, and you can barely see them in the sky.
When the moon is at half or less is a great time to shoot star trails photography.
The moon provides some nice lighting to the landscape but does not dominate the brightness of the scene.
This allows you to actually see the stars in the sky and still get some nice light on the landscape.
The following two examples, although not star trails, gives a good idea of how much a scene can change from moonlight.
The first has crescent moonlight on the scene.
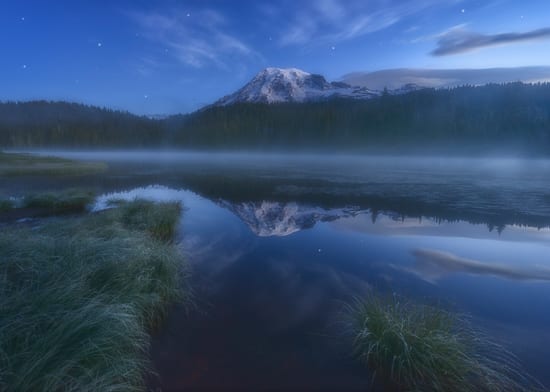
The second has no moonlight on the scene.
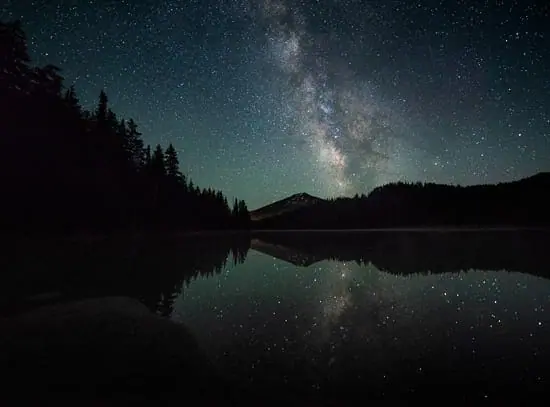
You can learn these types of shots in my Star Photography Guide.
Step 2 – Find a Location without Light Pollution
Blue Marble Light Pollution Map is the best tool I have found.
It works for the entire planet.
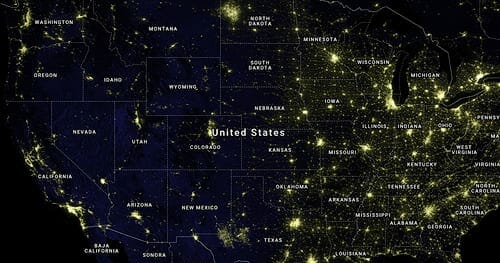
Areas that are black on the map are great for night sky photography.
Areas that are lighter have light pollution. Avoid these.
Step 3 – Find the Best Weather
This all depends on the shot you want.
You can get great results when there are perfectly clear skies, where the star trails scene dominates the sky.
It’s also great to shoot on nights with 20-50% cloud cover in the sky.
This provides fewer trails, but move cloud movement.
This is covered in video 2 above.
Step 4 – Determine Moonrise & Moonset Times
It does not matter if you shoot under moonlight or not.
It’s best to shoot during a time when the moon will not be rising or setting.
Then the light stays fairly constant on the landscape during your exposure.
This leads to better results.
Use the moonrise and moonset times in Photographers Ephemeris (TPE). I have linked this below.
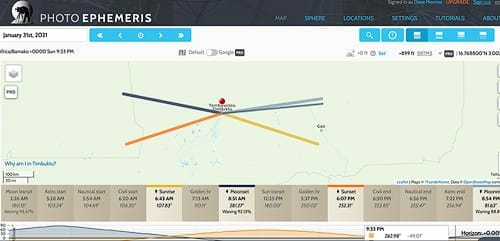
Start your shoot at least 2 hours before a moon or sun, rise or set event.
TPE provides sunrise, sunset, and twilight times as well as moonrise and moonset times.
Get TPE For: Desktop | iPhone | Android
Step 5 – Learn to Use Google Earth / Maps
Google Earth is a great way to see where you will be shooting prior to arrival.
This is a great way to visualize what you might want to shoot.
You could also arrive early and walk around the location when it’s light out.
I usually do both.
Out of all the tools on this page, Google Maps / Google Earth is where I spend the most time.
I teach this in video 2, above.
Get Google Earth For: Desktop | iPhone | Android
Step 3: Focusing Your Lens at Night
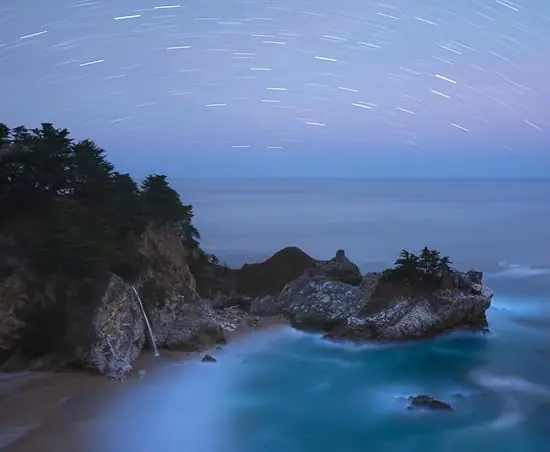 Always focus your lens before dialing in any other settings. This makes all the rest of the steps easier.
Since the distance between us and the stars is very large, focusing at or near infinity works well for star trails photography.
Although your lens may have an “∞” symbol on it, this is not always the ideal place to focus.
Here’s one method I use to focus for star trails photography.
Method 1 – Set Your Focal Point During the Day
When you’re starting out, it’s much easier to focus during the day, before your shoot, then use this same focus point once it gets dark.
Step 1: Set up your camera & lens that you plan to take out shooting with you.
It doesn’t matter where you do this so long as you can see a distant object or horizon at least 200 feet away from you.
Use the widest focal length and an f-stop ranging from f/2.8 to f/5.6.
Step 2: Find an object approximately 50 feet (15 meters) in front of your camera and focus on it.
You could also take 15-20 large steps to approximate this distance. It does not have to be perfect.
You can focus on anything in this area.
Step 3: Take a few exposures to verify you have sharp focus.
Verify this focus extends all the way out to the most distant horizon in your scene.
- If the focus doesn’t extend this far move the focal point slightly back in the scene.
- When the distant horizon is in focus, this ensures that your stars will also be in focus.
Step 4: Use white tape & mark your focal point on the lens. You can also tape it in place.
White tape is easy to see at night.
Remember, this is the focal point for the specific focal length and f-stop value selected only.
Advanced Focusing Tips & Techniques
There are 6 more night photography focusing techniques provided in my ebook, Photograph the Night Sky.
Step 4: Best Camera Settings for Star Trails
This section provides a quick reference for each of the settings.
The next sections teach each, step by step.
Camera Mode
Manual Mode allows you to manually adjust the ISO, Aperture, and shutter speed by hand.
Image Format Settings
RAW Image Format provides the least amount of noise and the best ability to edit the image files when you get back from your shoot.
Metering Mode
You can use any metering mode since it will be too dark for your camera to meter the scene.
I just leave mine on center-weighted average, since that’s what’s best for landscape photography as well.
White / Color Balance
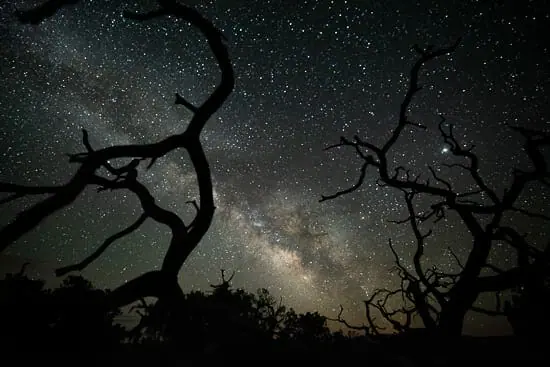 Kelvin Values between 4000K-5500K work best for night photography settings.
- Kelvin white balance mode controls this setting.
- Higher Kelvin values make the photo more yellow, where lower values make the photo bluer.
Try to match the Kelvin values to your scene, so the photo on the back of your screen looks like the scene you see with your eye.
The goal is for the white balance to be “neutral” and match this scene.
This will ensure your histogram reading is correct.
My White Balance Shooting Technique Video has detailed info on this topic.
Focal Length
Full Frame Focal Lengths: 14-50mm are the best focal lengths for star trails photography.
Crop Focal Lengths: 10-30mm will work well.
The larger the focal length (zooming in with your lens), the longer your star trails will appear over a shorter amount of time ( Reference – Selecting Exposure Time for Milky Way Photography ).
If you don’t want to wait around all night to capture a star trail scene, a zoom lens will be your best choice.
If you’re interested in capturing a full, wide-angle star trail scene showing a long star trail transition across the sky, a few hours will be required.
The best way to see this in physical form is to go out and try some test shots in the field.
This will show you how different lenses or focal lengths exhibit different star trail lengths over a given period of time.
F-Stop / Aperture Settings
The best f-stop setting for star trail photography is f/2.8 to f/5.6.
I’ll go in-depth on why this is the best setting in the next section.
My Aperture & Depth of Field Guide can be a great reference if you need a brush up on these basics.
Exposure Time / Shutter Speed
Shutter speeds ranging from 20-90 seconds are the best for star trails photography.
I use a technique that takes a few hundred-star images, without trails, and overlays them on top of each other, creating a star trails image.
You will learn this technique below.
Reference my Shutter Speed Guide if you need to brush up on the basics.
ISO Settings
ISO settings between 500-3200 are the best for star photography.
The following section will teach you precise ISO setting selection.
Reference my ISO Photography Guide if you need to learn more about the basics.
Noise Reduction & Long Exposure Camera Settings
Some cameras have noise reduction settings for long exposure and high ISO.
Turn both of these settings to OFF.
They are only applied to JPEG Images.
Since you are shooting in RAW, having them on only wastes battery.
Step 5: Best F-Stop Settings for Star Trails
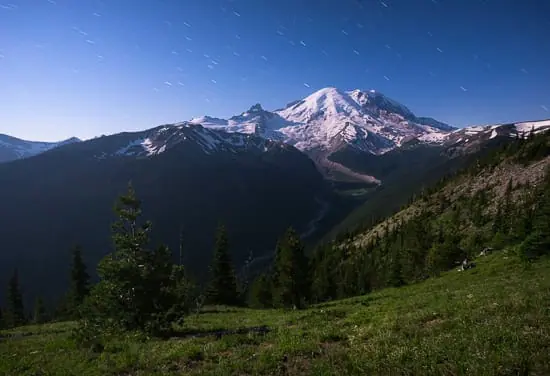 Depending on the amount of moonlight in the scene, f-stop values ranging from f/2.8 to f/5.6 area ideal.
When there is some moonlight, shooting at higher f-stop values, such as f/5.6 can extend the depth of field giving an overall sharper image.
When there isn’t any moonlight, shooting at f/2.8 will be necessary to collect enough light from the scene.
The goal is to keep the aperture wide enough that you don’t have to increase the ISO too much, but can still get an extended depth of field to keep the foreground and stars sharp.
Shooting under a crescent moon is ideal because the ISO can be kept low while increasing the f-stop to f/4 or f/5.6 to ensure sharp focus in the entire composition.
I recommend taking some practice shots at all different settings, ranging from f/2.8 to f/5.6, then comparing them when you get back home.
There are pros & cons to each variation.
Step 6: Best ISO Settings for Star Trails
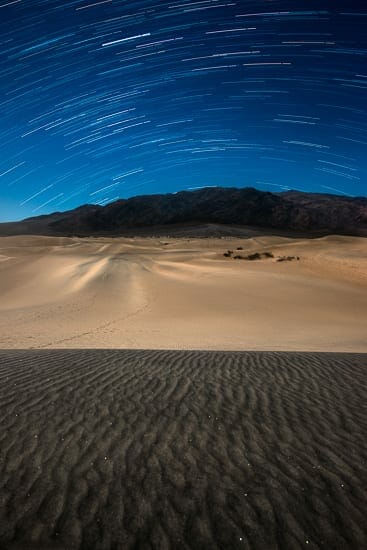 Read through this section and the shutter speed section fully, then come back & try it with your camera.
This section won’t make complete sense until you integrate it with the shutter speed section below.
ISO settings for star trails photography depend on how much ambient light (moon/light pollution ) is present in the scene you are shooting.
It works well to shoot star trails when the Moon is visible in the sky.
Make sure to shoot in the opposite direction of the Moon so it will light your scene nicely.
The moonlight allows you to capture well-exposed star trail shots while keeping your ISO fairly low.
Try starting at ISO 300, increasing as required to approximately ISO 800.
Increase your ISO until your image is correctly exposed.
If your shot isn’t bright enough, and you can still increase your exposure time, always do this instead of increasing your ISO too far beyond 800.
ISO is the worst-case method of increasing the brightness of your star trail shots since it is the only setting that degrades image quality.
For those of you shooting with a crop sensor, it’s best practice to stay within the range of ISO 160-500.
Trying higher ISO values such as 800 will never hurt.
It’s all about getting a nice exposure, without much noise.
Step 7: Best Shutter Speed for Star Trails
There are two different methods for capturing star trails images.
Method 1, covered below, takes 50-100 exposures of the night sky, with the exact same composition.
Next, each of these exposures is layered in Photoshop, producing a star trails image.
Method 2 involves one really long exposure. I don’t recommend this method, but you can try it using the steps below.
Method 1 – Star Trail Stacking
Preferred Method
The star trail camera settings for each of these overlaid exposures is exactly the same.
The only thing that changes is the position of the stars relative to the Earth.
Why is Stacking Star Trails Images the Best Option?
Using multiple exposures will allow you to keep your exposure time and ISO fairly low, in turn reducing noise.
Almost all cameras, when pushed to take very long exposures ( 3+ minutes ) start to exhibit what is known as long exposure noise.
To prevent this, Method 1 is used.
Full Frame & Crop Sensor Shutter Speeds
Full Frame Camera: 30 – 60 seconds works well to capture star trails per Method 1 as described below.
The longer the exposure the more “far away light” your camera will capture.
A longer exposure picks up more light at a greater distance from our planet.
In turn, you will see stars that you wouldn’t have with a shorter exposure time.
On the other hand, light sources closer to our planet will appear even brighter at longer exposure times.
This applies to any type of night photography.
Using a longer exposure will allow you to keep your ISO low, reducing noise, and providing a higher quality image.
Crop Sensor Camera: 30 – 120 seconds works well when shooting per the instructions provided in Method 1 below.
Since crop sensor cameras don’t handle high ISO as well as full-frame cameras, the exposure time may need to be increased.
Don’t be afraid to try out 120-second exposures and see how they work using a lower ISO and in turn providing higher overall image quality.
Selecting the Number of Exposures
The more exposures you take, the longer your star trails will be.
You can always take more exposures and then throw some of them out if you want shorter star trails in the final image.
I recommend taking 80-100 exposures your first time and going from there.
Since your location on Earth, your lens and camera model, composition, and the desired effect ( long or short trails ) will directly affect the number of exposures required, it is impossible to provide an exact calculation.
The only real way to perfect this skill set is going out and taking practice shots until you get the desired results.
The number of exposures required for star trails directly correlates to the percentage of the composition that is taken up by the night sky.
For example, if your composition is half sky and half foreground, then your stars would have to move across half of your photo to produce star trails across the entire sky.
If your composition is only ¼ night sky, and ¾ foreground, then the stars only have to move across ¼ of your photo.
In turn, this requires less elapsed shooting time and a smaller number of exposures.
Intervalometer Settings for Star Trails Photography
I highly suggest using an intervalometer.
Otherwise, you will be pushing the shutter button again and again for hours.
Some cameras have an interval timer mode built into them, this works as well.
Always verify that you have your settings perfectly dialed in for 1 exposure, before taking a series using these exact same settings and the intervalometer.
Shutter Speed / Exposure Time: The length of each exposure.
Time Between Each Exposure: I would suggest using 1 second between each photo.
For example, if the time between exposures was 1 second, your camera will take a photo, wait 1 second, then take the next photo.
This will continue until your elapsed shooting time ( described below ) has ended.
Elapsed Shooting Time / Total Number of Exposures: The total length of time that your camera will be taking photos or the total number of photos you would like your camera to take.
Since these are dependent on one another and the time between each exposure, only one needs to be input into your camera timer.
For example, you may want to take 100 exposures at 30 seconds each, with 1 second between each shot.
Method 2 – Single Exposure ( Second Best Option )
Another method to photograph star trails is a single long exposure, captured over a few minutes of elapsed time.
In most cases, single exposure star trails won’t be able to transverse the entire composition of the photo. Instead, these star trails will resemble long streaks of light in the sky.
Follow these steps to try this method:
You will need to turn on your camera’s Long Exposure Noise Reduction setting.
Find this setting by looking in your camera instruction manual or online. Not all cameras have this setting, but nearly all full-frame cameras do.
After doing so, focus your lens per the steps above.
Next, select your composition and try an exposure time of 3-4 minutes with an ISO of 600-800 and take a picture.
If your picture is too dark, increase the exposure time. If your trails aren’t long enough, increase the exposure time. This is all personal preference.
Increase and decrease the ISO as required if there is too much noise in the photo.
Method 2 is all about trial and error, finding which settings work best and which don’t.
Eventually, you will start to see photos you like! That being said, USE METHOD 1 if at all possible:)
Bonus: Photo Editing for Star Trails Photography
Lightroom & Photoshop Video Tutorials
Now that you learned how to take star trails photos, it’s time to post-process / edit your pictures.
I don’t prefer star trail photography software. It can be done without any extra plugins using the following steps.
How to 10X Your Learning Speed
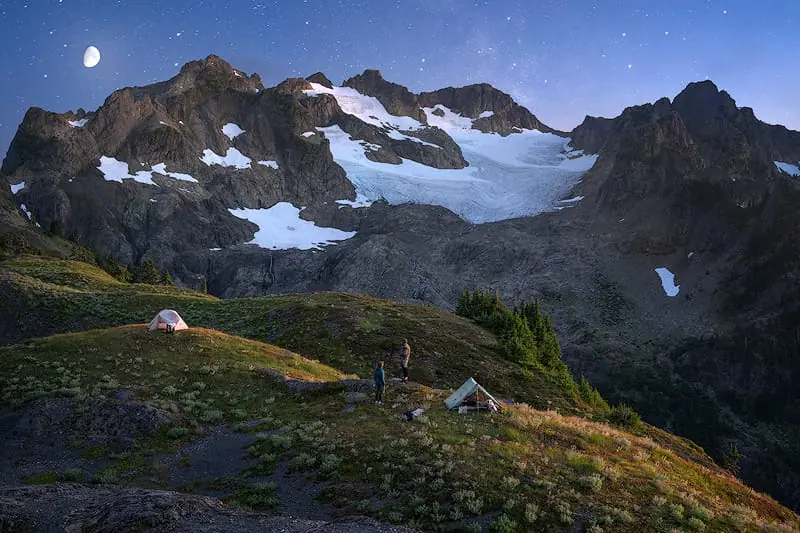
The best way to improve quickly is by learning firsthand from someone that’s optimized their skills, over a decade or more through trial and error.
You can’t read blogs and watch internet videos to do this.
I offer workshops & tours for all skill, fitness, and age levels.
Over a 3-day weekend, I can teach you everything I know, plus provide 1 on 1 feedback that will quickly improve your skills.
I’ve seen students learn more in a 3-day trip than they have in 20 years of trying to learn on their own.
Check out my workshops & tours, right here.